


🐍 How To Integrate Froala To A Django Web Application With Image Upload
Table of contents
- What are the Prerequisites?
- What will we be making?
- Functionalities
- Models (Database logic)
- Why Django?
- What is Froala?
- Quick Note
- How to Prepare the Necessary Dependencies?
- Create the virtual environment
- Installing Django and Django Froala Editor with pip
- Optional: Using Tailwind
- How to Set up the Project?
- Creating the Django project
- Creating the app
- Configuring the settings
- Mapping the routes

- Creating the models
- Preparing and migrating the database
- Adding the models inside the admin panel
- Creating the superuser
- How to Create the Views?
- Creating the homepage function
- Creating the page view
- Adding the urls.py file in the application
- Creating the base template
- Creating the homepage HTML
- Creating the page view HTML
- How Easy to Use Froala?
- Showcasing
- Utilizing the Django admin CRUD functionality
- Froala Editor within the models
- Optional: How to Place the Editor Outside the Admin Panel and Add Image Support?
- Adding the Froala Editor outside the Django Admin Panel
- Create Forms.py
- Adding the widget
- Adding extra URL path
- Adding the new create page function
- Are You Ready to Get Started with Froala and Django?
- Source Code

What are the Prerequisites?
This article assumes basic Python and Django knowledge, which means routing and static files should be familiar to you, but if not, you can use the official Django docs that go in-depth to refresh url routing [1] and managing static file [2] concepts. Also, if you are just learning, since the code in this article is mostly images, I highly recommend typing everything character per character as it will get you more engaged with the code you’re writing which gets you a better feel to the language and makes your brain develop a habit of coding.
What will we be making?
We’ll be making a knowledge base documentation application with Django and Froala at its core while utilizing Froala’s free online JavaScript editor as the main editor for the content in the application. Using Froala’s WYSIWYG editor means that anyone using our application would not have to think about proper formatting of HTML and CSS since it will be doing the work for us. This can be used for but is not limited to:
- How-to guides
- Troubleshooting articles
- Internal documentation
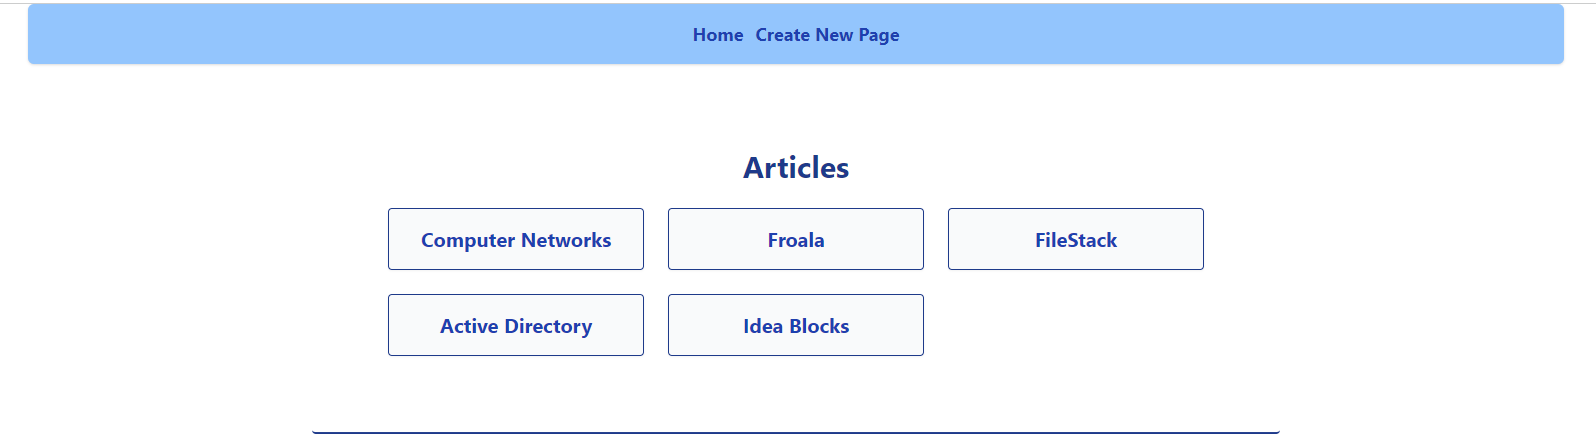
Homepage
Froala Editor

Froala Editor inside the admin panel
Functionalities
Basic CRUD (Create, Read, Update, Delete) functionalities using Django’s built-in admin panel.
Models (Database logic)
The knowledge base will be separated using Articles that have their own Pages. An Article can have many Pages, but Pages can only be associated with one Article. This is to keep the complexity low while also being a functional knowledge base application. You can customize the logic if you want, but that’s not within reach of this tutorial. This tutorial will focus on Froala’s integration with Django; this means you can further customize the models to your liking, but we will just be covering the above use case for the sake of simplicity.
Why Django?

Django is a framework built on python that prides itself on following python’s “batteries included” [3] approach. It is somewhat opinionated but can still be extended using plugins and other third-party software like django-packages [4] to customize your application based on your requirements.
For the knowledge base application we will make, we will take full advantage of Django’s built-in functionalities, specifically its built-in admin panel to quickly get our app up and running. Froala is an excellent choice for our app because it has a convenient library that supports Django when it comes to text editing. Due to it having an intuitive and fully customizable interface, we can get a proof of concept application running easily.
Froala also supports a lot of frameworks out there, such as Angular, Vue, and many more.
Django also has a built-in admin function to make it easier for us to use the CRUD database functionality instead of creating one on our own.
What is Froala?

Froala is a WYSIWYG HTML Editor that makes formatting easier on websites that require content to look pleasing.
It also has a sleek and minimalist editor that looks nice to work with. And since we will be creating an application that requires mostly writing knowledge bases and documentation, it is crucial to have your editor look and feel good while also being functional to work efficiently. As it is a WYSIWYG (What You See Is What You Get) editor, it gets out of your way and just lets you do your work while taking care of the formatting of your content and converting it into HTML code that is compatible with most browsers.
It’s also available to use and easy to install and extend with most of the popular frameworks out there. It has a free trial to get a quick proof of concept running to decide if it’s for you. It also has comprehensive documentation, so if ever you get lost or need to customize things to your liking, you have the docs to fall back on.
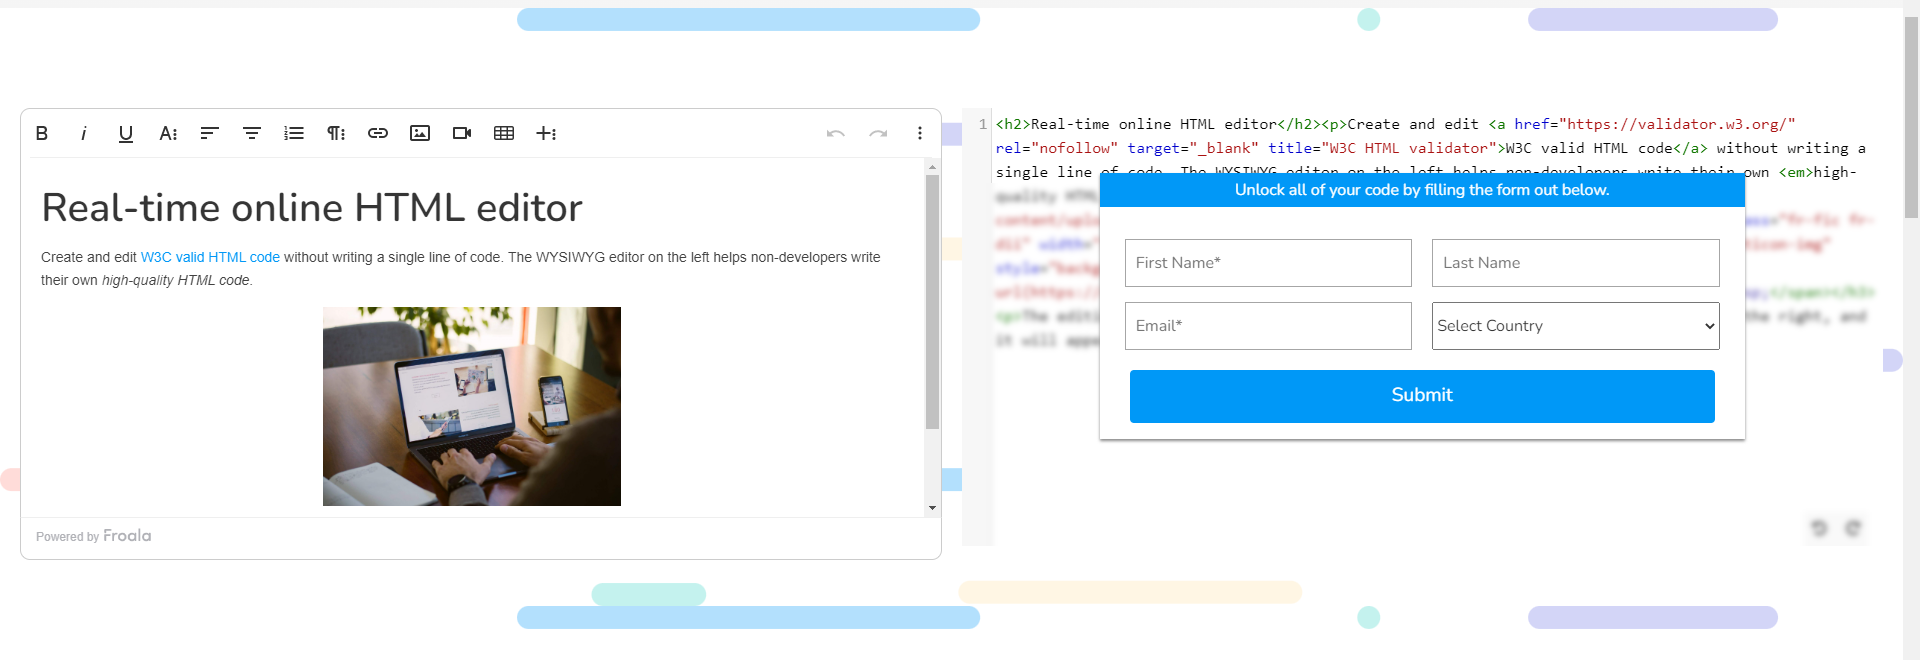
There is an online HTML Editor that you can use for free; just fill up the form, and anything you put inside the editor there will be translated into HTML code.
You can read more about Froala’s WYSIWYG HTML Editor here.
Quick Note
Before we get further into the article, I would recommend reading the Django docs [5] if you are not yet familiar because it covers all the concepts here in-depth, and it provides lots of examples for lots of use cases. Django’s documentation is one of the best because you can search for almost anything, and it will have an example ready for you.
Let’s get started.
How to Prepare the Necessary Dependencies?
Create the virtual environment
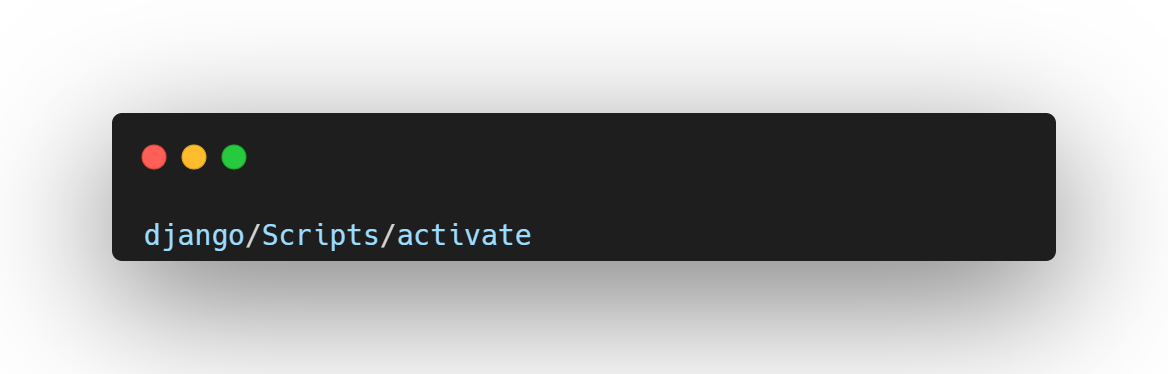
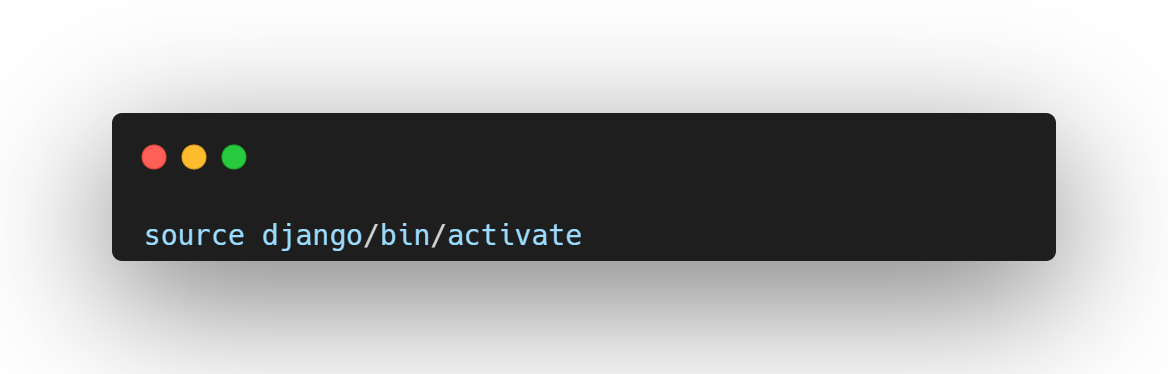
Activate the virtual environment
Windows
Linux
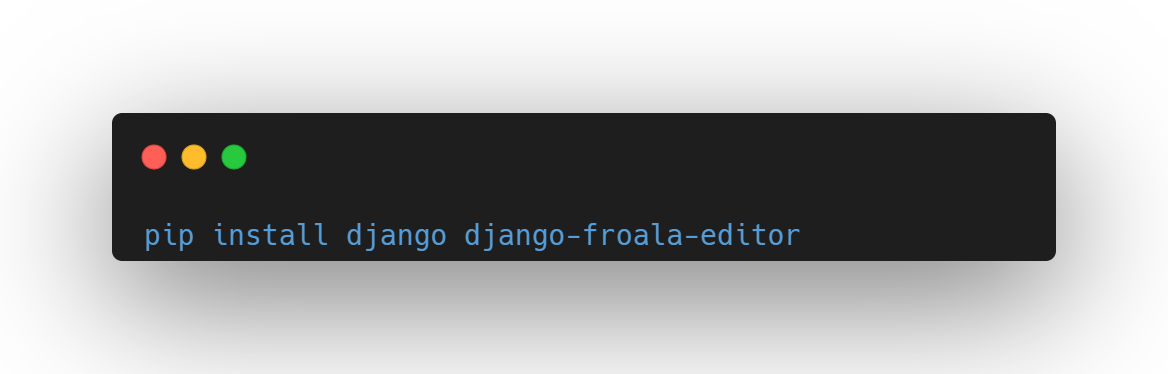
Installing Django and Django Froala Editor with pip
Optional: Using Tailwind
For this application, I used Tailwind to create a minimal style for the overall look and feel of the app. You can use your own styling and just follow the instructions within the Django docs to enable static/CSS files within your application, you can just include the cdn [6] if you want instead of installing tailwind since this is not for production yet.
How to Set up the Project?
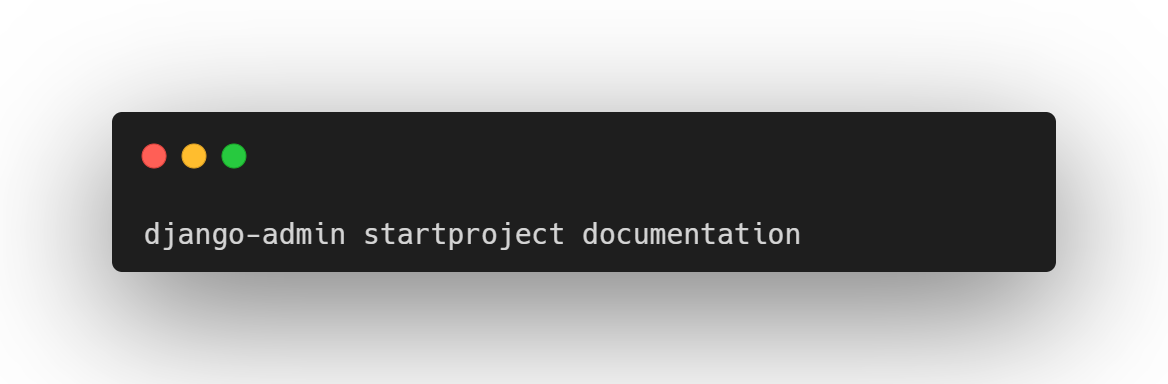
Creating the Django project
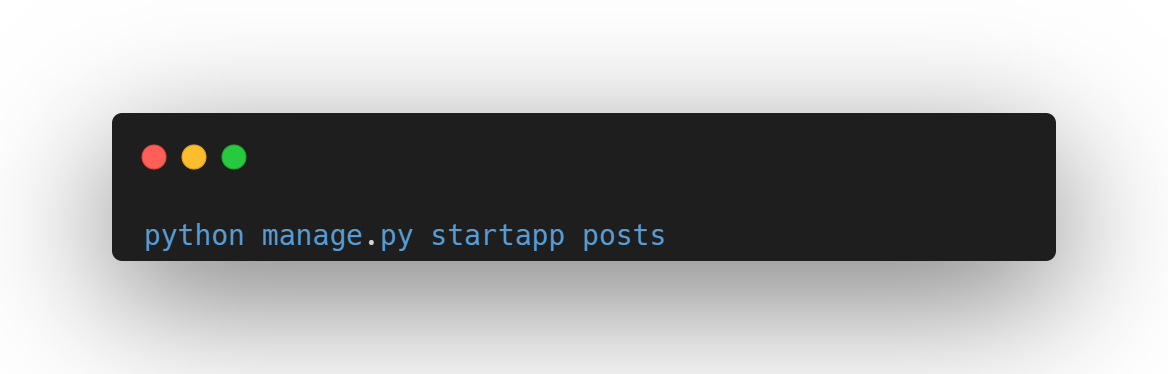
Creating the app
Configuring the settings
I always start my Django projects with configuring the settings
- Plug the application inside INSTALLED_APPS.
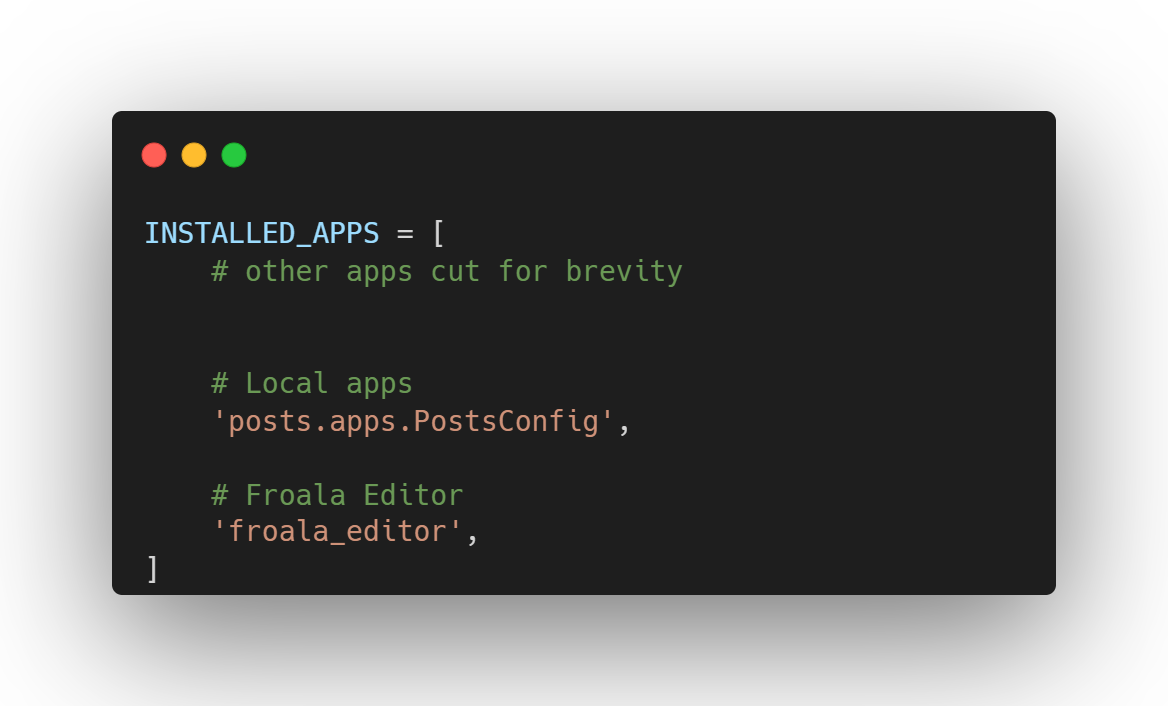
Note: Do not forget to add ‘froala_editor’ inside the INSTALLED_APPS else Froala will not work with the application
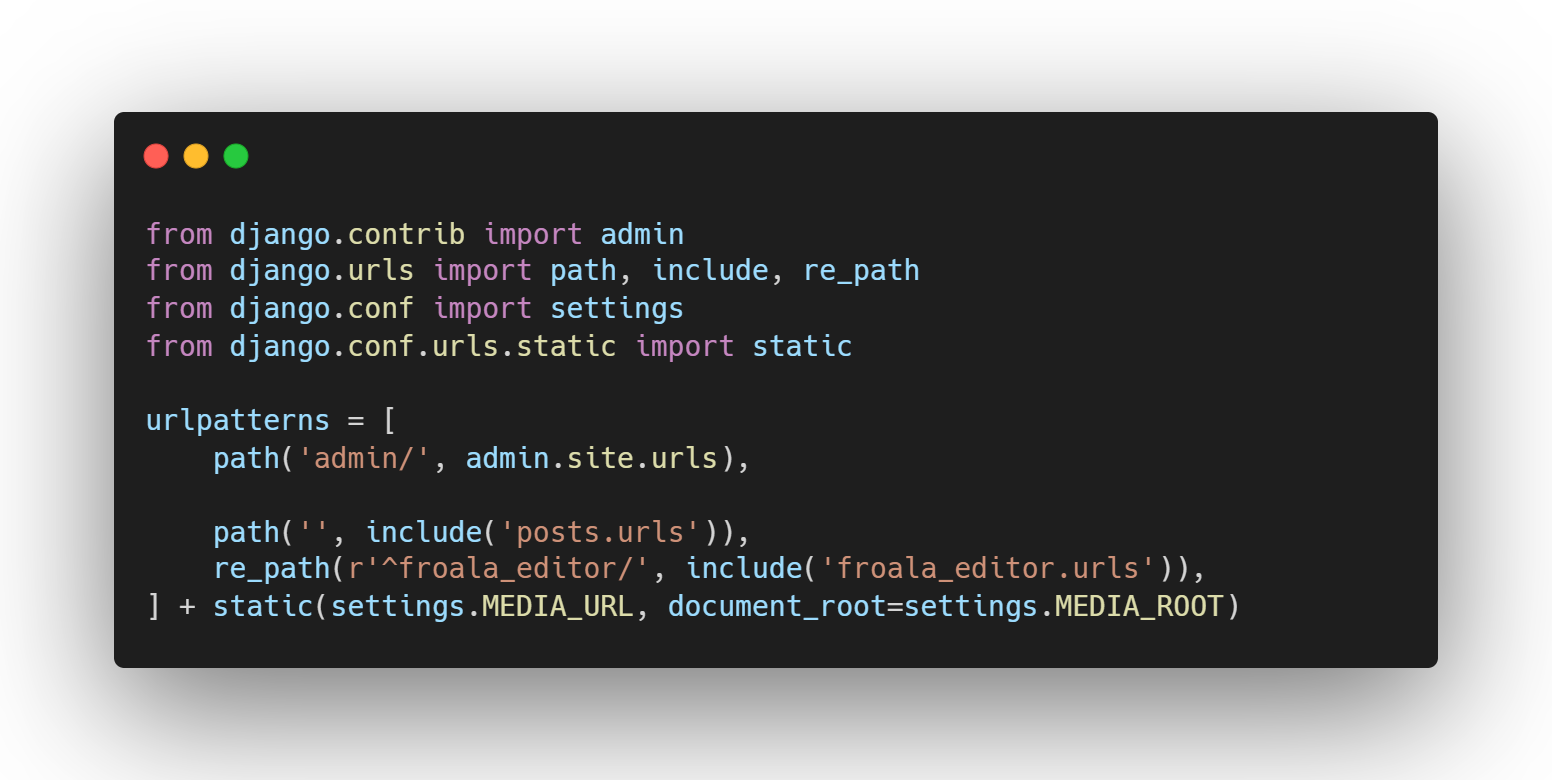
Mapping the routes
According to the docs, you need to add url(r’^froala_editor/’, include(‘froala_editor.urls’)), the project urls, but url is not used anymore and is replaced with re_path so we will be using re_path instead of url.
Creating the models
This will be the basis of the logic of our application.
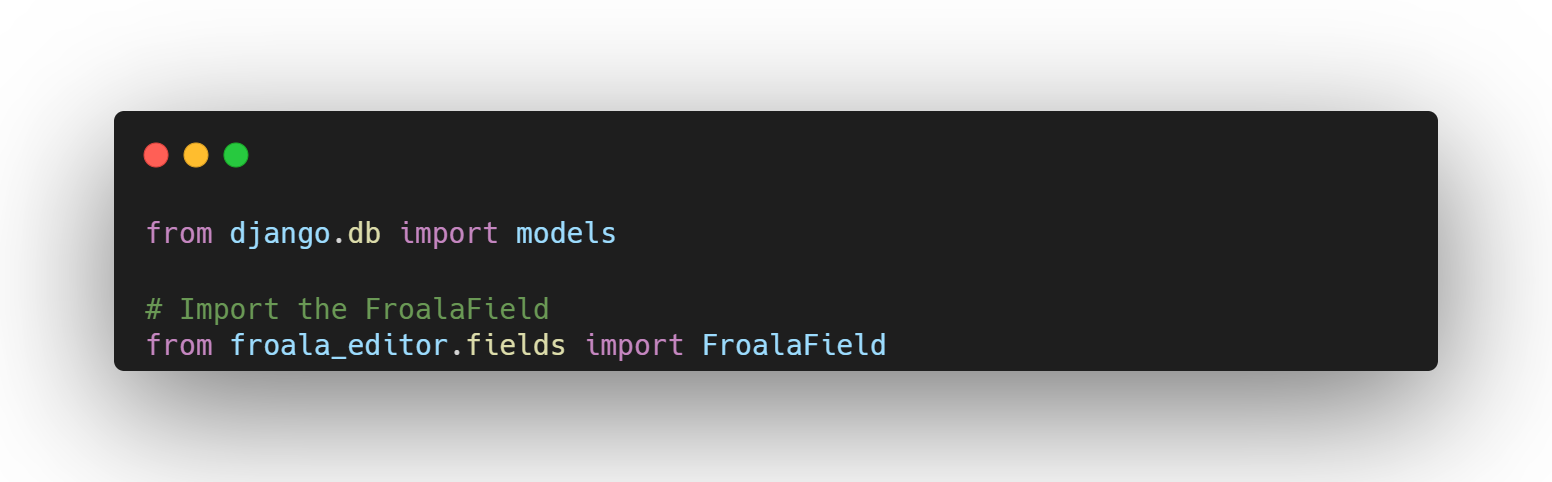
- Import the following
- Add the models
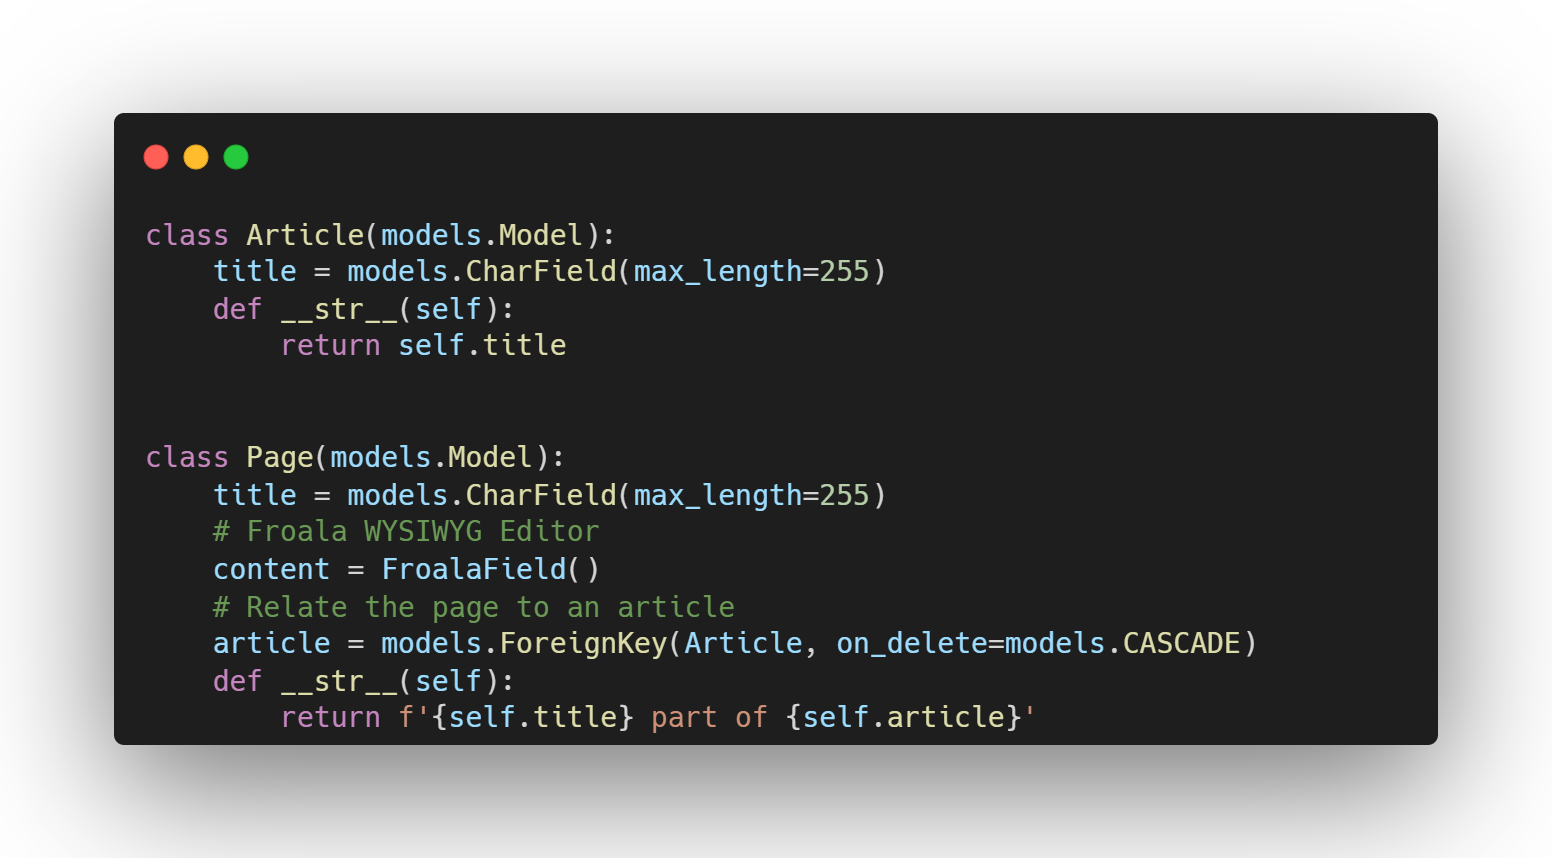
Notice that the field “content” is not a CharField or a regular Django model but a FroalaField(). This means that the content will be turned into a Froala Editor and anything that we put in “content” using Froala will be posted into our database.
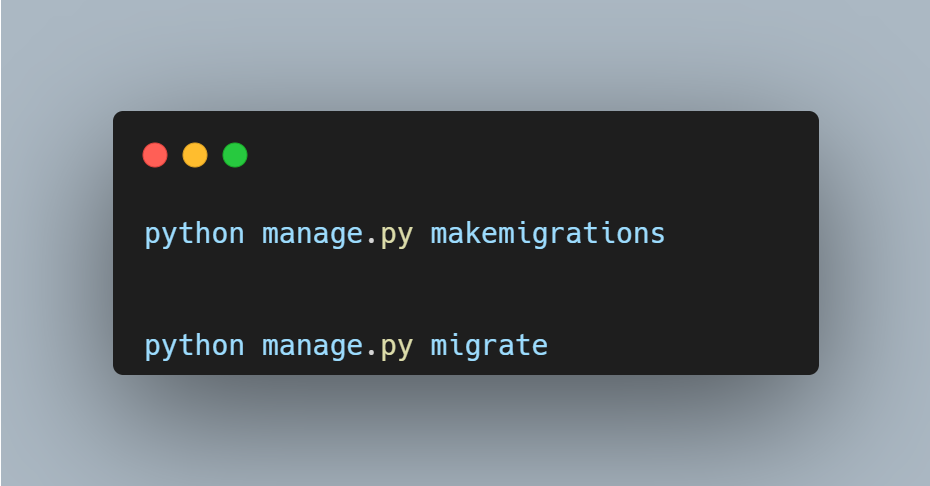
Preparing and migrating the database
To use the models we created, type the following commands directly into the command line:
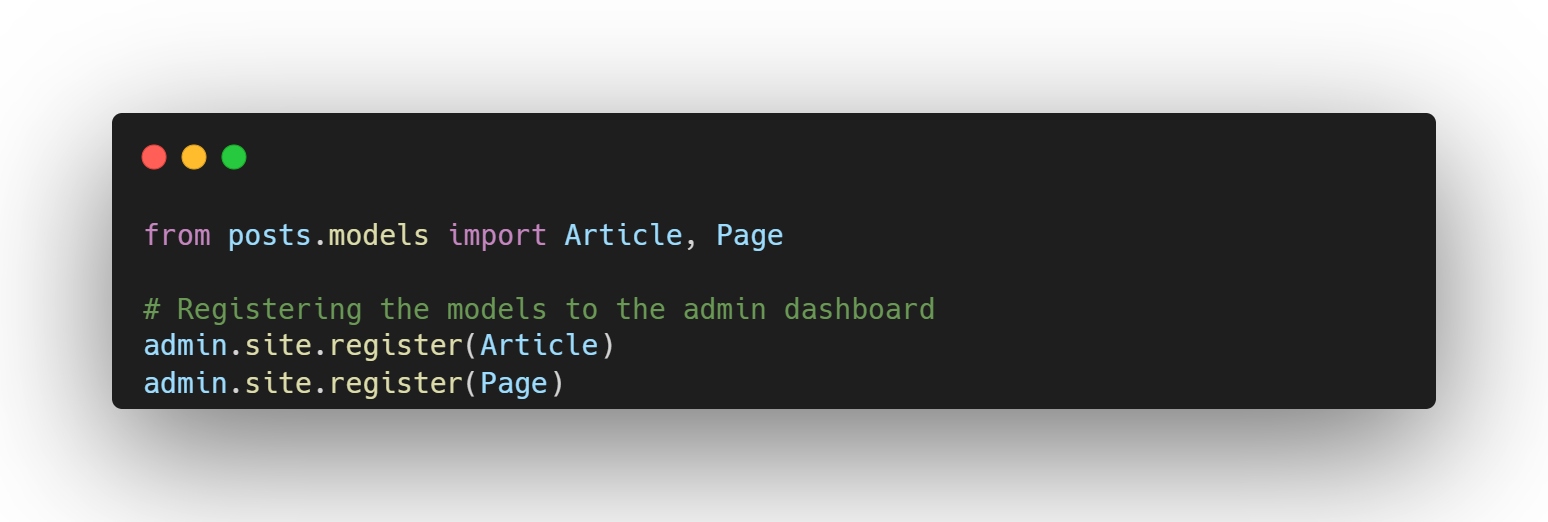
Adding the models inside the admin panel
Add the following code to your admin.py file
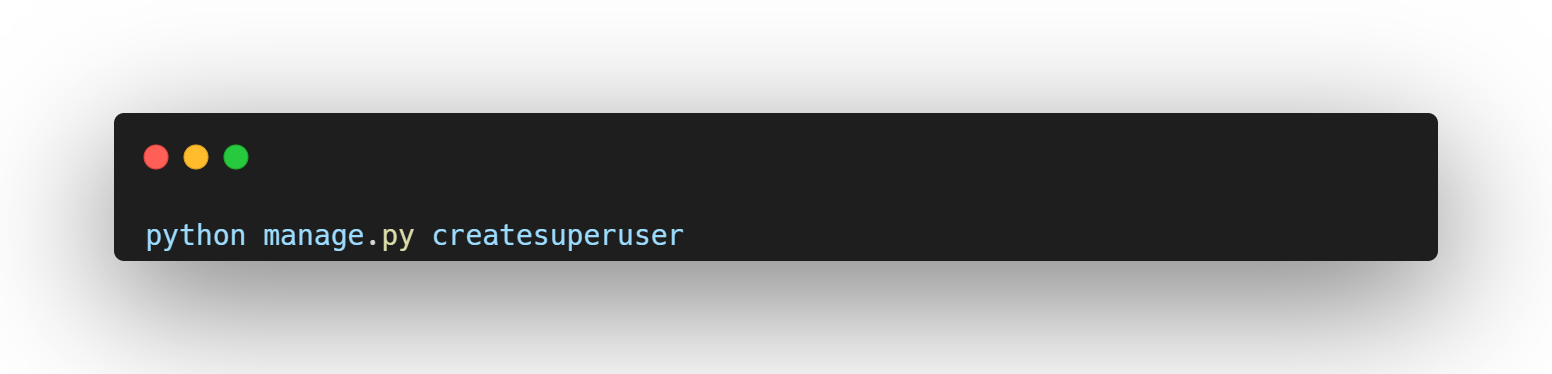
Creating the superuser
Create your account here with the credentials you want to login, don’t forget it as this will be your admin account.
How to Create the Views?
This is where the functions that will serve the content we need in our application will live.
-
Creating the homepage function
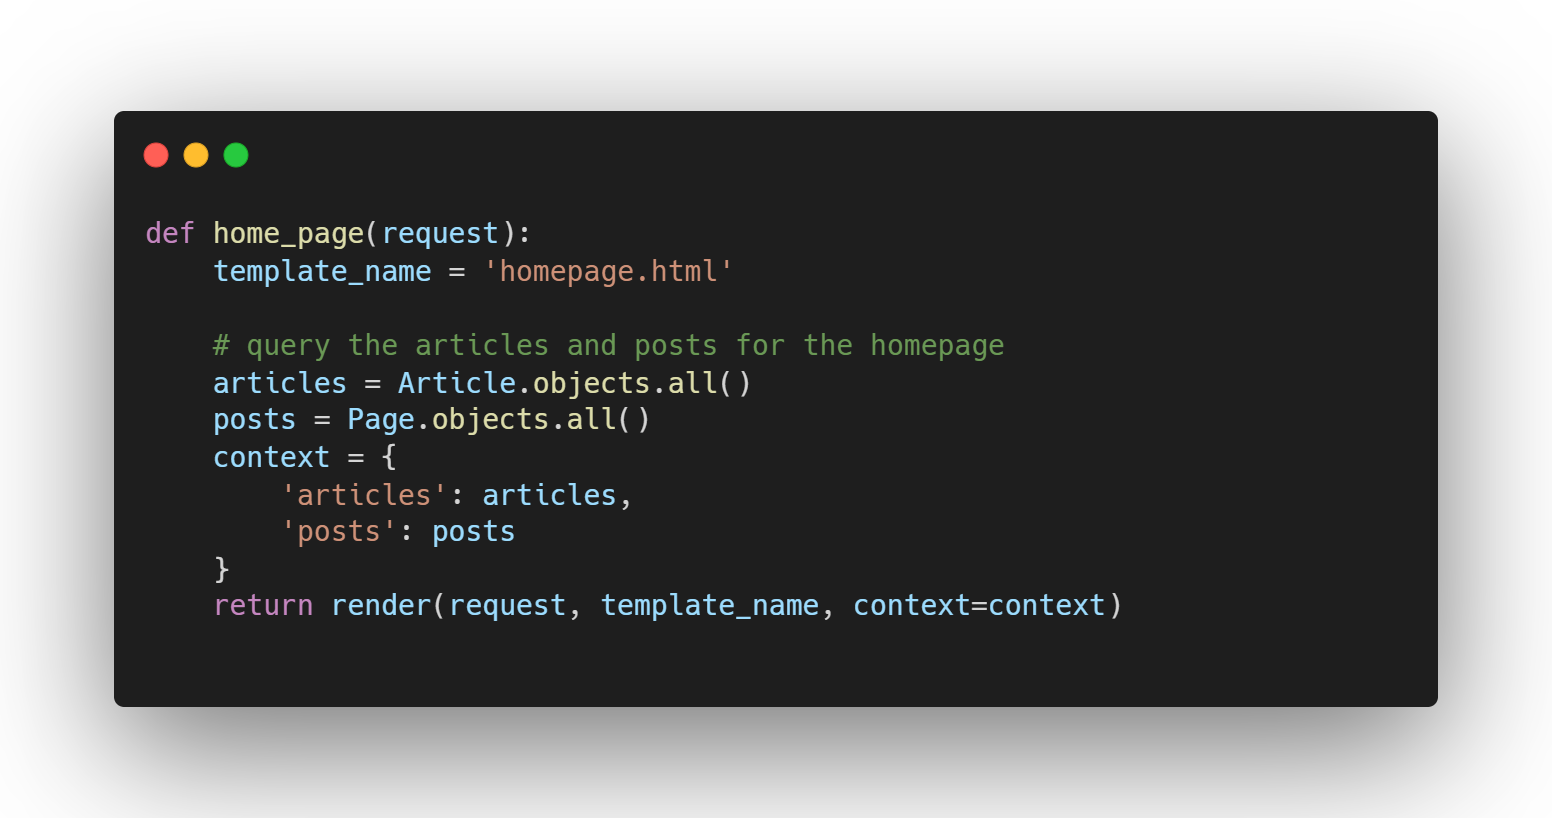
What this home page does is serve all the articles in our application for easier access.
-
Creating the page view
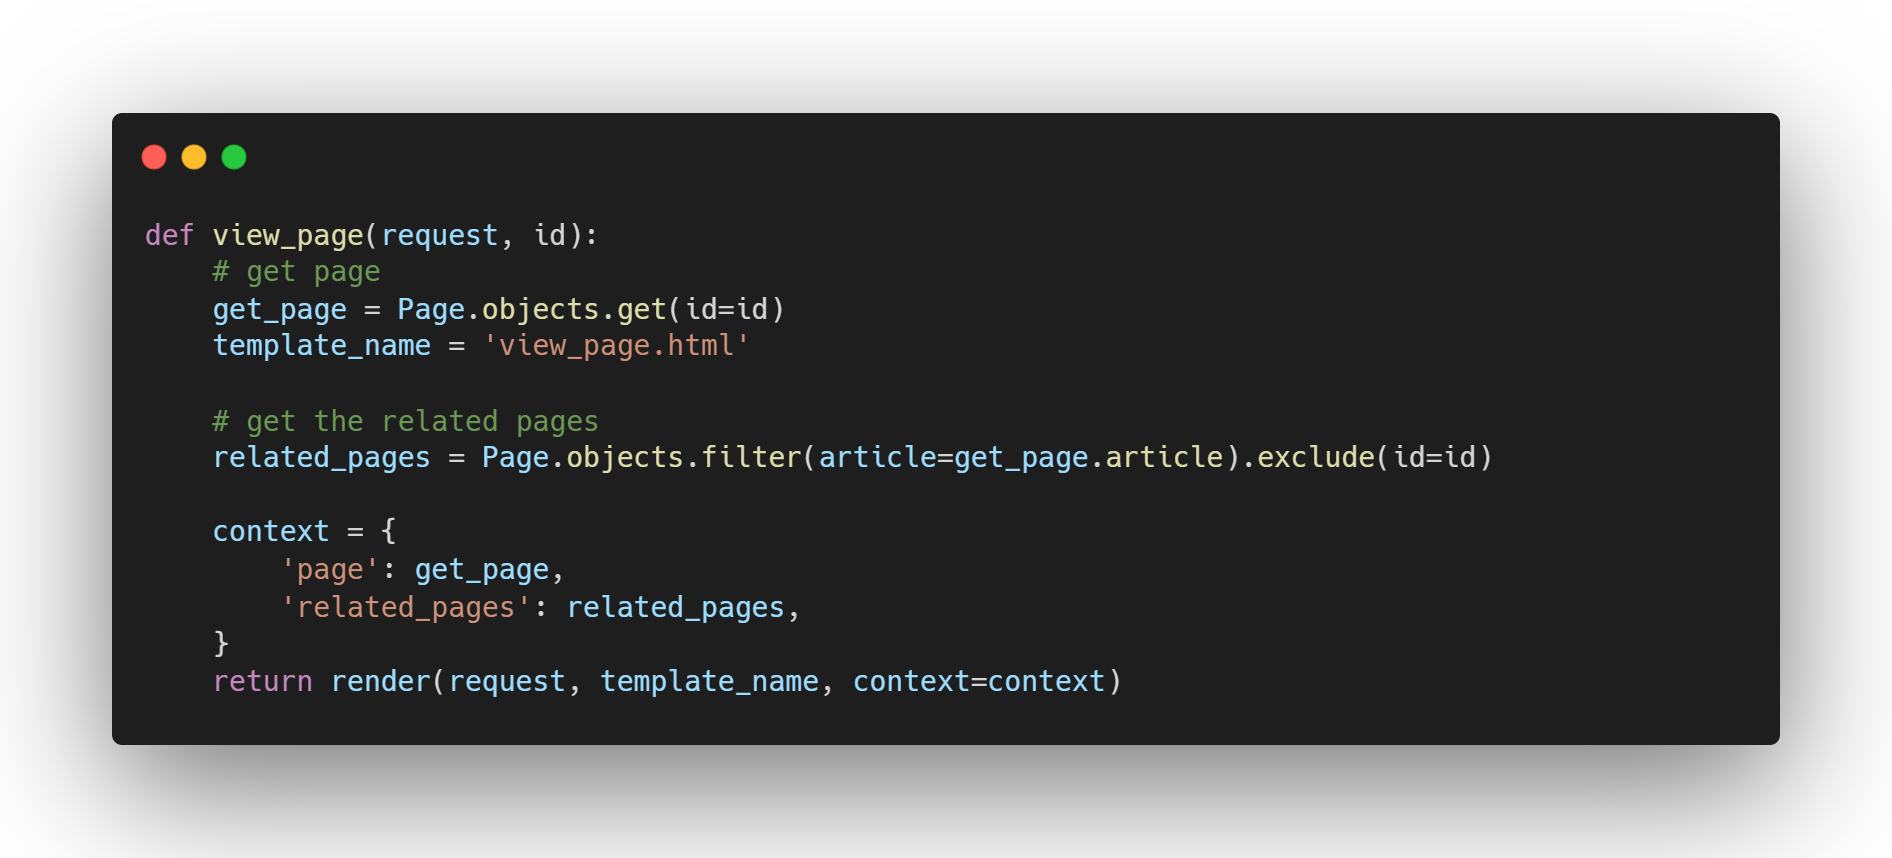
To view the created content inside the page, we would need to have a separate function to handle this. This function takes in an id of a page, checks if it’s in the database and serves it on the template file associated with it. This is also responsible for getting all the related pages(within the same article) on the side for easier access.
Adding the urls.py file in the application
- Create a file called urls.py in the “posts” directory and populate it with the following code
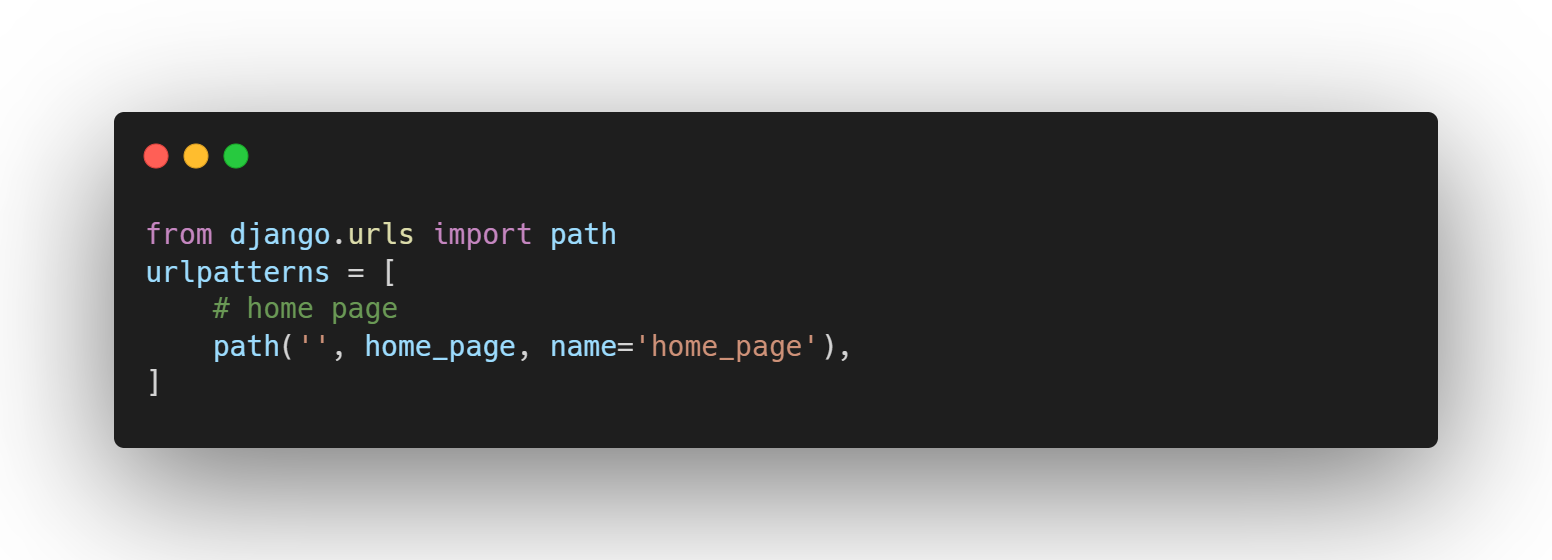
This will serve as the main homepage route of our application.
For brevity, I will just link the html templates here and just copy paste it on your own code.
Creating the base template
The base html will serve as the overall template for our application. Just create a base.html file inside your templates folder and paste the code in the link below:
Creating the homepage HTML
This is where our created homepage view will go.
Creating the page view HTML
This page will serve the detailed page.
The only thing you need to make sure here is that when you render the content, you must mark it as “safe” as such with the code below
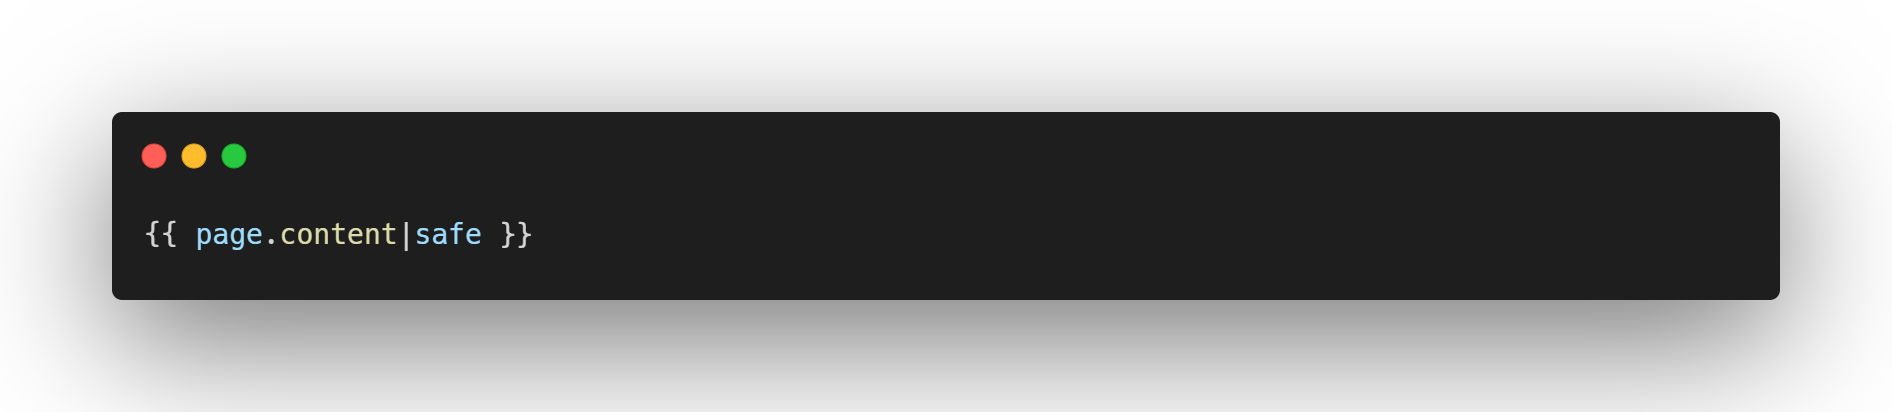
You can style it however you want. You just need to make sure that the content is marked safe, with this code
![]()
Because if you do not add “|safe” in the Jinja template, the content you made with Froala will not work and will just show up with html tags instead of the converted HTML one.
How Easy to Use Froala?
Showcasing
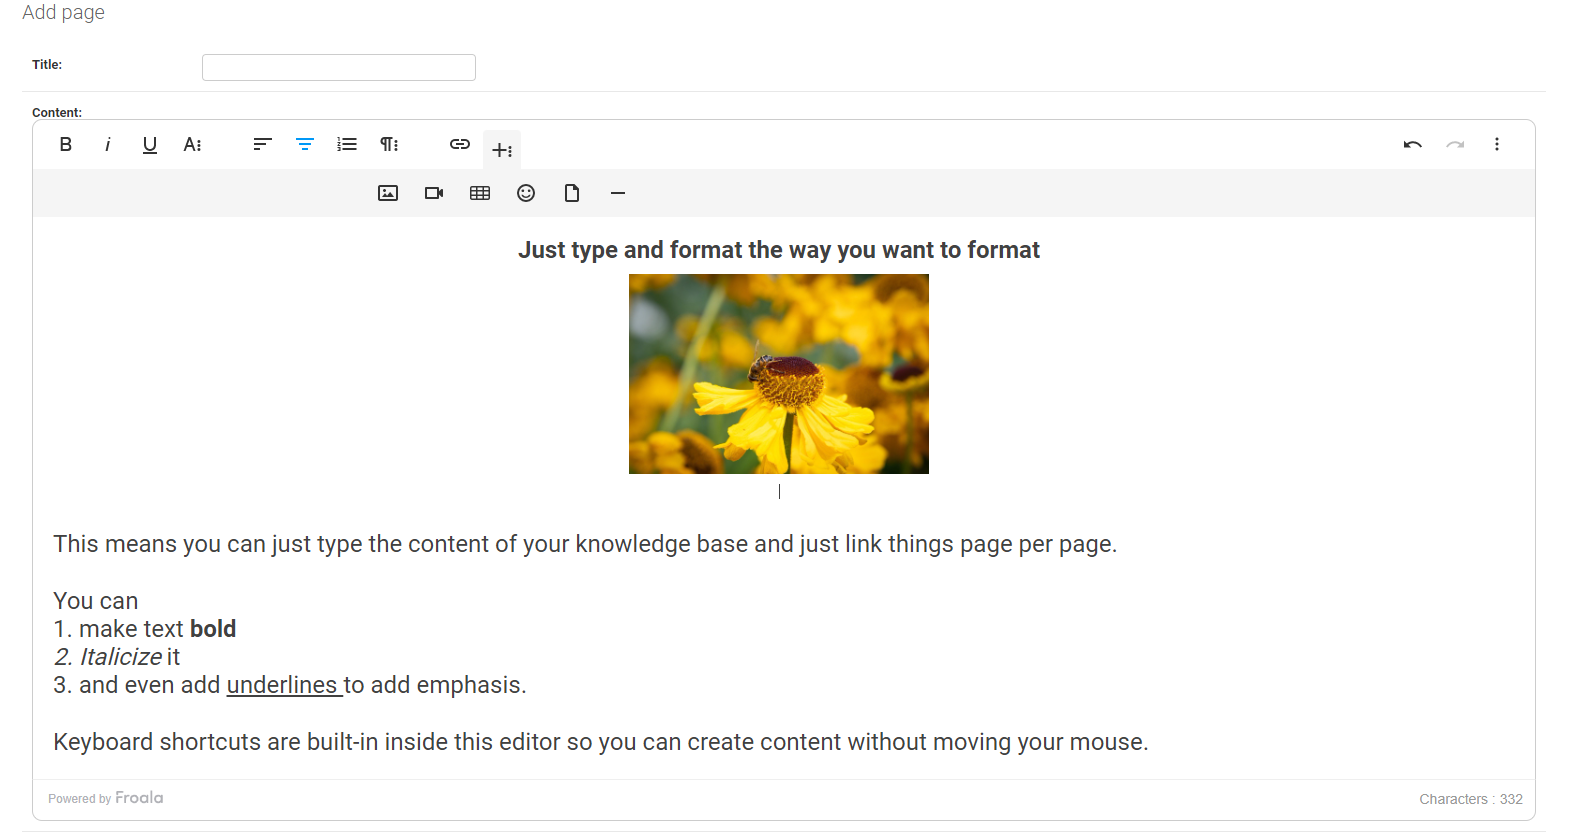
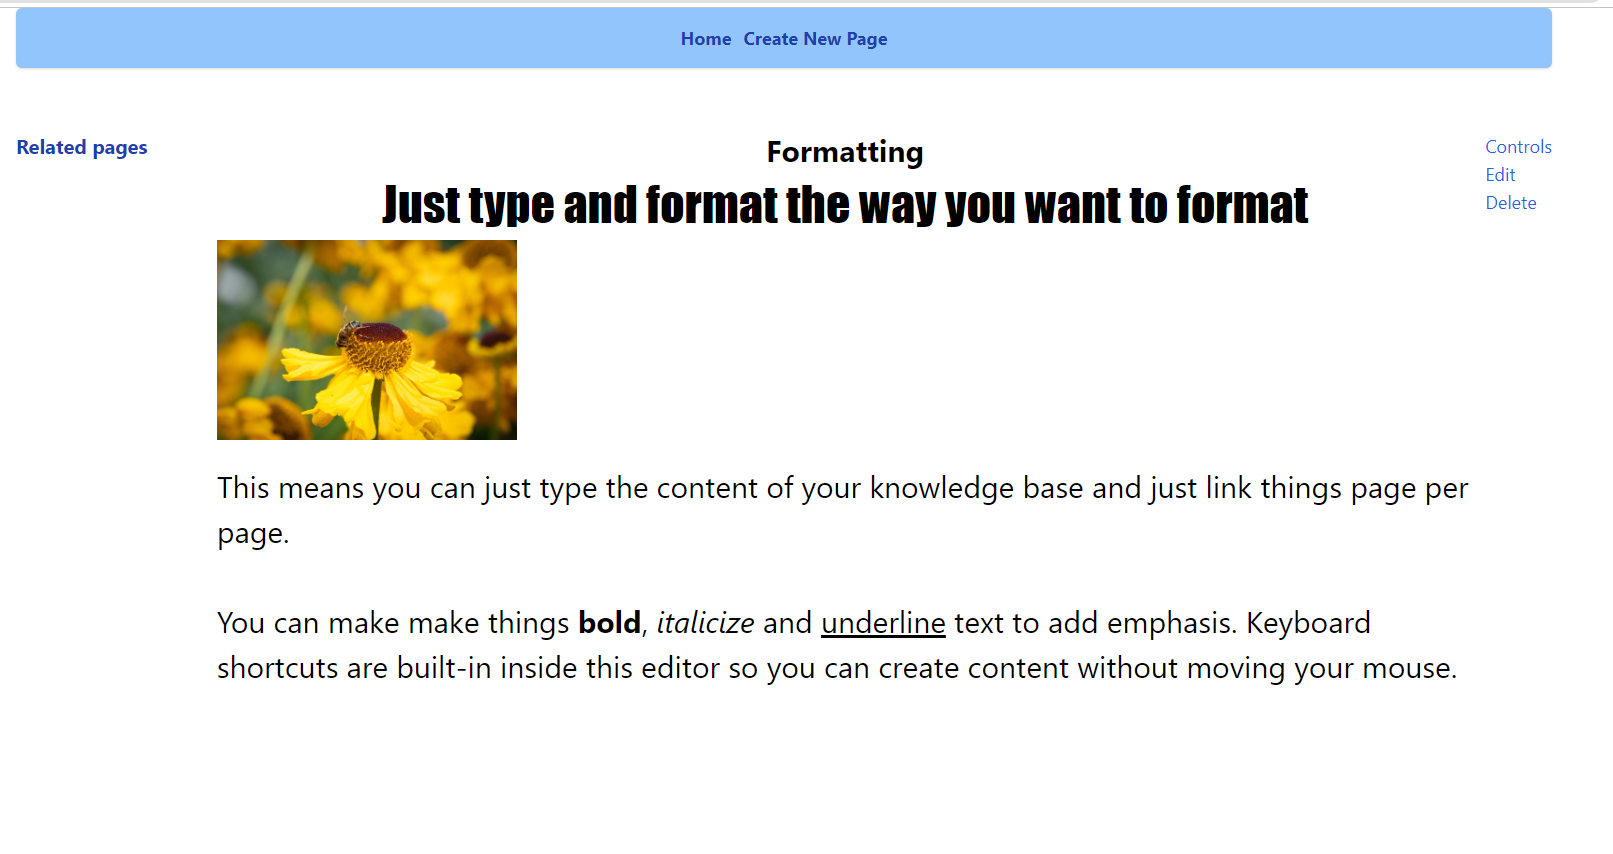
As you can see on the image above, I just created my content and formatted it inside the editor without extra HTML or markdown syntax.
This is how it looks like in my styled application
Utilizing the Django admin CRUD functionality
Run the server using:
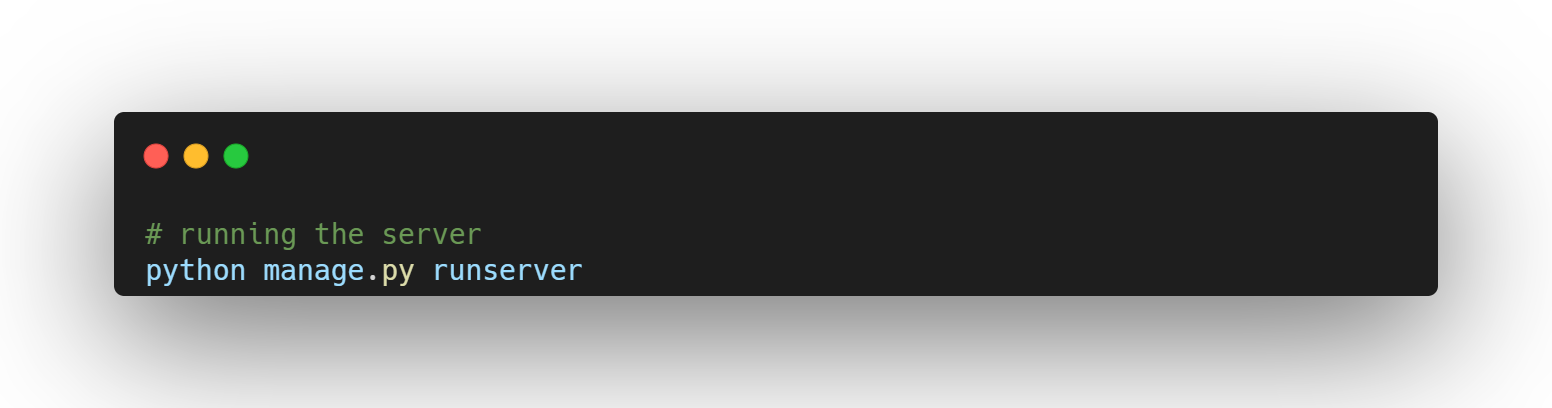
And login to the built-in Django admin account by going to localhost:8000/admin and login using the credentials you inputted inside the prompts:

Froala Editor within the models
Recall during the creation of the models, specifically the Pages model that we made the content a FroalaField(). This means that if we access it within the built-in Django admin panel, we can see the Froala editor embedded inside when you choose to add that specific model.
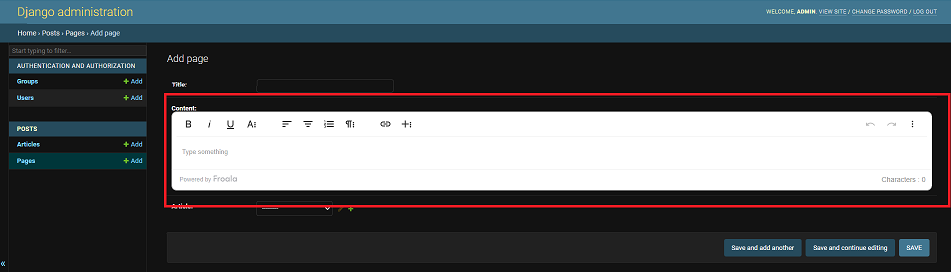
The editor within the red box is Froala’s WYSIWYG Editor that we can use to format our knowledge base without having to know HTML or CSS. This means that whatever we write in Froala’s Editor and whatever formatting we put inside it, it will reflect and convert it to HTML.
Pro Tip: You can even copy text with formatting or background colors from anywhere and it will reflect in Froala. I will copy “this text is copied from the article to Froala” and paste it inside Froala’s Editor
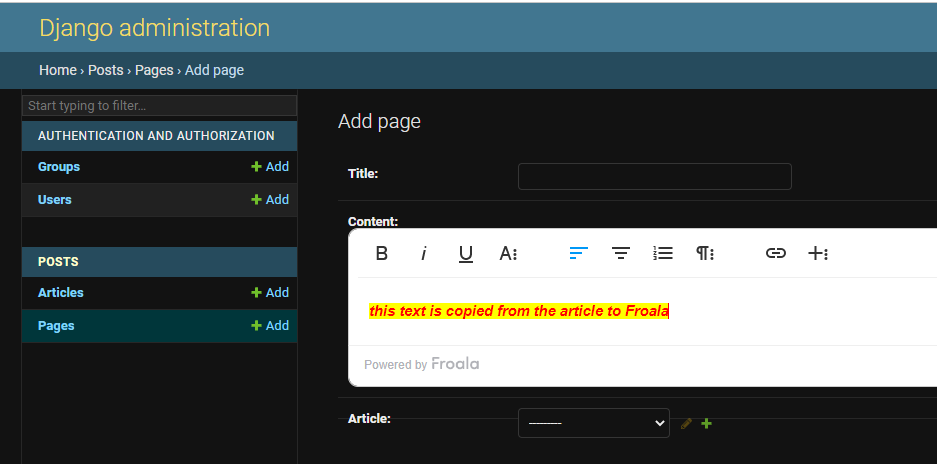
As you can see, the text that I copied from this editor reflected in Froala’s editor with all the formatting included. This means that formatting your knowledge base will become effortless as you can just utilize Froala’s built in WYSIWYG Editor to make your content look good and pleasing to the eyes.
Optional: How to Place the Editor Outside the Admin Panel and Add Image Support?
If you want to place Froala’s editor outside the Django built-in admin panel, you would have to include these extra steps:
Adding the Froala Editor outside the Django Admin Panel
-
Create Forms.py
![]()
Create forms.py inside the posts/ folder.
-
Adding the widget
Create the modelform inside forms.py, populate it with the following code:
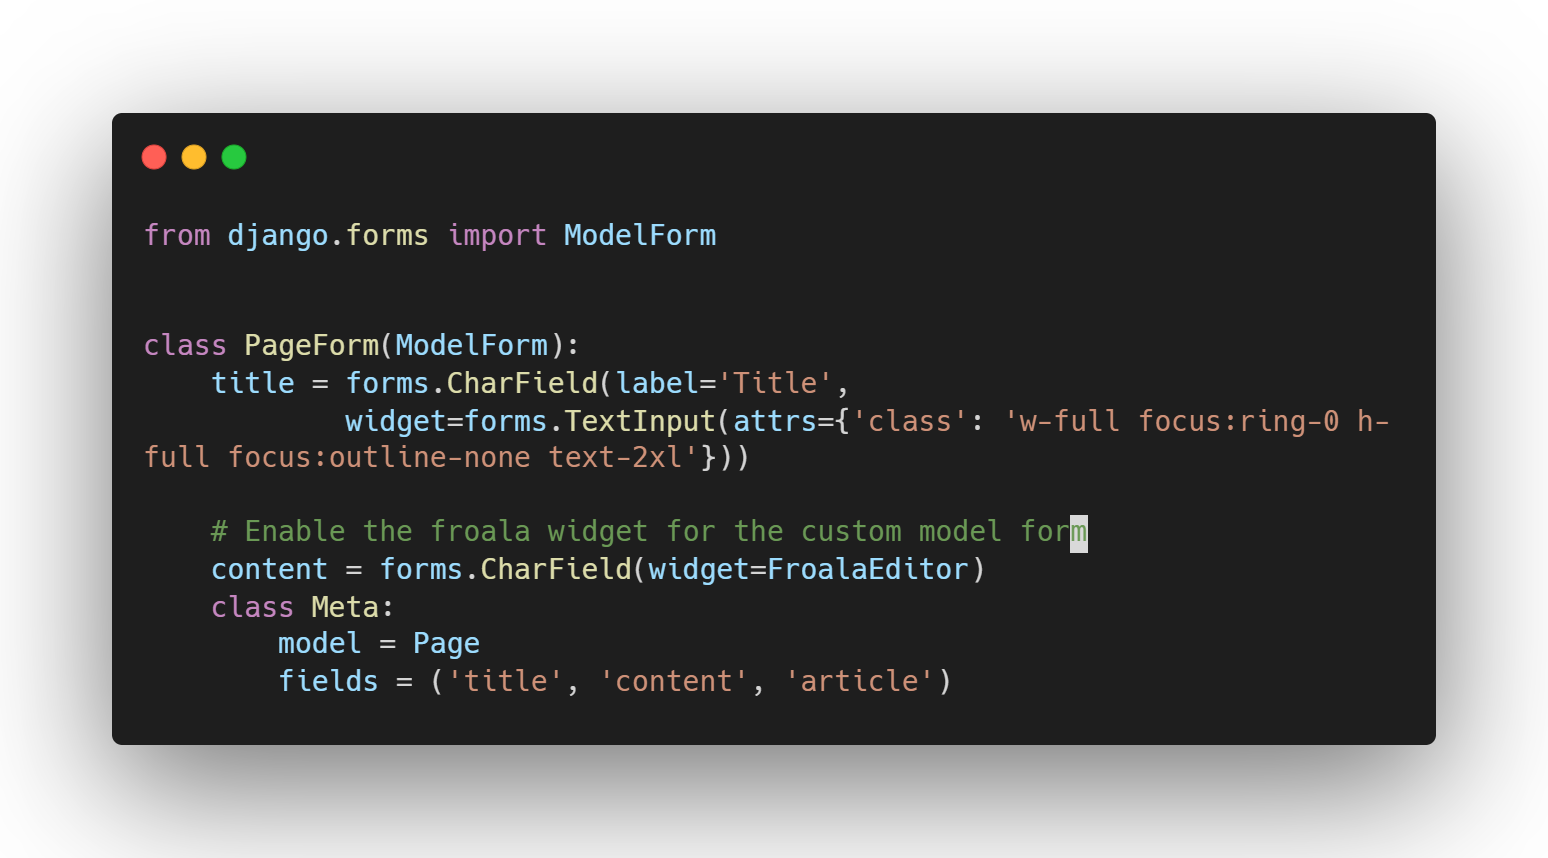
If you’re not familiar with Django code, this just means we are binding the model we made to an html form.
Look closely at the content field and you can see that there is a “forms.CharField(widget=FroalaEditor). This tells Django that we are extending the form to use Froala’s built in editor when we place it in our html.
-
Adding extra URL path
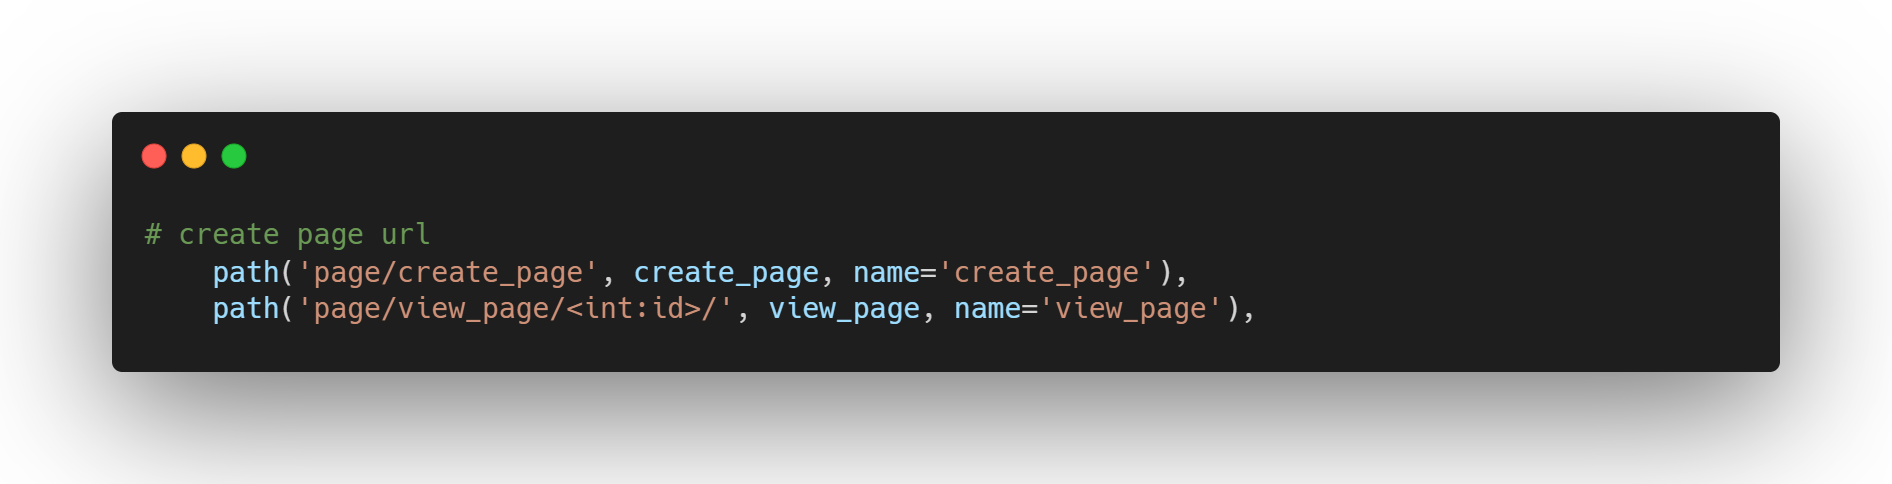
The new routes will handle the routing for creating the page, and viewing the single page.
-
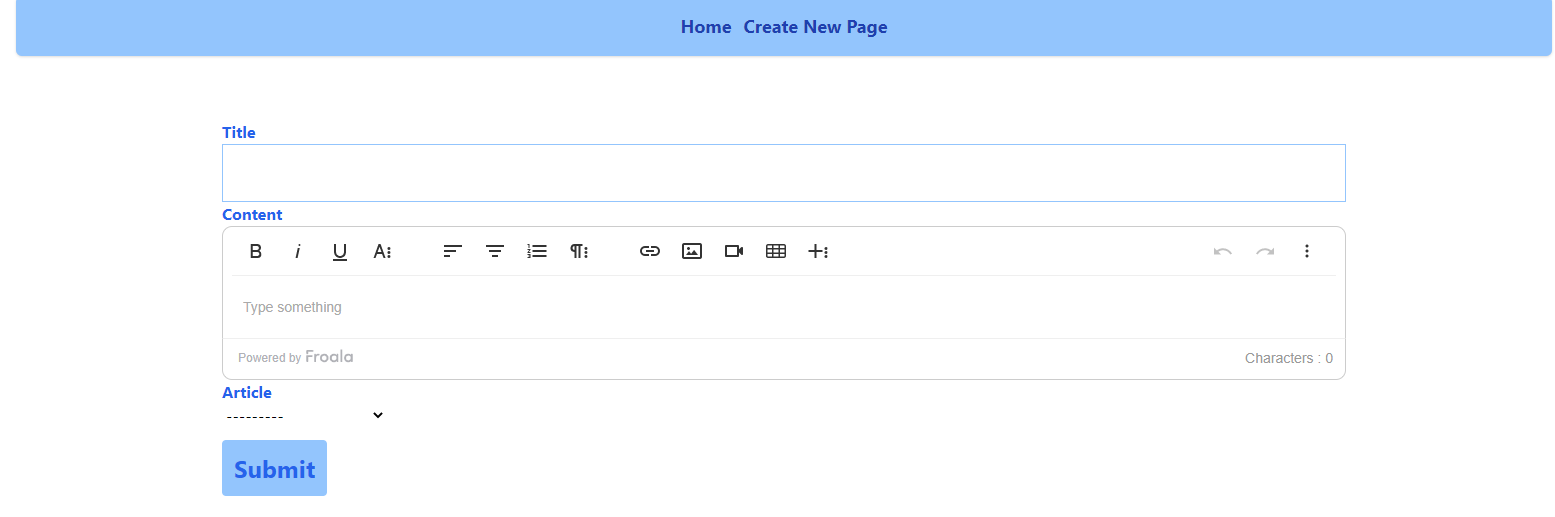
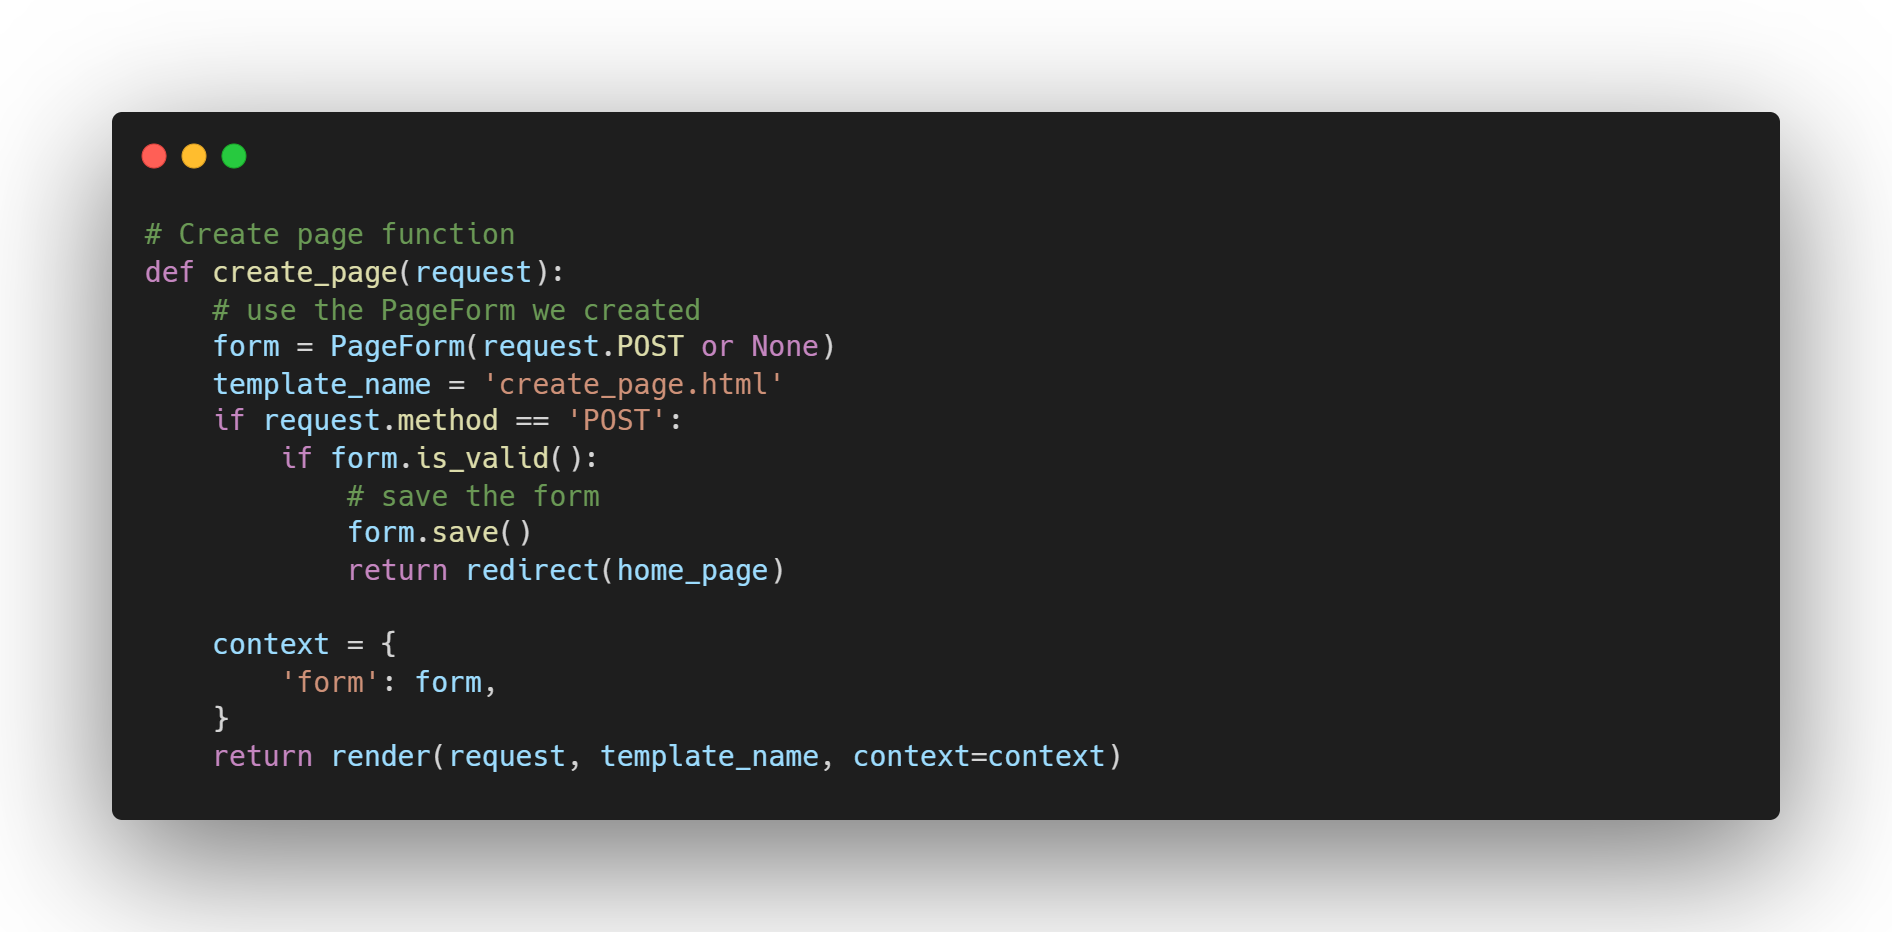
Adding the new create page function
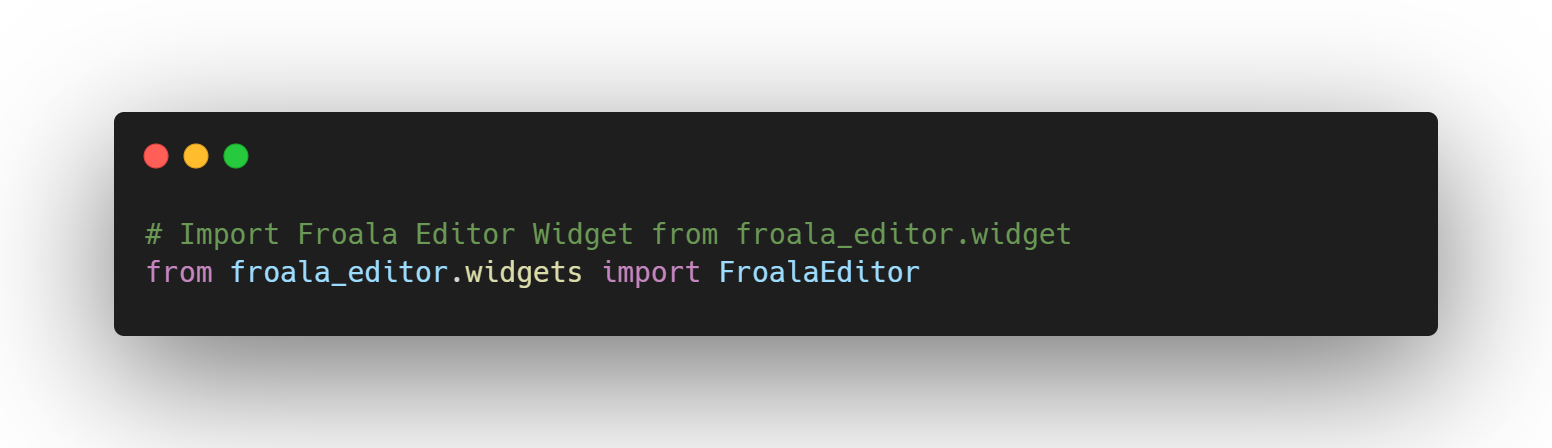
- Add the widget
Import the Froala Editor widget with the following code
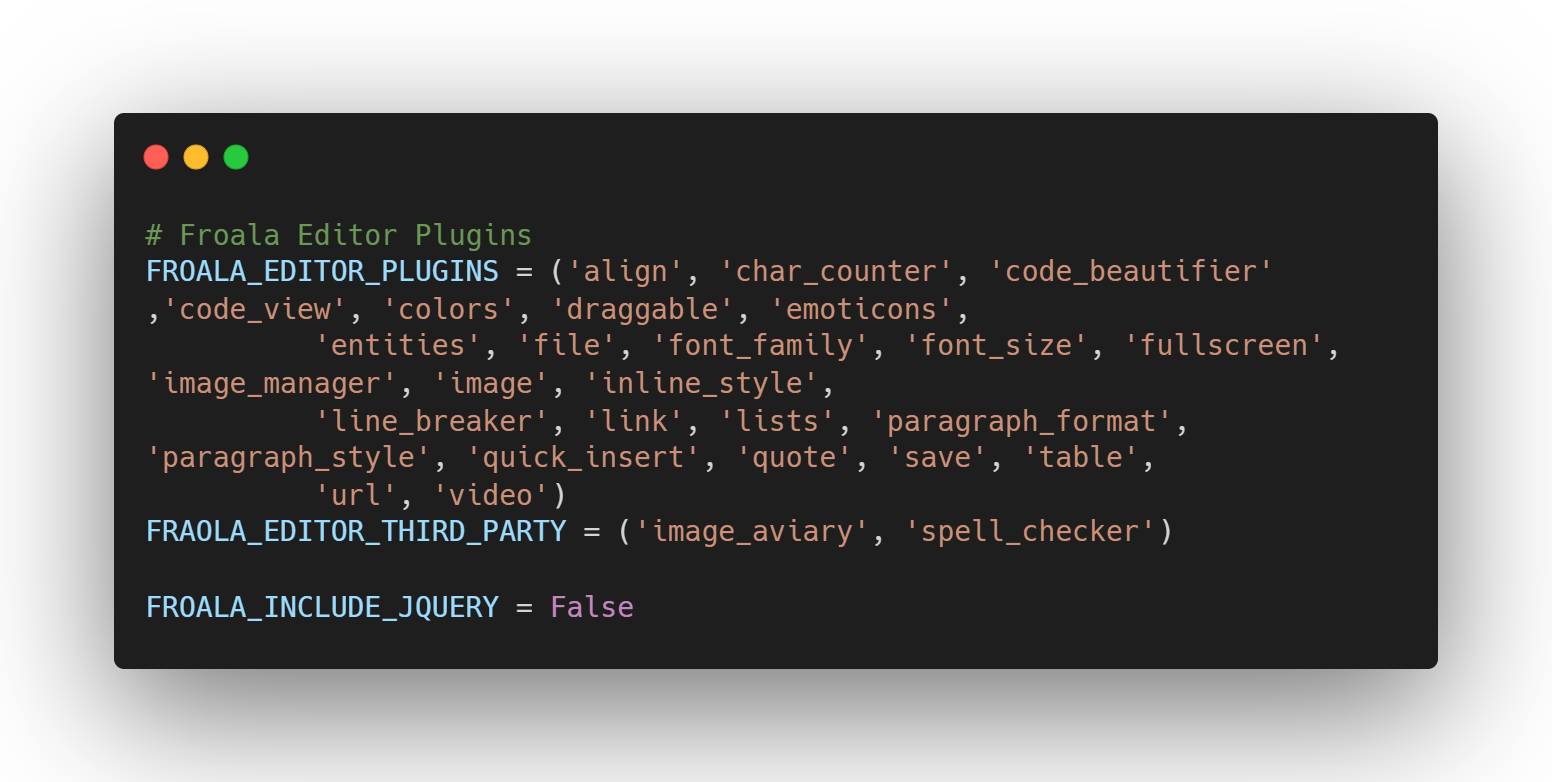
- Modify the settings
Modify the settings to add the plugins
- Create a folder to place your image uploads
Modify your settings.py and declare a variable called FROALA_UPLOAD_PATH and match it with the folder you created. This will serve as the folder in which all the images you upload to a Froala editor will go.
x
IMPORTANT: Add “{{ form.media }}” inside your base.html file. This tells Django to include the Froala Editor to manually include it outside the Django Admin page.
And we’re done. You can now customize your own knowledge base application to your liking and utilize what Froala can do in terms of creating good looking HTML for your knowledge bases.
Are You Ready to Get Started with Froala and Django?
Steps taken
To recap,
- We’ve successfully set up a Django application along with the models, routing, and the views.
- We’ve integrated Froala inside our application by utilizing the built-in support it offers for Django.
- We utilized Django’s built-in admin panel for our content creation inside the knowledge base.
- Optionally added image support alongside custom forms to use Froala’s editor outside the Django built-in admin panel.
Application Usefulness
The knowledge base application we made might be simple, but it serves its purpose. You can fully customize it to your liking by building upon the base models that we created in this tutorial to add tags, categories, and user authentication.
Froala at the core
Because the knowledge base application we made is content-focused, Froala being at its core, made the application easy to use. It integrated quickly with the Django admin panel and was ready to use once the database was migrated. As a developer, ease of use is one of the things I look for, along with customizability. Froala checks both those boxes with its WYSIWYG Editor and the additional plugins it offers.
If your application will require heavy content creation by your users, I highly recommend integrating Froala inside your Django application as it is painless to integrate, gets out of your way, and has good documentation around it in case you get lost or would want to customize it even further.
You can get started with Froala for free here.
Source Code
You can see the full source code of this application in the link below:
[1] https://docs.djangoproject.com/en/4.0/topics/http/urls/
[2] https://docs.djangoproject.com/en/4.0/howto/static-files/
[3] https://docs.djangoproject.com/en/4.0/ref/contrib/
[4] https://djangopackages.org/
[5] https://docs.djangoproject.com/en/4.0/
[6] https://tailwindcss.com/docs/installation/play-cdn


No comment yet, add your voice below!