Days
Hours
Minutes
Seconds
x

New Froala Editor v4.5.1 is here – Learn More

Skip to content

The Power of ChatGPT and Froala


What if you had the power of a reliable, built-in co-writer in your HTML editor whenever you were writing? And I’m not talking about the human kind of co-writer. What I’m talking about is a ChatGPT instance within a WYSIWYG (what you see is what you get) HTML editor. That means that using a single editor, users can tap into ChatGPT to generate content with just a button click.

You’ve probably heard of the terms “ChatGPT” and “WYSIWYG editor,” especially if you’ve recently searched the internet for tech news. In this article, I’ll tell you about these topics and discuss the ethics of using ChatGPT. Furthermore, I’ll show you how you can integrate ChatGPT into an easy HTML editor.

ChatGPT functionality as a custom button in Froala

Before we dive further into the hows, let’s first have a refresher on what ChatGPT and WYSIWYG editors are.

What is ChatGPT?

ChatGPT is an artificial intelligence (AI) language model that people can interact with conversationally. It’s capable of answering questions, recognizing mistakes, including its own, and declining inappropriate requests.

ChatGPT came from OpenAI, a company that works on AI that can potentially help people. They trained ChatGPT using reinforcement learning from human feedback (RLHF). This is a process where human trainers simulate conversations as both AI and users.

Now, I’m not an expert on creating AI, so I went ahead and asked ChatGPT how it works. Here’s a summary of the conversation we had, along with an image of our actual conversation:

  • ChatGPT uses machine learning algorithms to analyze and process data, which it then uses to generate responses
  • ChatGPT preprocesses any inputted text into a format that it can understand better. It then breaks down the text into smaller components known as tokens
  • ChatGPT then tries to come up with a meaning for the input text by analyzing the tokens from the previous step
  • The model samples several predefined model outputs and compares them with each other or a newly generated response
  • ChatGPT returns the best ranking generated response to the user

This conversation I had with ChatGPT explains how ChatGPT works

It’s important to know how ChatGPT works, but what’s more important is the responsibility that we have when using it. Like it says in the image above, ChatGPT cannot always generate the correct or appropriate responses. Furthermore, the content that it generates can sometimes contain potentially plagiarized phrases. So, is it really okay to use ChatGPT? What should we use it for? Is there a way to use it responsibly? Let’s answer these questions in the following section.

The ethics of using ChatGPT

Let’s admit it: AI, despite its usefulness and coolness, is scary. After all, people can use it to plagiarize content. For example, people can ask ChatGPT a question and paste the answer while claiming it as original work. Furthermore, irresponsible writers can fail to fact-check the generated content. This could result in spreading incorrect or confusing information. If people fully and irresponsibly depend on these tools, they will end up creating bland, repetitive, or inaccurate content.

If that’s the case, then why should we still learn ChatGPT? Let’s go back to the goal of OpenAI: using AI to benefit humanity. ChatGPT, when used correctly, greatly helps individuals and organizations alike create content easily.

Is it okay to use ChatGPT?

The answer depends on what you’ll use ChatGPT for and whether the institution to which you belong allows it. For example, it’s best to categorize using ChatGPT for schoolwork as something that’s not okay. That’s because critical thinking is a necessary foundation and skill for people. Using AI to do all the work for them could prevent students from developing this essential skill.

What should we use ChatGPT for?

  • Overcoming writer’s/coder’s block
  • Planning the contents of a copy
  • Reducing the time it takes to produce content

How do we use ChatGPT responsibly?

  • Fact-check the generated content. Because ChatGPT can’t guarantee the correctness of the content that it generates, you should always fact-check it.
  • Understand the generated content. Instead of just copying and pasting ChatGPT’s response, you should read and understand it. Then, try to summarize or explain it in your own words. If you don’t, you can potentially plagiarize some existing content or spread misinformation without even knowing.
  • Double check for plagiarism. Speaking of plagiarism, you should always aim to reduce or eliminate it, especially if you use ChatGPT for content. If in doubt, cite your sources or attach a link to the source.
  • Think of it as a guide, not a direct solution. ChatGPT isn’t the answer to everything, so we shouldn’t just copy and paste away. It’s better to let it guide us in creating authentic, high-quality content quickly.

There’s much more to think about when it comes to the ethics of using ChatGPT and similar software. But for now, it’s enough to keep what we’ve discussed so far in mind. Now that we’ve talked about ChatGPT, it’s time to look at WYSIWYG HTML editors.

What is a WYSIWYG HTML editor?

A WYSIWYG editor is an HTML editor that lets users easily create content and see how it’ll look once rendered. It comes with a toolbar and a space where users can write or edit HTML content.

WYSIWYG editors have rich text features (e.g., text and paragraph formatting and styling, image handling, etc.) and much more. And by that, I mean real-time collaboration, autosaving, document and inline modes, support for Markdown, accessibility, and other advanced features. These editors also usually allow users to paste content from different sources and keep its format.

What is an easy HTML editor to integrate and use?

Froala is a lightweight, elegant, and powerful WYSIWYG HTML editor that’s easy to integrate and use. It has over 100 features, a 40 ms initialization speed, and a cozy user experience. Froala is also developer-friendly with its ease of use, quick integration, and excellent documentation. These are just a few of the reasons why we’ll use this for our simple but fun experiment.

best HTML editor

To get started, include Froala’s files into your project by NPM, download, or CDN. Afterwards, create a DOM element (for now, we’ll use a <div> with the id “froala-editor”). The last step is to initialize the editor via JavaScript. In our case, that’s

var editor = new FroalaEditor(“div#froala-editor”);

Great! We now have Froala in our project. Let’s start creating our brilliant co-writer by integrating ChatGPT.

How to integrate ChatGPT into Froala

To add ChatGPT capabilities, we’ll need to create a custom button in Froala Editor (click here for a full guide). The way we want this feature to work is as follows:

  1. Type a question or a command for ChatGPT to answer.
  2. Highlight this question or command.
  3. Click the custom button for ChatGPT.
  4. Wait for ChatGPT to replace the highlighted question with the answer.

Creating the custom button

Let’s start by creating the custom button using the code snippet below.

Initializing the custom button for the ChatGPT feature

We have two things to note here. First, we have to define both the custom button and the icon that represents it in the toolbar. To do this, we need to use Froala’s DefineIcon and RegisterCommand methods. The former takes the icon name and the icon image as parameters. On the other hand, RegisterCommand defines a custom button, its title, and its properties. Its properties also include the function to call once the button is clicked.

The second thing is that when initializing the editor, we must include the custom button’s name in the toolbar. In our case, it’s “chatGPT”. Note that we separated it from the other buttons by placing it in another square bracket group.

After doing this, you should see the following when you run the application in a browser:

The Froala Editor is initialized, and the custom button for the ChatGPT feature is now visible on the editor

Making the OpenAI API Request

Next up, we have to replace the “Insert ChatGPT code here” part of the code with the API request. To do this, let’s follow the instructions here, but instead of a cURL, let’s use the fetch method.

In this image, we request a query from the OpenAI API

The first thing you need to do is secure an OpenAI API key. After that, you can initialize a constant with your API key as its value. Then, get the highlighted text from Froala Editor by using this.selection.text(). Before you make the API call, you should prepare the data first by defining its properties:

  • model refers to a particular GPT-3 model release of ChatGPT. In our case, we’ll use Davinci (or text-davinci-003), which is the most capable one at this time of writing.
  • prompt refers to the user input that ChatGPT will process.
  • max_tokens is responsible for setting an upper limit for the number of tokens that the API will return.
  • Lastly, temperature refers to the sampling of the output. Having lower values produces more deterministic or precise results. On the other hand, higher temperature values (e.g., 0.95) tend to yield more creative, diverse, but inconsistent results. It’s up to you to choose the right value (we chose 0 here), but in summary, 
    • Lower temperature = boring but higher probability of correctness
    • Higher temperature = creative but higher probability of errors or nonsense

Once the data is ready, request a query using the fetch method. Don’t forget to provide the API key that we defined earlier! And remember to convert the JSON object into a JavaScript object since the API returns JSON as a response. Once you’re done, it’s as simple as getting the first element of the object and inserting it into Froala.

Now that we’re done with the coding part, let’s see our ChatGPT-powered Froala Editor in action.


Conclusion

So, what do you think? Having a co-writer within your own Froala editor sounds pretty awesome, right? What we accomplished in this article might be simple, but it’s a great start to making something truly amazing. With an integrated ChatGPT, your users can write articles and other content (and get rid of writer’s block) more effectively. Just make sure to not misuse, rely too much on, or abuse this wonderful and innovative tool.

Froala Blog Call To Action


Code Your Website: The Ultimate HTML Code Writer Tool

Features of an Ultimate HTML Code Writer Tool

Having the ultimate HTML Code Writer Tool requires the best features to be able to handle every problem you give it. It needs to be very versatile but also user-friendly. These HTML editor’s features should help web developers both beginners and advanced to be able to write high-quality and efficient code which leads to successful projects. With the right features, the ultimate tool can increase your productivity, improve collaboration and reduce errors.

User-Friendly Interface

The first thing most users would notice and need is the user interface. Being able to navigate to the features of the tool is one of the most important features of any application. Having good features means nothing if the user is not able to navigate to them. A well-streamlined user interface also helps the user to navigate to the tool quickly. In addition, it also helps developers customize the tool to fit their preferences and workflow which then leads to a better coding experience free from frustration and errors.

A user-friendly interface also means having good collaboration features because it makes it easier for team members to work together. After the pandemic, remote work has gotten popular, and a lot of teams, even us, work remotely. It essentially bridges the distance gap making sure everyone in your team is on the same page.

Moreover, a user-friendly interface attracts more users and increases customer satisfaction. This means the tool has the potential to become more popular in the community, which can lead to growth, development, and contribution from the users.

Syntax Highlighting and Autocompletion

Syntax highlighting and auto-completion are essential features if we’re looking for the ultimate code writing tool.

Derived from the word itself, syntax highlighting is pretty self-explanatory. It essentially highlights the different elements of the code with various colors to help the developer understand and identify the code. Because of this, the developer can find errors, inconsistencies, and poorly written code.

Auto-complete, on the other hand, speeds up the writing process by suggesting code snippets to the developer. It’s pretty much the same as the auto-complete feature on your phone when you type except it suggests codes instead of words. This reduces human error and saves a lot of time especially when writing repetitive code.

These two together improve speed and efficiency when writing code with lesser errors. Lesser errors mean an enjoyable and less stressful coding experience too.

Built-in Code Snippets and Templates

Code snippets provide pre-written blocks of code that can be inserted into a project. Since the code is already pre-written, this speeds up writing code. This also reduces the likely occurrence of errors.

Templates can help provide a good starting point for a project. Templates pretty much provide the basic and essential features which developers can edit to their linking. This drastically reduces the time spent on setting up the project.

Using built-in code snippets and templates ensures consistency on your project as it provides a standard way of writing code that the developer can follow. Following a standard means collaboration with other developers and maintenance of the code is easier.

Cross-Browser Compatibility Testing

Cross-browser compatibility means that the website or application looks and functions correctly across different web browsers.

Different web browsers display the same code in many ways which can lead to inconsistencies or incompatibilities especially in visually and functionally. Testing different browser compatibility can make sure these issues are resolved.

Since the website or application was tested to make sure it’s compatible in different browsers, the website will function as intended and ensure a user-friendly experience which leads to higher usage of the application and visitors on the website.

Benefits of Using the Ultimate HTML Code Writer Tool

The Ultimate HTML Code Writer Tool should provide several benefits from improved efficiency to better quality written code. Things such as syntax highlighting and auto-complete speed up coding. Built-in code snippets and templates save time as it’s easier to write complex functions using code blocks while also ensuring consistency throughout the project. The tool also needs to have collaboration and sharing capabilities so groups and teams can easily work efficiently together. While cross-browser compatibility ensures that the application or website will function across all major browsers. There are more benefits and to using the ultimate HTML code-writing tool and we’ll discuss them further below.

Increased Productivity and Efficiency in Coding

There are many ways that the ultimate HTML code writer tool can increase productivity and efficiency. As we’ve discussed before, the user-friendly interface help developers easily navigate through the tool and can also debug code easily. Cross-browser compatibility testing also makes sure that the application or website is functioning well before it goes live, decreasing the time to have to put the website in maintenance mode.

Improved Accuracy and Reduced Errors in Coding

Most features of HTML tools are mainly to improve accuracy and error detection. The best example of this is syntax highlighting and the auto-complete feature, these two improve accuracy since it suggests the right syntax for the code you might be using. And the auto-complete feature suggests the proper code avoiding misspellings and wrong code. Both also speeds up coding along with built-in code snippets which saves time as it suggests code that developers can reuse throughout the project which also ensures consistency. While the built-in code snippets and templates also reduce the likelihood of errors as developers can use pre-written code that already has been tested for its functionality.

Time-Saving Features That Streamline Workflow

Like improving accuracy and reducing errors, saving time is guaranteed by working with the best tool. The auto-complete literally lessens the time you write code because you don’t have to write it anymore. The same goes for code snippets as the developer can just copy the code snippet and paste it into their project. Long code function severely increases coding time and if the developer is able to reuse code functions that the tool provides, it will lessen his development time by a lot. The collaboration feature also lessens time when developing with a team as this enables the developer to quickly share their work with other team members without going through the hassle of doing it the old way such as screen sharing.

How to Get Started with the Ultimate HTML Code Writer Tool

How to get started with the ultimate HTML code writer tool, you need to download the tool and install it. Once you’ve installed it, you can start familiarizing yourself with its features. Maybe start with a few test projects so you can familiarize yourself with it using experience as experience is the best teacher. Once, you’ve familiarized yourself enough, you can start tweaking its features to suit your needs and your style. For example, you can customize the user interface to make it easier for you to navigate to your favorite tools. Don’t forget to try advanced features as well to streamline your workflow even further. Things such as the collaboration feature can have hidden features that you can put to great use.

Downloading and Installing the Ultimate Code Writer Tool Instructions

Next, we’re going to teach you a step-by-step instruction to download and install the tool.

  1. Go to the HTML editor’s website and for this example, we will use our very own Froala, a text-based HTML editor. Go to the main page and click the download button. This will take you to the download page. You will have to fill up the form to be able to download the Froala editor. This will give you a 30-day free trial of our WYSIWYG HTML editor.
  2. You will now have a copy of our editor. And the page will take you to our documentation. From there, you can customize our online editor to suit your needs.
  3. Unzip the file and depending on your platform, you can follow the instructions provided on the documentation on how to install it to your project. You can also check out our Getting Started guide.
  4. Once the installation is complete, you can check out our APIs page to take advantage of specific features of our editor.
  5. You can also add other plugins to further customize your editor.
  6. Continue to familiarize yourself with the documentation and if you have any questions, you can contact us at [email protected].

How to Use the Tool

Froala has a really intuitive user interface that most people are familiar with. It uses the typical word editor toolbar that popular document editing software as well as CMS such as WordPress use. The toolbar has basic functions such as bold, italic, underline, align, links, etc. By using the editor, you don’t need to edit the HTML of your blog for example as you can write your article how you would write it on a Microsoft Word document. Froala editor, does all the code for you so you can focus on what matters more, writing or designing your website.

If you encounter issues or need help, you can check out our documentation or contact our support. Our blog also has tons of tutorials and information regarding our HTML editor.

Conclusion

In conclusion, the ultimate HTML code writer tool will definitely help web developers improve accuracy, efficiency, and speed in coding. The user-friendly interface, auto-complete, code snippets, templates, and syntax highlighting make the process much faster. Meanwhile, cross-browser compatibility testing makes sure that the application works in most browsers. The perfect code writing tool also should be fairly easy to download and install with an abundance of documentation and support from the developers and the community. Try using the HTML code writer tool and you’ll see that it’s such a valuable asset for any web developer aiming to streamline their work.

Art of Web Design with a Visual HTML Editor: Tips and Tools

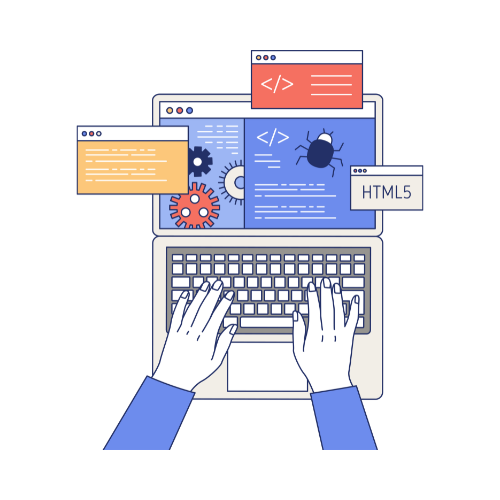
Overview of Visual HTML Editor

Without needing to write code manually, a developer is able to create stunning websites and applications using a visual HTML editor. Using a visual editor, a developer can manage the interface, design elements, and customize pre-designed templates and blocks to make attractive websites. Visual HTML editors or also WYSIWYG HTML editors are great for developers who want to create these web pages fast without needing to manually code each element. If you also lack extensive coding knowledge or expertise regarding developing web pages, visual HTML editors are perfect for you. By utilizing these tools, users can save time and focus on what’s important, the design and the content of their websites.

Explanation of what a visual HTML editor is

If you still don’t now what a visual HTML editor is, it is basically a tool which allows developers to create and edit web pages through visual means using a GUI. Instead of manually typing every code, a developer is able to utilize buttons to manipulate the elements on the page. This optimizes web design for individuals who lack technical skills or developers who want to work fast and efficiently.

This is done by converting the user’s input from the GUI into HTML and CSS code. For example, when a user drags and drops an element onto a page, the editor automatically generates the proper code for it. It offers lightweight customization as well such as the ability to customize the element such as color, font, position and many more. Subsequently, the editor generates and applies the appropriate CSS to the elements.

Perhaps, one of the most important features of a visual HTML editor is it provides an intuitive and graphical interface to its user. This enables non-technical users to create pages easily. This tool is perfect for small business owners, bloggers or anyone who wants to create a website for personal use but lacks resources to hire a professional. Instead of putting effort in learning to various languages mainly HTML and CSS with structured markup, they can focus on creating content.

Importance of using a Visual HTML editor

A visual HTML editor simplifies the process for users who lack the technical skills to write code. With these editors, they are able to create professional and attractive web pages without having to write any code as it provides a user-friendly interface. The interface gives the user a lot of options to customize the elements. With professional looking websites, visitors are more likely to stay longer resulting in increased engagement and higher conversion rates. Professionals and freelancers also establish credibility and build brand recognition easily with a professional website.

And if you’re an experienced web developer you will still benefit tremendously from a visual editor. HTML editors save time and effort and still able to produce amazing results. By being letting the HTML editor write simple code for them, developers can focus on the more complicated areas of the website.

Pros and Cons of Visual HTML Editors

Though we may be building up and heavily praising visual HTML editors, there are still pros and cons to these tools.

Pros:

  1. User-Friendly Interface: An intuitive interface enables users to create web pages easily. They have buttons and visual editor icons to help users easily navigate to certain features.
  2. Time-Saving: Editors eliminate the need for users to manually write code, thus saving time. It also have pre-designed blocks of code that developers can use.
  3. Customization: Users can customize their web pages’ such as its fonts, colors, images, and even use fruit grid layouts with ease.
  4. Accessibility: Web design is made accessible to non-technical users since they are able to create professional web pages without the need of a professional web developer.
  5. WYSIWYG: Using a “What You See Is What You Get” approach, users are able to preview their work.

Cons:

  1. Limited Control: Editing of codes may sometimes have certain limitations and restrictions. This becomes a challenge when implementing a very specific design that is not built-in to the editor.
  2. Bloated Code: Sometimes the code generated is bloated an inefficient and can cause your website to be slower.
  3. Compatibility Issues: The editors can generate code that is not compatible with  certain platforms such as browsers or devices.
  4. Security Risks: They also may introduce security risks if they generate code that has vulnerabilities. It is highly advised to add cloud security features.
  5. Learning Curve: Though HTML editors are mostly user-friendly, there is still a learning curve to it. Navigating through the application and installing certain features still requires learning and reading the documentation.

Tips for Using a Visual HTML Editor

Here are some tips and best practices to follow when using a visual HTML editor:

  1. Organize Design Elements: It’s important to organize design elements for efficient use by grouping similar elements together. Use labels as well to help identify elements on your page. This makes it easier to edit.
  2. Understand the Basics of HTML and CSS: Even though HTML editors eliminate the need for manual coding, it still vastly helps having a slight understanding about HTML and CSS. This will also help you when you get stuck help you produce better projects.
  3. Utilize Templates and Pre-Designed Blocks: Learn to take advantage in using pre-designed templates and blocks that can be used as a starting point. This is better than having a blank canvas and no ideas whatsoever. This not only saves time but helps the website maintain a consistent theme and design.
  4. Avoiding Bloat: Despite having the HTML editor generate code for you, that shouldn’t stop you from auditing its code making sure it’s optimized. You can do this by selecting only the necessary design elements, compressing images, and avoiding unnecessary scripts and plugins. Always delete unnecessary plugins. Also, make sure to also use SEO so your pages rank in search engines. Sometimes you need to do this manually but it will vastly help your website.
  5. Testing Across Devices and Browsers: After you design your website, make sure to test it across major devices and browsers. This ensures that your pages will function as intended and your visitors will have a better user experience.

Top Visual HTML Editors on the Market

Numerous visual HTML editors are available and each of them having their own unique features. They also vary in cost. Some are completely free, while some have limited options for the free version, and others are paid. Here are some of the popular editors.

  1. Froala – Froala is one of the best editors at customizing web pages with its simple and user-friendly user-interface. It includes an intuitive toolbar which you can use to make lists, tables, and more. Not only that, you can further customize it with plugins. It also compatible with all major browsers and frameworks.  Froala has a Free trial and it’s Basic plan is $299 a year.
  2. TinyMCE – TinyMCE was designed with accessibility. It has features like WAI-ARIA support and keyboard shortcut for your users that have disabilities. TinyMCE’s Core plan are free while its Essential starts at $37.5 a month with a 14 day trial.
  3. CoffeeCup – CoffeeCup is another popular option with a wide range of choices. Plus, it has a Components Library to update certain elements everywhere saving you time. It’s pricing varies depending on how many copies and which version you get.

Visual HTML Editor Chart Comparison

Here’s a comparison chart of the editors mentioned:

Editor Features Pricing
Froala Intuitive user-friendly WYSIWYG interface, can be customized with plugins to add more functionality Basic Plan at $299/year
TinyMCE Customizable rich text editor, has great features for accessibility Core is free with Essential at $37.5/month
CoffeeCup WYSIWYG interface with a Components Library to allow you to update elements everywhere on your webstime Pricing varies

By comparing the features and pricing options of each editor, you can choose the right one that meets your specific needs and budget.

Conclusion

So here’s a quick recap. Visual HTML editors increase efficiency by helping users create and edit pages quickly and easily without code knowledge. It also helps design as you have at your fingertips a range of customizable features, templates and pre-designed blocks of code that help you produce interactive and attractive web pages. These editors also simplify development as they allow users manage the interface and organize its design elements faster. Lastly, it enhances functionality if you add SEO tools, plugins, analytics and many more to your project.

It’s important to consider you and your projects needs when choosing a visual HTML editor as well as the budget. Some editors like Wix and Squarespace make it easy to make web design with its user-friendly interface but it comes at a cost. While others like WordPress are free but may require more technical knowledge but also provide more customization features for advanced developers.

Whatever you choose, remember to use best practice, take advantage of features like templates, and understand a little bit of HTML and CSS to make beautiful web pages.

Choosing The Right HTML Editor Software

html editor

Overview of text to HTML Editor Software

When choosing the right HTML editor for you, it is important to remember some key features as they will impact your productivity and the quality of your work. A good web design software too not only helps write clean and efficient code, but also provides specific tools to debug, collaborate, test, and optimize your workflow.

Web developers can increase their productivity, reduce errors, and collaborate effectively with their team members by choosing the right HTML editor software. Therefore, this leads to high-quality and efficient projects. Here’s a beginner’s guide to get started with HTML editors.

Key Features to Look for in an HTML Editor Software

There are some must-have features of any HTML editor that maximize productivity and can lead to faster development and efficient work. Here are some essential features you might want to look at when finding the best HTML editor:

  1. Syntax Highlighting: Highlighting different elements of code with different colors makes coding easier. This differentiation allows developers to easily understand the code.
  2. Auto Completion: The auto-complete feature makes code suggestions which makes it easier and faster for the developer when code editing. This also reduces errors.
  3. Debugging Tools: What this tool essentially does is help the user identify and fix errors in the code.
  4. Integration with Other Tools: A software that easily integrates with other tools makes plugins and third-party software easy to install and troubleshoot along with your HTML editor.
  5. Customizability: Being able to customize the software allows specific user needs to be taken into account and can make a big difference in productivity. Drag and drop builders are usually easy to customize.
  6. Collaboration Features: Features such as real-time editing, commenting, and version control allow groups and teams to work together faster and better.
  7. Multi-Platform Support: Being able to work on different platforms such as Windows, Mac, and Linux gives the user a lot of flexibility.

Popular HTML Editors that are packed with great features:

  1. Froala: This WYSIWYG editor has great utility with its plugins that allow the editor to be heavily customizable. For example, you can integrate it with a content management system like WordPress.
  2. Brackets: Brackets is an open-source project made in JavaScript. In addition, it has an inline editor, live preview, syntax highlighting, and preprocessor support. To further customize it, you can install extensions that you can browse on their website.
  3. Visual Studio Code: Visual Studio Code or VSCode as it’s more popularly known is a free, open-source code editor that has a large community of developers developing plugins for it to extend its functionality. It has general features and very specific extended features which is why VSCode is one of the most popular editors today.
  4. Sublime Text: Sublime Text is a minimalist cross-platform code editor. It is pretty straightforward and easy to use for beginner coders. This editor has syntax highlighting, and auto-complete, and can be customized as well with plugins and integrations. 
  5. TinyMCE: TinyMCE like others on the list offers syntax highlighting and code completion features. It can integrate with other tools as well like Git and JIRA.

html editor

Tips and Tricks for Optimizing Your HTML Editor

  1. Keyboard shortcuts: Most applications nowadays have keyboard shortcuts for common and most used actions such as saving files, copying and pasting, opening files, and more. Using this basic tip will save you a lot of time and increase your productivity.
  2. Code snippets: Code snippets are basically code that you can copy and insert to your project which makes it easier for you to write certain functions for your project. Many editors have a built-in library of these and you can tweak and customize it. This will save you a lot of time when developing.
  3. Auto-complete and code suggestion: A lot of editors now have an auto-complete and code suggestion feature which suggests the rest of the code. It essentially guesses the code you’re trying to write which saves time and reduces errors.
  4. Project management features: Project management features are usually now added to many editors. Examples of these are version control, and code commenting. These can help you stay organized and optimize your development frameworks.
  5. Customize your workspace: Editors now let you customize their user interface so make sure to customize it according to your style and needs. The layout of your workspace will help you work faster and more efficiently.

Best practices for using HTML editor software in combination with other tools:

  1. Version control software: Tracking changes is important when developing a project. It manages and tracks changes to your code. Utilizing version control software can help you with your work. HTML editors usually have built-in support for version control software such as Git.
  2. FTP client: An HTML editor that has FTP support makes it easier for you to upload to a remote server and edit its files.
  3. Task runner: A task runner automates common tasks such as optimizing images, compiling Sass, and more.
  4. Browser extension: Browser extensions like LiveReload automatically reloads the page when you make changes to your code.
  5. Code validation tool: Code validation tools help you find and fix errors. Many editors have built-in support for this.

Customization Options to Enhance Efficiency

Customizing your HTML editor can boost efficiency and simplify workflow. Tailor the editor to fit your unique preferences, needs, and workflow. Consider the following benefits of customization options:

  1. Customize the interface: Customize the interface to make it more user-friendly. Adjust the colors, fonts, and layout to suit your preferences.
  2. Create custom keyboard shortcuts: Increase efficiency with custom keyboard shortcuts. Assign shortcuts to frequently used commands or functions.
  3. Customize menus and toolbars: Improve accessibility by customizing menus and toolbars. Rearrange, add, or remove frequently used commands.
  4. Configure auto-completion and code snippets: Simplify coding with customized auto-completion and code snippets. Modify, add, or remove snippets to suit your needs.
  5. Create custom plugins: Boost productivity with custom plugins. Automate tasks or add new features with editor-supported plugins.

html editor

Collaboration and Sharing Capabilities

Modern web development teams require collaboration and sharing capabilities to work efficiently. Typically, multiple team members handle different aspects of the same project. Therefore, it’s crucial to share work, coordinate efforts, and ensure consistency. Collaboration and sharing capabilities enable team members to achieve these goals. It also helps to increase productivity, reduce errors, and promote innovation.

Here is an overview of how different HTML editor software handles collaboration and sharing tasks:

  1. Froala: You can add real-time collaboration in Froala by using Codox.io. Codox is a real-time collaboration that enables real-time co-editing capabilities to your software.
  2. Brackets: “Live Preview” allows developers to preview their work on a browser and if you share the URL and paste it into another browser/ Thus, you essentially are able to share your workspace with another collaborator.
  3. Visual Studio Code: VS Code has a Live Share feature which enables the developer to quickly collaborate with your team without the need to sync the code or configure the same development tools. You can open files, navigate, edit and highlight code. The changes made are instantly reflected as well. Debugging is also a breeze with features like hovers, locals, and debug console.
  4. Sublime Text: You can install third-party plugins on Sublime Text which will allow it to have collaboration features. Moreover, the “Sublimerge” plugin allows users to compare and merge files together.
  5. TinyMCE: Its Real-Time Collaboration (RTC) plugin allows more users to collaborate on the same TinyMCE project. The user’s browser encrypts the data locally, ensuring its security.

Conclusion

In conclusion, to streamline workflow and collaborate effectively, web developers rely heavily on tools like HTML editors. There are many HTML editors out there and choosing the right one for you can be tricky. When choosing an HTML editor, developers should prioritize features like syntax highlighting, code completion, debugging, and tool integration. Of course, customization options such as custom snippets, macros, and shortcuts also enhance productivity.

Collaboration and sharing capabilities also enhance productivity especially when workin in teams. HTML editors often integrate these tools, while third-party plugins are required for others. Ultimately, the best HTML editor software depends on each developer’s unique needs and preferences. With the right software, developers can create scalable, efficient, and high-quality websites and applications.


A Pro’s Guide to Froala’s Word and Excel Pasting

Froala Pasting plugin

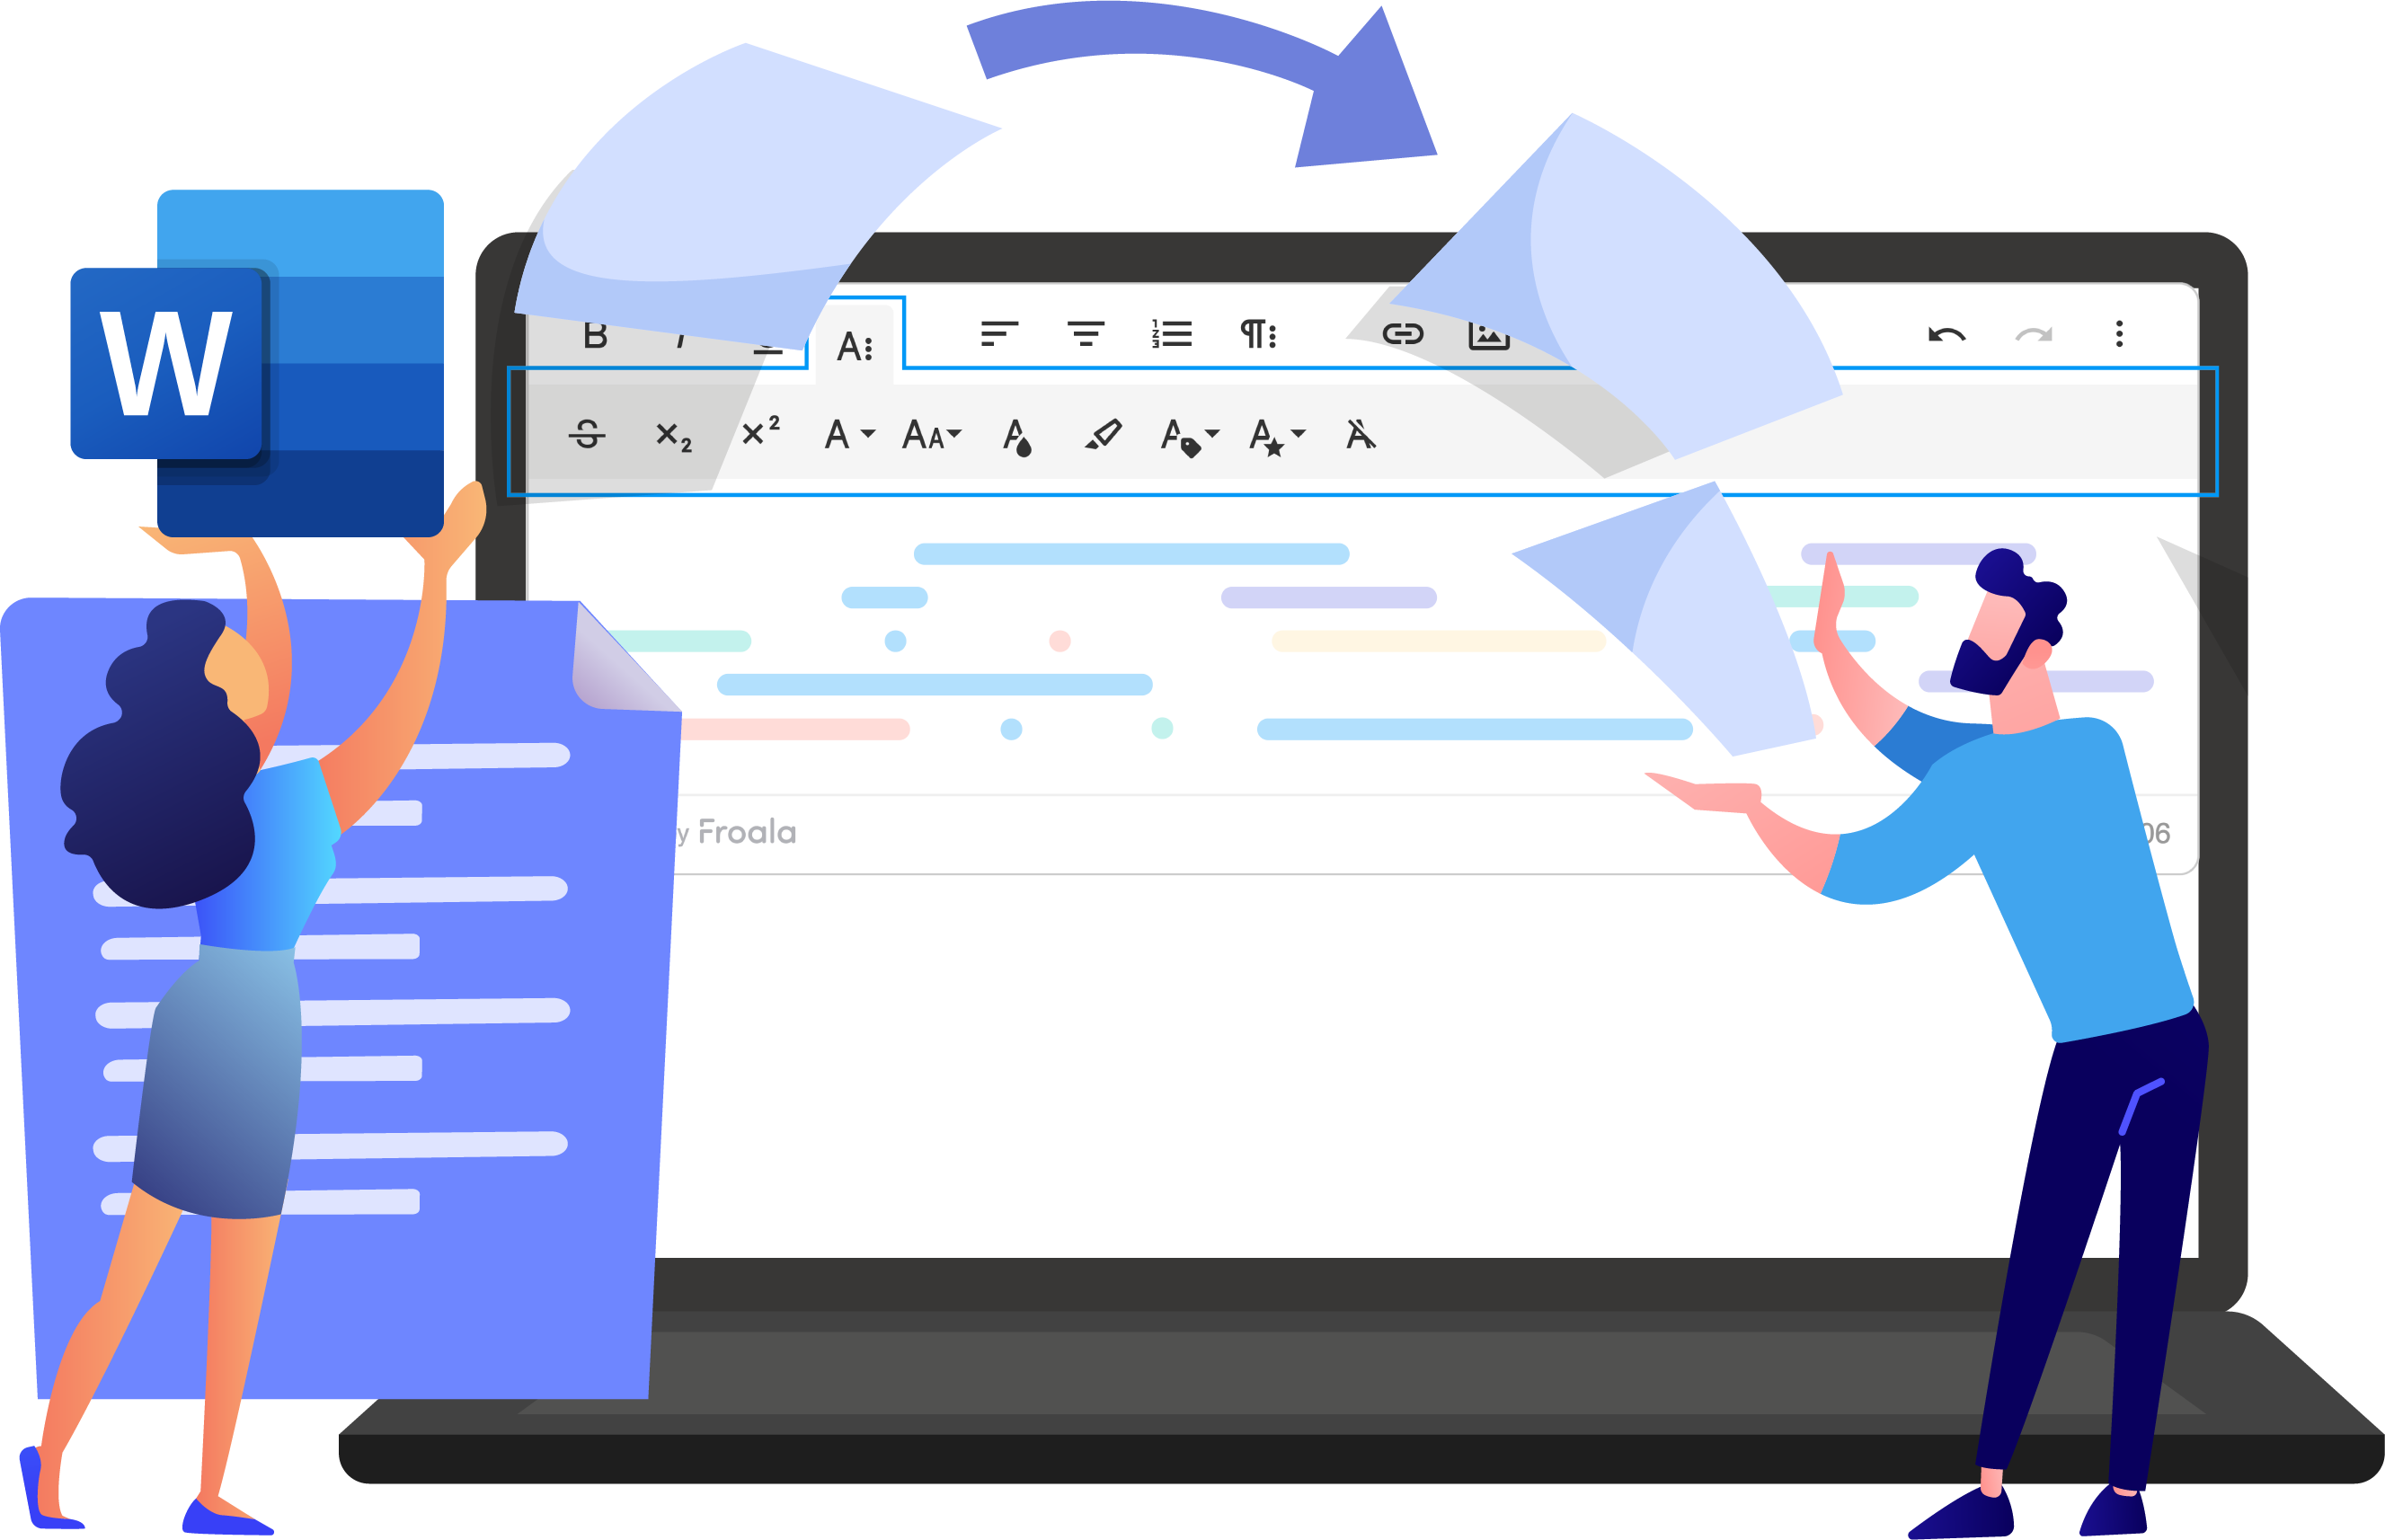
Need an easy way to send Word and Excel content in your forms or messaging apps? Want to create an app compatible with Word and Excel?

Froala WYSIWYG editor is an easy yet powerful solution for reaching your goals.


Froala Pasting pluginWhy should you consider Froala for online document editor applications?

Froala will save your time and effort by providing an easy and intuitive way to implement your online document application. To make the Froala WYSIWYG editor user interface look like an online documents editor, you simply need to set the documentReady Froala API option to true. By doing this:

  • Froala will display only the most frequently used toolbar buttons for editing documents.
  • Froala reorder toolbar buttons to provide the best document editing experience.
  • The editing area’s default height will be increased to resemble a typical A4 document.

If you don’t like the defaults, With Froala editor, you can change the theme, add more toolbar buttons, customize the buttons’ order, and extend functionality with custom plugins.

Is Froala editor compatible with Word and Excel?

Froala editor is compatible with Microsoft Word documents and Excel sheets. This enables the smooth transfer of content, retaining the same format, between these applications. This is made possible by Froala’s enhanced Microsoft Word and Excel Pasting Plugin, also called the Word Paste plugin.

Word content contained an excessive amount of unnecessary markup, making implementation of this feature challenging. Moreover, important information that doesn’t come as HTML has to be parsed and converted appropriately for the browser to render it.

As a leading WYSIWYG editor, the Froala team accepted this challenge and worked hard to support Word markup. Furthermore, when Word images are pasted into the editor, we process them and upload them to your server in the same way as regular images.

In our comparisons with other WYSIWYG editors such as TinyMCE and CKEditor, we found that Froala preserved the original formatting of the content pasted from Microsoft Word and Excel better than any other editor.

Configuring Froala’s Enhanced Microsoft Word and Excel Pasting Plugin

With Froala’s Enhanced Microsoft Word and Excel Pasting Plugin, copying and pasting content from Microsoft Word or Excel into a WYSIWYG editor is easy and streamlined. It includes several options and events for customizing it to best suit your application. Let’s explore its configurations further.

Options

wordPasteModal

Set whether you want to display a modal to choose if you want to keep the pasted style or not.

wordPasteKeepFormatting

If you choose to not display the modal, you can specify here whether the editor will keep the pasted styles or not. By default, the editor will keep the styles.

wordDeniedTags

An array of HTML tags that will be removed altogether with their content when pasting content into the rich text editor from Word. For example, to remove links from the pasted content set this option to

new FroalaEditor('.selector', {

wordDeniedTags: ['a']

});

wordDeniedAttrs

An array of HTML attributes to be removed altogether with their content when pasting content into the rich text editor from Word. For example, to remove the id of the pasted elements set this option as

new FroalaEditor('.selector', {

wordDeniedAttrs: ['id']

});

wordAllowedStyleProps:

An array contains the allowed CSS properties to be used for tags when pasting from Word. by default it is set to allow the following properties

['font-family', 'font-size', 'background', 'color', 'width', 'text-align', 'vertical-align', 'background-color', 'padding', 'margin', 'height', 'margin-top', 'margin-left', 'margin-right', 'margin-bottom', 'text-decoration', 'font-weight', 'font-style', 'text-indent', 'border', 'border-.*']

Note: The Froala API offers additional options related to pasting content. These can impact how content is pasted from Word documents too. For instance, if you set the pastePlain API option to true, all pasted content is cleaned, regardless of the value of wordPasteKeepFormatting.

Let’s look at the other pasting options that affect pasting content whether it is from Word or other sources.

pastePlain

Indicates whether the rich text editor should strip formatting when pasting content or not. In both cases, the content structure is preserved. It is set to ‘false‘ by default. This keeps the text formatting.

new FroalaEditor('.selector', {

  pastePlain: true

});

Other options

The other options pasteDeniedTags, pasteDeniedAttrs, and pasteAllowedStyleProps are similar to wordDeniedTags, wordDeniedAttrs, and wordAllowedStyleProps respectively but they affect the content copied from any sources. 


Events

Events are callback functions that are triggered during the paste process. You can customize the editor’s behavior by handling these events in your application’s logic.  In this section, we will explore all the events related to pasting content as each one is critical for customizing the process.

paste.before

This event occurs before the paste action is performed. This lets you modify pasted content before it’s inserted into the editor or add custom logic.

 new FroalaEditor('.selector', {
   events: {

    'paste.before': function (original_event) {

      // Do something here.

      // this is the editor instance.

      console.log(this);

    }

  }

});

You will receive the jQuery event object for the paste event (original_event) as the first parameter. 

For example, if we paste this “Froala WYSIWYG editor is an easy yet powerful solution for reaching your goals.“ into the editor, the first argument will be 

{

paste: { target: p, clipboardData: DataTransfer }

bubbles: true

cancelBubble: false

cancelable: true

clipboardData: DataTransfer { dropEffect: "none", effectAllowed: "uninitialized", mozCursor: "auto", … }

composed: true

currentTarget: null

defaultPrevented: true

​eventPhase: 0

explicitOriginalTarget: <div class="fr-element fr-view" dir="auto" aria-disabled="false" spellcheck="true" contenteditable="true">

isTrusted: true

originalTarget: <p>

returnValue: false

srcElement: <p>

target: <p>

timeStamp: 114314

type: "paste"

<get isTrusted()>: function isTrusted()

<prototype>: ClipboardEventPrototype { clipboardData: Getter, … }

}

paste.beforeCleanup (clipboard_html)

The event is triggered after the content has been pasted into the Froala Rich Text Editor but before any clean action is performed.

new FroalaEditor('.selector', {

  events: {

    'paste.beforeCleanup': function (clipboard_html) {

      // Do something here.

      // this is the editor instance.

      console.log(this);

    }

  }

});

In this event, you will receive the clipboard-pasted HTML (clipboard_html) string as the first parameter.

For example, if we paste this “Froala WYSIWYG editor is an easy yet powerful solution for reaching your goals.“ into the editor, the first argument will be:

  • In case you copied it from not Word document
<html><body>

<!--StartFragment-->Froala WYSIWYG editor is an easy yet powerful solution for reaching your goals.<!--EndFragment-->
</body>
</html>
  • In case you copy it from a Word document
<html xmlns:o="urn:schemas-microsoft-com:office:office"

xmlns:w="urn:schemas-microsoft-com:office:word"

xmlns:m="http://schemas.microsoft.com/office/2004/12/omml"

xmlns="http://www.w3.org/TR/REC-html40">

<head>

<meta http-equiv=Content-Type content="text/html; charset=utf-8">

<meta name=ProgId content=Word.Document>

<meta name=Generator content="Microsoft Word 15">

<meta name=Originator content="Microsoft Word 15">

<link rel=File-List

href="file:///C:/Users/mostafa/AppData/Local/Temp/msohtmlclip1/01/clip_filelist.xml">

<!--[if gte mso 9]><xml>

 <o:OfficeDocumentSettings>

  <o:AllowPNG/>

 </o:OfficeDocumentSettings>

</xml><![endif]-->

<link rel=themeData

href="file:///C:/Users/mostafa/AppData/Local/Temp/msohtmlclip1/01/clip_themedata.thmx">

<link rel=colorSchemeMapping

href="file:///C:/Users/mostafa/AppData/Local/Temp/msohtmlclip1/01/clip_colorschememapping.xml">

<!--[if gte mso 9]><xml>

 <w:WordDocument>

  <w:View>Normal</w:View>

  <w:Zoom>0</w:Zoom>

  <w:TrackMoves/>

  <w:TrackForma…

Note: you can modify the pasted content by returning a new string.

paste.afterCleanup (clipboard_html)

The event is triggered after the content has been pasted into the Froala Rich Text Editor and cleaned up. The pasted content will be replaced with the returned string if one is returned. This allows users to manipulate the pasted content before it becomes a part of the editor’s content.

new FroalaEditor('.selector', {

  events: {

    'paste.afterCleanup': function (clipboard_html) {

      // Do something here.

      // this is the editor instance.

      console.log(this);

     // Return modified clipboard_html if needed.

      return clipboard_html;

    }

  }

});

You will receive the cleaned HTML as the first parameter.

For example, if we paste this “Froala WYSIWYG editor is an easy yet powerful solution for reaching your goals.“ into the editor, the first argument will be:

  • In case you choose to clean the content
<p>Froala WYSIWYG editor is an easy yet powerful solution for reaching your goals.</p>
  • In case you choose to not clean the content
<p style="margin-top:0in;margin-right:0in;margin-bottom:8.0pt;margin-left:0in;line-height:107%;font-size:15px;font-family:&quot;Calibri&quot;,sans-serif;">Froala WYSIWYG editor is an easy yet powerful solution for reaching your goals.</p>

paste.after

This event is triggered after the paste action has been processed and the content has been inserted into the editor. It allows you to perform additional actions once the paste is complete. It doesn’t have any parameters.

new FroalaEditor('.selector', {

  events: {

    'paste.after': function () {

      // Do something here.

      // this is the editor instance.

      console.log(this);

    }

  }

});

Paste Images from Word

Froala uploads images pasted from Word just like regular images. Since there are no specific API options or events for this, the pasting image process can be customized using general API options and events.

Image paste Options

pasteAllowLocalImages

Removes images that have a local path (file://) on paste. Enabling this option might result in having mixed content on HTTPS websites.

new FroalaEditor('.selector', {

  pasteAllowLocalImages: true

});

 imagePaste

Allows pasting images from clipboard.

new FroalaEditor('.selector', {

  imagePaste: false

});

imagePasteProcess

Use default image settings for pasted images.

new FroalaEditor('.selector', {

  imagePasteProcess: true

});

Image paste Events

image.beforePasteUpload (img)

Triggered before uploading a pasted image from clipboard to the server. The first parameter is the DOM element representing the image to be uploaded.

Note: Returning false in the handler assigned to the event will cancel the current action.

new FroalaEditor('.selector', {

  events: {

    'image.beforePasteUpload': function (img) {

      // Do something here.

      // this is the editor instance.

      console.log(this);

    }

  }

});

Demo

Take a look at the browser console to see the event results after pasting some content in the demo below

Conclusion

Implementing an online documents editor, such as Froala Editor is a powerful, time-saving solution. By properly configuring the editor, and adding the enhanced Microsoft Word and Excel Pasting Plugin, you can make it easier for users to compose and edit content in familiar formats, No more hassle of having to reformat text, lists, tables, and images copied from Word or Excel files. If you find anything that you believe should work differently, just reach our engineering team and we’ll get it solved.

Overall, Froala is an excellent solution for building online documents, creating messaging applications, or any form that requires rich text editing capabilities with a modern and intuitive user interface. Give the Froala Editor a try today and elevate your document editor game!