
Enhance Your React Forms With a Rich Text Editor

React, a popular JavaScript library for building user interfaces, offers a seamless development experience.
The 2023 StackOverFlow survey with 60,000 developers highlights that React remains one of the most popular frameworks and web technologies used by professionals. However, when it comes to forms, React’s native input components cannot handle rich text formatting.
In content creation, blog posts, or email composition scenarios, users need formatting options like bold, italic, bullet points, and hyperlinks.
Improving the experience
Integrating a rich text editor is essential to overcome this limitation and provide a robust form experience.
By incorporating a rich text editor, developers can empower users to express themselves more effectively and enhance their experience.
This article will explore how to enhance React forms using Froala Editor, a customizable rich text editor solution.
Creating a Project
If you haven’t already, set up a new React project by running a Create App React:
| npx create-react-app my-app |
Before installing the Froala package, enter the newly created app directory with the command.
| cd my-app |
Install the Froala Editor package in your React project.
This package provides components and stylesheets required for integrating Froala Editor seamlessly into the application.
You can do this by running the following command in your project directory.
| npm install react-froala-wysiwyg |
Starting the code
Import Froala Editor: In the component where you want to use the rich text editor, import the elements from the Froala Editor package.
import ‘froala-editor/css/froala_editor.pkgd.min.css’; import ‘froala-editor/css/froala_style.min.css’; import FroalaEditor from ‘react-froala-wysiwyg’; import React from ‘react’; |
Implement the Editor: In your component’s render method, add the FroalaEditor component, passing the necessary props.
| class ReactForm extends React.Component { constructor(props) { super(props); this.state = { editorContent: ”, }; } |
The code is defining a class called ReactForm which extends React.Component class. This indicates that ReactForm is a component in a React application.
The constructor method is used to initialize the state of the component. In React, a state is an object that holds the data that can change over time and affect the component’s rendering. The constructor takes in a props parameter, representing the properties passed to the component.
Inside the constructor, the super(props) statement is called, which is necessary when defining a constructor in a subclass of React.Component. It calls the constructor of the parent class (React.Component), passing in the props parameter. This ensures that the component is initialized correctly according to the React.Component implementation.
The state property of the component is set using this.state = { editorContent: ” }. Here, editorContent is the key in the state object, and its initial value is an empty string (”). The state object is used to store and manage the data specific to the component.
| handleEditorChange = (content) => { this.setState({ editorContent: content }); } |
This code defines an arrow function called handleEditorChange within the class ReactForm. This function takes a parameter called content.
The function is used as an event handler for updating the state of the component. In particular, it is designed to handle changes in an editor, where the content parameter represents the updated content of the editor.
Inside the function body, this.setState({ editorContent: content }) is called. setState is a method provided by the React.Component class that allows you to update the state of a component.
In this case, setState is called with an object { editorContent: content }. This object specifies the new state values to be updated.
Using setState, React knows that the state has changed, and it triggers a re-render of the component, causing any parts of the UI that depend on the state to update accordingly.
| render() { return ( <div> <h2>React Form</h2> <FroalaEditor tag=’textarea’ onModelChange={this.handleEditorChange} config={{ toolbarButtons: [‘bold’, ‘italic’, ‘underline’], }} /> </div> ); } } export default ReactForm; |
The code shows the render method of the ReactForm component. In React, the render method is responsible for generating the JSX (JavaScript XML) that represents the component’s UI.
Inside the render method, there is a return statement that wraps the JSX within parentheses. The returned JSX represents the structure and content of the component’s UI.
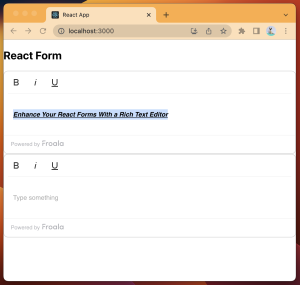
In this case, the returned JSX consists of a <div> element as the root container. Within the <div>, there is an <h2> element with the text “React Form” as the heading.
Below the <h2> element, there is a FroalaEditor component. It is assumed that the FroalaEditor component is imported from an external library or component module. The FroalaEditor component represents an editor component for handling text input.
The FroalaEditor component has several props passed to it:
tag=’textarea’: This prop sets the underlying HTML tag of the editor component to be a <textarea>. It indicates that the editor should behave as a textarea input field.
onModelChange={this.handleEditorChange}: This prop sets the event handler function handleEditorChange to be called whenever the content of the editor changes. It means that whenever the user makes changes to the editor’s content, the handleEditorChange function will be invoked.
config: This prop is an object that contains configuration options for the editor component. In this case, the toolbarButtons option is set to an array [‘bold’, ‘italic’, ‘underline’]. This configures the toolbar buttons of the editor to only display the buttons for bold, italic, and underline formatting options.
Overall, the render method generates the JSX that represents the UI of the ReactForm component. It includes a heading, a FroalaEditor component for text input, and sets the event handler and configuration options for the editor.
The complete component will be this:
import ‘froala-editor/css/froala_editor.pkgd.min.css’; import ‘froala-editor/css/froala_style.min.css’; import FroalaEditor from ‘react-froala-wysiwyg’; import React from ‘react’; class ReactForm extends React.Component { constructor(props) { super(props); this.state = { editorContent: ”, }; }
handleEditorChange = (content) => { this.setState({ editorContent: content }); }
render() { return ( <div> <h2>React Form</h2> <FroalaEditor tag=‘textarea’ onModelChange={this.handleEditorChange} config={{ toolbarButtons: [‘bold’, ‘italic’, ‘underline’], }} /> </div> ); } } export default ReactForm; |
In this example, we limit the toolbar buttons to include bold, italic, and underlined options. You can explore the Froala Editor documentation to discover the available toolbar buttons and their corresponding names.
That’s it! You now have a rich text editor integrated into your React form using Froala.
Formatting options
Users can input and format text content with formatting options provided by the editor.
Integrating a rich text editor into React forms empowers developers to offer users a powerful and intuitive content creation experience.
By providing a range of formatting features, Froala Editor enhances the functionality of React forms, enabling users to create visually appealing and well-structured content effortlessly.
Integrating a rich text editor into React forms is a game-changer for capturing and manipulating rich text content.
React forms become more versatile and user-friendly, allowing users to format text, insert media, and customize their content.
Froala Editor provides a solution for seamlessly integrating a feature-rich text editor into React applications.
Its extensive customization options and plugin support allow developers to create highly tailored and engaging editing experiences.


No comment yet, add your voice below!