Froala Image Management in Laravel: Easy for HTML Code Writers
- Posted on
- By Mostafa Yousef
- In Editor, Tutorials

If you’re using the Froala html code writer in your Laravel project to offer rich-text editing options for your users, they can use it to insert images in their content. These images are not saved to your PHP server by default, but you need to handle storing these images using the Froala events. Since uploading images to a PHP server could be a complex task for many developers, Froala offers a PHP SDK to simplify this process. The SDK provides a set of functions and methods that streamline the image management process, allowing you to upload, edit, and delete images with ease.
This article is the second part of the “Building a Support System Using Laravel PHP Framework and Froala html editor software“ series. We will use the Froala PHP SDK to enhance the support system we created by adding the functionality to store, validate, and remove images in the contact form. By doing this, we can display the uploaded images within the “Request Details” field to the admin at a later stage.
Get Started
To get started, you’ll need to install the Froala PHP SDK in your Laravel project. Include the SDK as a dependency in your composer.json file.
{
    "name": "laravel/laravel",
    "type": "project",
    "description": "The Laravel Framework.",
    "keywords": ["framework", "laravel"],
    "license": "MIT",
    "require": {
        "php": "^7.3|^8.0",
        "fruitcake/laravel-cors": "^2.0",
        "guzzlehttp/guzzle": "^7.0.1",
        "laravel/framework": "^8.75",
        "laravel/sanctum": "^2.11",
        "laravel/tinker": "^2.5",
        "twbs/bootstrap": "5.3.2",
        "froala/wysiwyg-editor-php-sdk" : ""
    },
    "require-dev": {
        "facade/ignition": "^2.5",
        "fakerphp/faker": "^1.9.1",
        "laravel/sail": "^1.0.1",
        "mockery/mockery": "^1.4.4",
        "nunomaduro/collision": "^5.10",
        "phpunit/phpunit": "^9.5.10"
    },
    "autoload": {
        "psr-4": {
            "App\\": "app/",
            "Database\\Factories\\": "database/factories/",
            "Database\\Seeders\\": "database/seeders/"
        }
    },
    "autoload-dev": {
        "psr-4": {
            "Tests\\": "tests/"
        }
    },
    "scripts": {
        "post-autoload-dump": [
            "Illuminate\\Foundation\\ComposerScripts::postAutoloadDump",
            "@php artisan package:discover --ansi"
        ],
        "post-update-cmd": [
            "@php artisan vendor:publish --tag=laravel-assets --ansi --force"
        ],
        "post-root-package-install": [
            "@php -r \"file_exists('.env') || copy('.env.example', '.env');\""
        ],
        "post-create-project-cmd": [
            "@php artisan key:generate --ansi"
        ]
    },
    "extra": {
        "laravel": {
            "dont-discover": []
        }
    },
    "config": {
        "optimize-autoloader": true,
        "preferred-install": "dist",
        "sort-packages": true
    },
    "minimum-stability": "dev",
    "prefer-stable": true
}
Run the composer update command
composer update
This command will update the dependencies specified in the composer.json file and install the latest versions of the packages.
Before we dive in, make sure your server has the FileInFo extension enabled. You can do this by opening your server “php.ini“ file and removing the “;“ before “extension=fileinfo” if it exists.
The SDK also requires the Imagick extension to be enabled. To install the Imagick extension on XAMPP, you can follow these steps:
- Download the appropriate Imagick DLL file for your PHP version from the PECL website.
- Copy the downloaded php_imagick.dll file to the “ext” directory in your XAMPP installation.
- Copy other DLL files to the PHP root directory (where you have php.exe). Ex: For XAMPP users, `C:\xampp\php\` folder.
- Open the “php.ini” file in the “php” directory of your XAMPP installation.
- Add the following line to the “php.ini” file:
extension=php_imagick.dll
- Save the changes to the “php.ini” file and restart the Apache server in XAMPP.
Once you have completed these steps, the Imagick extension will be installed and ready to be used in your XAMPP environment. Now you can proceed to use the Froala html code writer PHP SDK in your Laravel application.
Upload images using the Froala PHP SDK
Before proceeding with the process of uploading images, it is necessary to configure certain Froala API options and events:
imageUploadParamis the name of the parameter that contains the image file information in the upload request. The default value is “file,” but you can change it to whatever name you want.imageUploadURLis the URL where the upload request is being made.imageUploadParamsare additional parameters that are passed in the upload request to the server.imageUploadMethodis the HTTP request type.imageMaxSizeis the maximum image size that can be uploaded.imageAllowedTypesis an array with the image types allowed to be uploaded.image.beforeUploadevent is triggered before starting the upload request and it can be used to change the upload params or cancel the action.image.uploadedevent is triggered after a successful image upload request, but before inserting the image into the editor.image.insertedevent is triggered after inserting the image into the editor.image.replacedevent is triggered after replacing the image in the editor.image.error eventis triggered if any errors occur during the upload process.
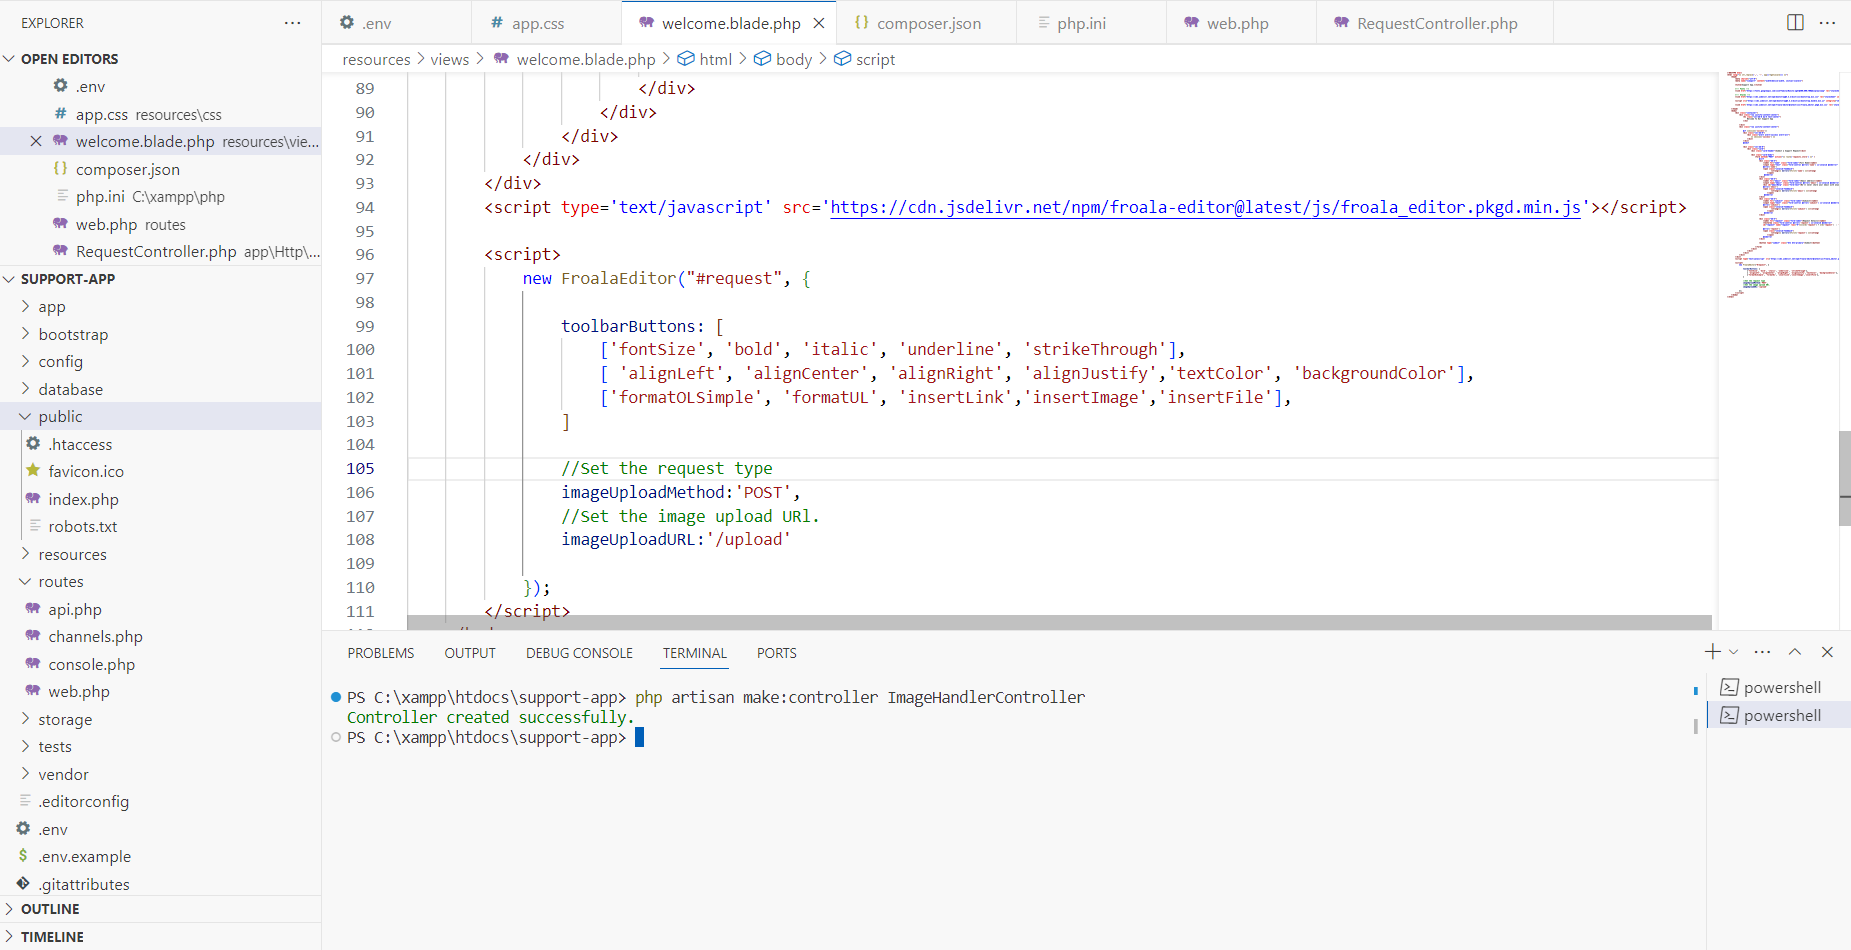
Go ahead to the `welcome.blade.php` and edit the script to
       <script>
            // to protect your application from cross-site request forgery (CSRF)
            let token = document.querySelector('[name="_token"]').value;

            new FroalaEditor("#request", {

                toolbarButtons: [
                    ['fontSize', 'bold', 'italic', 'underline', 'strikeThrough'],
                    [ 'alignLeft', 'alignCenter', 'alignRight', 'alignJustify','textColor', 'backgroundColor'],
                    ['formatOLSimple', 'formatUL', 'insertLink','insertImage','insertFile'],
                ],

                //Set the request type
                imageUploadMethod:'POST',

                //Set the image upload URl.
                imageUploadURL:'/support-app/public/upload',

                //To avoid getting 419 bad request
                imageUploadParams: {
                    _token: token
                }
            });
        </script>
The code above configures the image upload method and URL so that when a user inserts an image in the editor, an HTTP request is automatically sent to the ‘/upload’ URL.
To prevent server errors and protect against CSRF attacks, we included the CSRF token generated by Laravel for each active user session in the request. This was done using the imageUploadParams option in Froala.
Next, we need to create a route and controller to handle the HTTP request for inserted images. Use the following command to generate the controller.
php artisan make:controller ImageHandlerController
Then, open our “web.php” and define a route for the URL assigned to the imageUploadURL option.
use App\Http\Controllers\ImageHandlerController;


Route::post('/upload', [ImageHandlerController::class, 'store']);
Open the newly created controller to add the store function. In this function, we will use the Froala PHP SDK upload method to store the uploaded images in the storage\app\public\uploads folder.
<?php

namespace App\Http\Controllers;

use Illuminate\Http\Request;
use FroalaEditor_Image;

class ImageHandlerController extends Controller
{
    /**
     * Store the uploaded image
     */
    public function store()
    {
        return FroalaEditor_Image::upload('/support-app/storage/app/public/uploads/');
    }
}
The upload method returns the URL of the uploaded image, which is then assigned to the src attribute of the inserted image by Froala.
Now, when a user inserts an image in the Froala html code writer, it will be automatically uploaded to the specified URL and stored in the designated folder.
After submitting the form, the database will store the permanent URLs of the inserted images within the “request details” content. These images can then be displayed on the admin dashboard for reviewing user requests.
Server-side image upload validation
Froala editor offers imageAllowedTypes and imageMaxSize options for client-side validation of image type and size. Additionally, the Froala PHP SDK upload method enables server-side validation of uploaded images. This provides an extra layer of security and ensures that only valid images are accepted.
The second parameter of the FroalaEditor_Image::upload accepts an array for validating the uploaded image.
To validate image uploads on the server side, make the following modifications to the store function in the ImageHandlerController
    public function store()
    {
        $options = array(
            'validation' => array(
            'allowedExts' => array('jpeg', 'jpg'),
            'allowedMimeTypes' => array('image/jpeg', 'image/pjpeg')
            )
        );
        return FroalaEditor_Image::upload('/support-app/storage/app/public/uploads/', $options);
    }
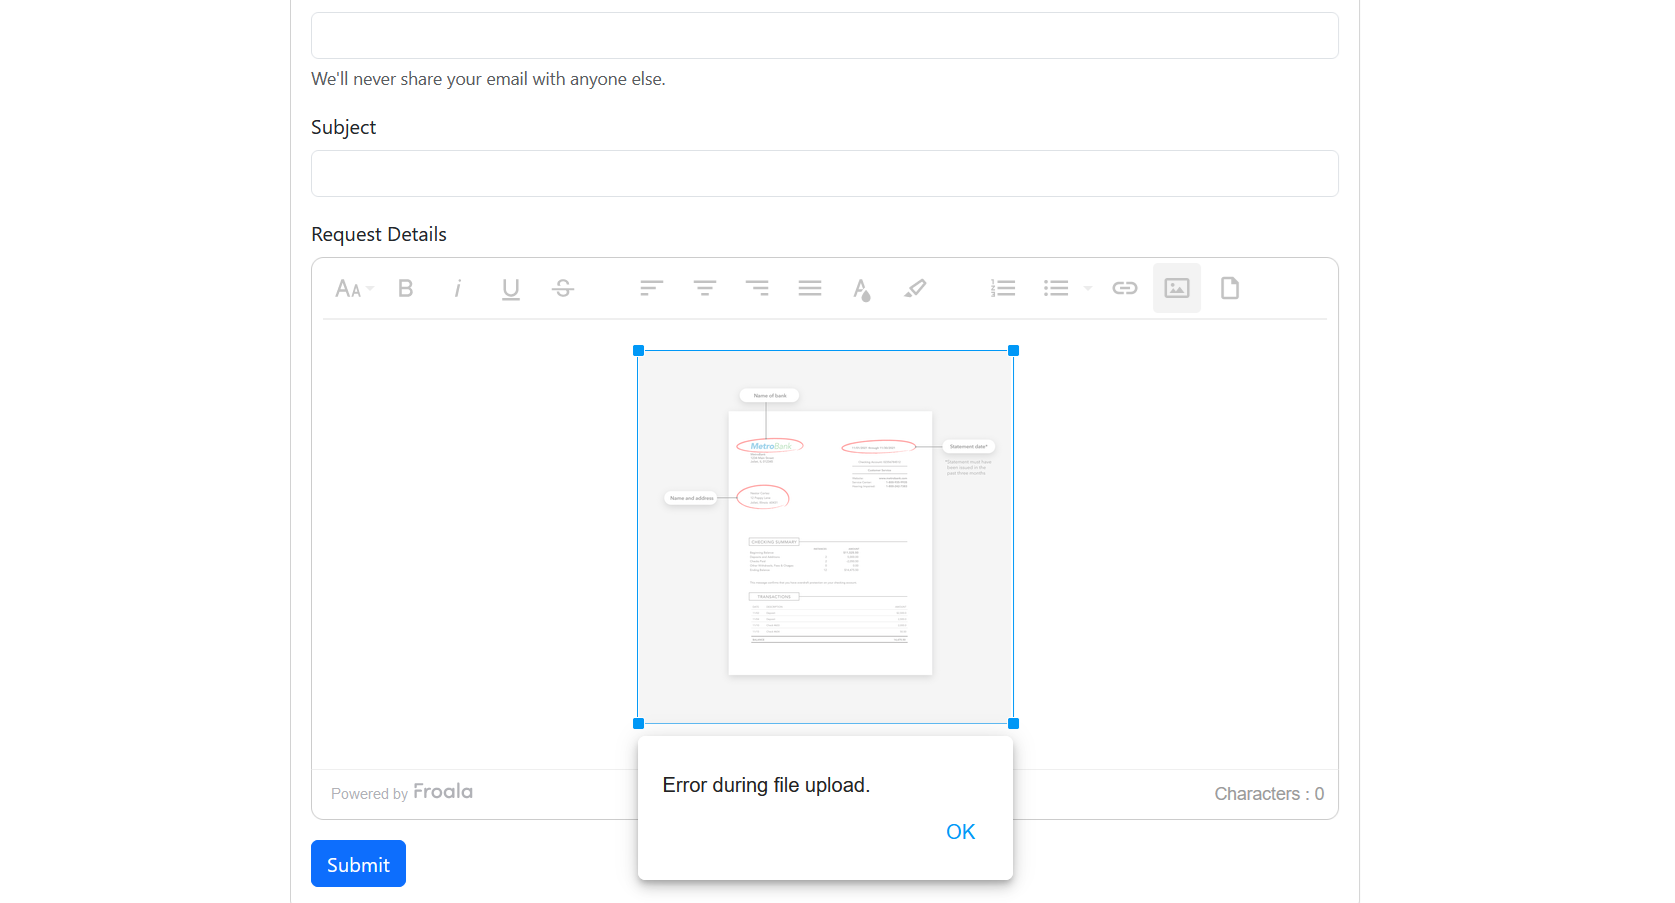
The code above sets Froala to accept only JPEG and JPG images. Uploading any other image type will trigger an error message.
By implementing image upload validation on the server side, we can ensure that only valid images are accepted and stored in the designated folder. This helps to maintain the integrity and security of the application.
Removing Images From the Server
Unlike uploading, Froala does not have a built-in option for making a server request to delete uploaded images. However, we can utilize the froalaEditor.image.removed event to send an AJAX request to the server when the user selects the “remove image” button. This event is triggered after the image has been removed from the editable area.
Open welcome.blade.php and add the following code to the Froala initialization code.
                events:{
                    'image.beforeRemove': function ($img){

                        const url = '/support-app/public/image-delete',
                        params ={
                            src: $img[0].src
                        };

                        // Send Ajax call to delete the image
                        fetch(url,{
                            method: 'delete',
                            headers: {
                                'Content-Type': 'application/json',
                                'X-CSRF-TOKEN': token
                            },
                            body: JSON.stringify(params)
                        })
                        .then(response => {
                            const reposList = response.json();
                            console.log(reposList);
                        })
                        .catch(err => console.log(err))
                    }
                }
The code above sends a delete request to the “/image-delete” URL, including the image src attribute of the image that will be deleted.
Let’s define the “/image-delete” URL in the “web.php“ file.
Route::delete('/image-delete/', [ImageHandlerController::class, 'remove']);
This route action is controlled by the remove method in the ImageHandlerController. Open the `ImageHandlerController.php` to define this method.
    /**
     * Remove the uploaded image
     */
    public function remove(Request $request)
    {
        $search = request()->getScheme().'://'.$_SERVER['SERVER_NAME']; //
        $src= str_replace($search, '', $request->src);
        return FroalaEditor_Image::delete($src);
    }
The remove method utilizes the FroalaEditor_Image::delete method from the Froala PHP SDK to delete the image from the server.
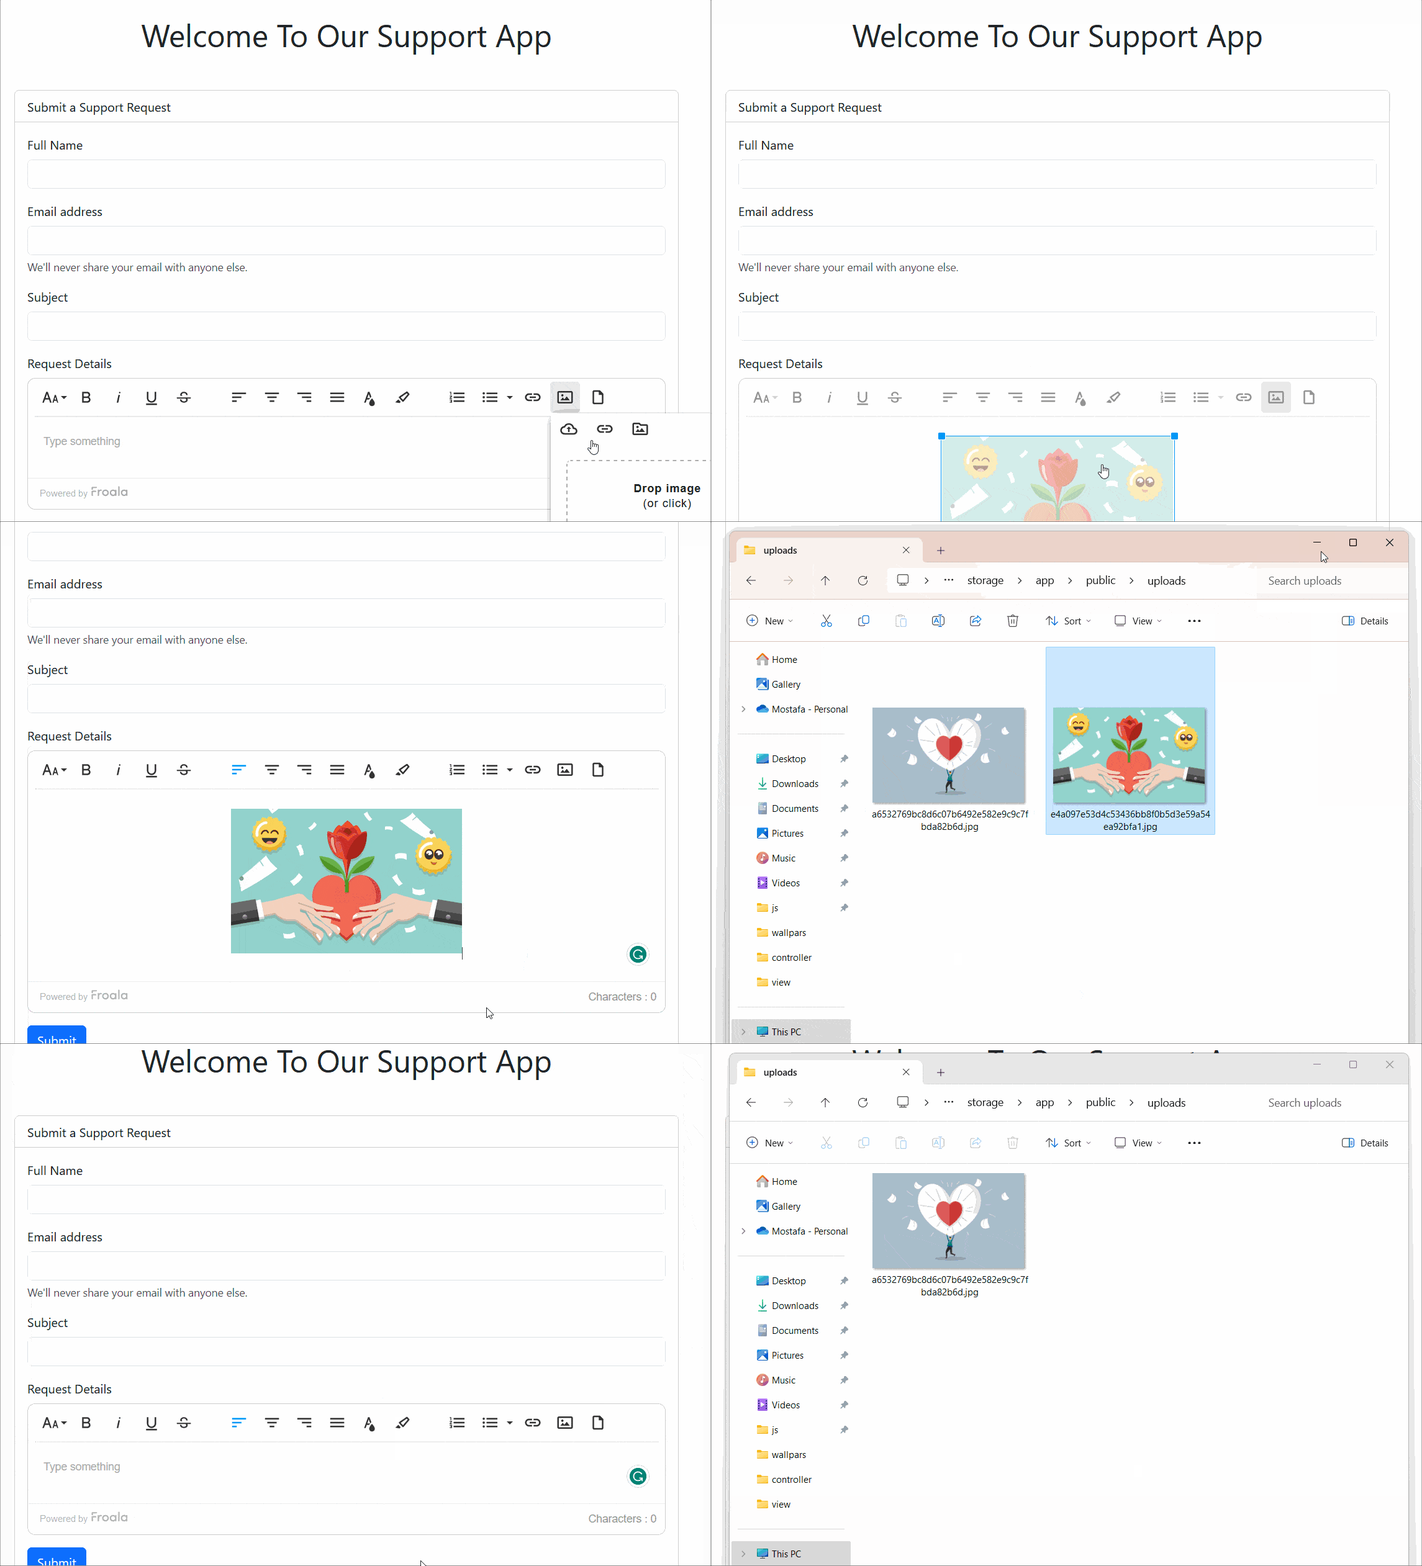
Testing Image Upload and Removal Functionality
To test if everything is working properly, follow these steps:
- Upload an image to the editor.
- Navigate to the
storage\app\public\uploadsdirectory to view the uploaded image. The image should be there. - Return to the editor and click on the image. Then, choose the “Remove Image” option from the “Edit Image” popup.
- Open the
storage\app\public\uploadsdirectory again. The image shouldn’t be there anymore.
Replace the uploaded image
The Froala “Edit Image“ popup allows users by default to replace the current image with a new one. This enhances the user experience by enabling them to quickly update the image without needing to remove the current uploaded image first. However, while Froala automatically replaces the image on the front-end, the functionality of removing the selected image from the server and storing the new one must be implemented separately. We can utilize the Froala PHP SDK to accomplish this task efficiently. Nonetheless, this article will not cover the implementation process. Instead, we will hide the “Replace Image” option, requiring users to remove the existing image before uploading a new one.
Edit the Froala initialization code at welcome.blade.php to
            // to protect your application from cross-site request forgery (CSRF)
            let token = document.querySelector('[name="_token"]').value;

            new FroalaEditor("#request", {

                toolbarButtons: [
                    ['fontSize', 'bold', 'italic', 'underline', 'strikeThrough'],
                    [ 'alignLeft', 'alignCenter', 'alignRight', 'alignJustify','textColor', 'backgroundColor'],
                    ['formatOLSimple', 'formatUL', 'insertLink','insertImage','insertFile'],
                ],

                imageEditButtons: ['imageAlign', 'imageCaption', 'imageRemove', '|', 'imageLink', 'linkOpen', 'linkEdit', 'linkRemove', '-', 'imageDisplay', 'imageStyle', 'imageAlt', 'imageSize'],


                //imageMaxSize: 1024 * 1024 * 3,

                //Set the request type
                imageUploadMethod:'POST',

                //Set the image upload URl.
                imageUploadURL:'/support-app/public/upload',

                //To avoid getting 419 bad request
                imageUploadParams: {
                    _token: token
                },

                events:{
                    'image.beforeRemove': function ($img){

                        const url = '/support-app/public/image-delete',
                        params ={
                            src: $img[0].src
                        };

                        // Send Ajax call to delete the image
                        fetch(url,{
                            method: 'delete',
                            headers: {
                                'Content-Type': 'application/json',
                                'X-CSRF-TOKEN': token
                            },
                            body: JSON.stringify(params)
                        })
                        .then(response => {
                            const reposList = response.json();
                            console.log(reposList);
                        })
                        .catch(err => console.log(err))
                    }
                }


            });
In the above code, we customized the `imageEditButtons` API option by removing the ‘imageReplace’ from the array.
Conclusion
Integrating the Froala PHP SDK into your Laravel project provides a seamless solution for handling image management within the Froala JavaScript WYSIWYG editor. By leveraging the SDK’s functions and methods, developers can simplify the process of uploading, validating, and deleting images, offering a user-friendly experience for content creators.
Incorporating the Froala PHP SDK into your Laravel project not only simplifies image management but also enhances the support system you’ve built. By enabling users to upload and display images within the contact form, you can provide a more interactive and engaging experience for both users and administrators.
As you continue to build your Laravel project and leverage the power of the Froala PHP SDK, we hope that the insights and instructions provided in this article have proven helpful. Remember to stay updated with the latest SDK version and explore additional features and functionalities it offers. With Froala and Laravel at your disposal, you can create a truly dynamic and visually appealing content creation platform.





No comment yet, add your voice below!