Days
Hours
Minutes
Seconds
x
Skip to content

Froala Now Works Inside Claude Code

claude code plugin thumbnail

We built a Claude Code plugin that turns Claude into a Froala expert. Ask about setup, events, custom plugins, or Filestack uploads, and get framework-specific answers right where you write code.

The plugin is open source and available now on GitHub.

Key Takeaways

  • The Froala Claude plugin ships five skills that activate automatically based on your code and questions.
  • Claude detects context from your imports, method calls, and error messages, then loads the right skill.
  • Coverage spans initialization across Vanilla JS, React, Vue 3, and Angular, plus events, custom plugins, Filestack integration, and error diagnosis.
  • Install it locally through the Claude Code marketplace and start asking questions.

What This Plugin Does

Froala has a deep API. Toolbar configuration, the editor lifecycle, custom plugin registration, and Filestack wiring each have their own patterns and their own ways to trip you up. Documentation answers these questions, but switching tabs to find the right page slows you down.

This plugin keeps the answers in your editor. It ships with Froala knowledge as a set of skills that Claude activates on its own. You write code or ask a question, Claude recognizes the context, and the matching skill supplies accurate, version-aware guidance.

You never invoke a skill by hand. Claude reads your imports, your method calls, and your error output, then loads the skill that fits.

The Five Skills

A friendly, warm, hand-drawn-style flat vector illustration representing skills that activate automatically based on context, in the spirit of Notion and Headspace artwork. The illustration depicts a plump, pillowy editor window with a couple of soft code lines inside, and a small rounded key gliding on its own toward a chunky pillowy keyhole or lock that is gently clicking open — showing the right tool arriving automatically without being summoned. A soft motion swoosh and a tiny sparkle suggest the effortless, hands-free movement. Drawn with soft, humanist line work that has rounded line caps and rounded joins everywhere, with gentle organic weight variation, echoing the soft rounded terminals of the Nunito typeface. Forms are plump, chunky, and pillowy with generous oversized corner radii — nothing sharp, rigid, or mechanical. A subtle hand-drawn imperfection gives it warmth and character, as if illustrated with care by a designer rather than rendered by a tool. The color palette uses tints and shades of Froala Blue (#0098F7): pale blue fills with deeper blue accents, plus soft rounded Froala Gray (#2D313C) outlines for dark details. The little key has a pop of green (#15b69b) for energy. The composition is centered on a light, airy background (pure white or a soft pale-blue tint), with subtle floating rounded dot-grid clusters and tiny soft sparkle accents scattered around it. Cheerful, approachable, characterful, modern SaaS illustration style, no text

Initialization and SDKs

This skill activates when you import Froala packages, use a framework wrapper, or ask about setup. It covers installation for Vanilla JS, React, Vue 3, and Angular, along with toolbar configuration, editor lifecycle and cleanup patterns, and license key setup for localhost versus production.

Ask “How do I add Froala to my React app with a dark theme?” and Claude returns a complete component built with react-froala-wysiwyg, a config prop, and theme: ‘dark’.


Methods and Events

This skill activates when you work with editor events, get or set content, or intercept keyboard input. It covers event listener syntax like contentChanged, focus, and keydown, safe HTML handling through editor.html.get() and editor.html.set(), paste cleanup that strips Word and Google Docs formatting, and fixes for calling API methods before the editor finishes initializing.

Custom Plugins

This skill activates when you register custom plugins, create toolbar buttons, build popups, or extend formatting. It provides full plugin boilerplate with FroalaEditor.PLUGINS, RegisterCommand, and DefineIcon, plus custom dropdown buttons, floating popup panels, state synchronization, SVG icon registration, shortcut binding, and the plugin loading order rules that determine whether your button works.

Ask for a toolbar button that inserts a signature block and Claude generates the complete registration boilerplate.

Filestack Integration

This skill activates when you wire Filestack into Froala for image or file uploads. It covers two approaches.

The recommended approach uses the official Froala Filestack plugin. You enable the native filestack plugin through pluginsEnabled: [‘filestack’], configure filestackOptions with your filestackAPI key and pickerOptions, and hook into plugin events such as filestack.uploadedToFilestack and filestack.uploadFailedToFilestack. The skill also lists the required CDN dependencies.

The advanced approach uses manual interception. You cancel Froala’s default uploader through image.beforeUpload, pass files to filestack.client.upload(), and inject the CDN URL back with editor.image.insert(). This path includes React-specific wiring for the correct this context, CDN transformations applied before insert, and the common pitfalls that cause silent failures.

Error Diagnosis

This skill activates when you hit a Froala error or something silently does nothing. It walks through the usual suspects: a toolbar button that does not show, an editor that renders unstyled because CSS imports are missing, FroalaEditor is not defined from script load order, plugin methods that come back undefined, upload failures from a missing imageUploadURL or a CORS issue, and this context loss in event handlers. A quick diagnosis checklist handles anything outside the common cases.

Ask “My toolbar button shows up but clicking it does nothing” and Claude checks plugin registration order, the pluginsEnabled allowlist, and your callback context.

How Activation Works

Each skill carries a set of trigger keywords. When your code or question contains them, Claude loads that skill. Type new FroalaEditor( and the initialization skill steps in. Reference filestackOptions and the Filestack skill takes over. Paste an error like is not a constructor and the diagnosis skill responds. The match happens from your real context, so the guidance fits what you are actually building.

Install It

The plugin runs locally through the Claude Code marketplace. Add the marketplace and install:

/plugin marketplace add https://github.com/froala/froala-claude

/plugin install froala-claude-plugin@froala-local

Once installed, the skills activate on their own as you work.

Get Started

The Froala Claude plugin is open source under the MIT license. Clone it, install it, and give Claude expert knowledge of Froala without leaving your editor.

View the repository on GitHub to get started.

graphical user interface, text

How to Pick the Best WYSIWYG HTML Editor for Your Use Case

A glowing magnifying glass focusing on one editor interface selected from a row of candidates, representing the process of evaluating and identifying the best WYSIWYG HTML editor for a specific use case.

Not every content editor needs to write HTML, but every content team needs HTML to work correctly. That tension is exactly where the best WYSIWYG HTML editor earns its place. It should let writers, marketers, and developers produce structured web content without requiring everyone to speak the same technical language.

However, not all WYSIWYG editors function the same way or for the same purposes. An editor that works well for a solo blogger might frustrate an enterprise content team. Similarly, one that suits a marketing platform may lack the extensibility a SaaS product needs.

Choosing the best editor for your use case means understanding what your workflow actually demands and matching it to an editor’s capabilities. This guide walks you through what to look for, what to avoid, and how to evaluate editors for different contexts.

Key Takeaways

  • The right WYSIWYG editor depends on your specific context. Developers prioritize API access and clean HTML output, while content teams value ease of use and publishing speed.
  • Clean, semantic HTML output is one of the most critical features to evaluate, since bloated or non-semantic markup hurts accessibility, SEO, and long-term maintainability.
  • Deployment model matters. Cloud-based editors offer faster setup and lower maintenance, while self-hosted editors give organizations greater control over data and security.
  • Common selection mistakes include prioritizing feature count over usability and skipping performance testing with realistic content before committing.
  • A well-chosen editor grows with your operation. Strong API support, active development, and a plugin ecosystem prevent the tool from becoming a constraint as your content needs evolve.

What Is a WYSIWYG HTML Editor?

WYSIWYG editors sit at the intersection of visual design and structured markup. Understanding how they work makes it easier to evaluate whether one fits your needs.

Understanding WYSIWYG Editing

WYSIWYG stands for “What You See Is What You Get.” In practice, it means that when you resize images or format text, the editor shows you the formatted result immediately. You interact with content the way it will appear to an end user, not as raw HTML.

This approach lowers the barrier to content creation significantly. For instance, a marketing writer can format a landing page section without knowing what a <div> is. The editor handles the translation between visual intent and HTML output automatically.

How WYSIWYG HTML Editors Work

When a user makes a formatting change, the editor converts that action into valid HTML in the background. For example, clicking the bold button wraps selected text in a <strong> tag. Likewise, inserting an image generates an <img> element with the correct attributes.

However, the quality of this conversion varies significantly between editors. Some produce clean, semantic markup, while others generate bloated or inconsistent code that creates maintenance problems later.

Better editors also support media insertion, table creation, and layout adjustments through their interface, functioning much like an online HTML editor. Additionally, they can usually output HTML that follows web standards and renders consistently across browsers.

Common Use Cases for WYSIWYG HTML Editors

The same core technology can serve very different workflows:

  • Content management systems (CMS): Writers update page content directly without developer involvement.
  • Email template creation: Marketers build and edit HTML emails through a visual interface.
  • Website page editing: Teams manage landing pages, blog posts, and product descriptions at scale.
  • Collaborative content workflows: Multiple contributors edit, review, and approve content in a shared environment (e.g., Google Docs).

Why Choosing the Best WYSIWYG HTML Editor Matters

The editor your team uses every day shapes how fast content moves and how well it holds together at scale. A poor fit creates friction that compounds over time.

Impact on Content Creation Efficiency

A content production workflow showing a team moving through writing, review, and formatting stages on the left, transitioning into a streamlined automated pipeline on the right, with a stopwatch and rocket representing the speed gains a WYSIWYG editor delivers.

The best WYSIWYG HTML editor reduces the manual coding effort that slows down publishing cycles. This means that non-technical users can format and publish content independently, without waiting for a developer to implement changes. This independence directly improves turnaround time for campaigns, product updates, and editorial content.

Improving Collaboration Across Teams

Marketers, developers, and designers rarely use the same tools naturally. A WYSIWYG editor creates a shared environment where each role can contribute meaningfully. Writers handle copy and formatting, developers configure and extend the editor, and designers preview layout changes. Fewer handoffs means fewer delays in the approval and revision cycle.

Supporting Scalable Business Operations

As content volume grows, consistency becomes harder to maintain manually. A good WYSIWYG editor enforces formatting standards automatically, so content produced by different team members follows the same structural rules. For enterprise operations, this consistency at scale is what separates manageable content libraries from ones that require constant cleanup.

Key Features to Look for in the Best WYSIWYG HTML Editor

The feature set that matters most depends on your use case, but several capabilities apply broadly across teams and contexts.

User-Friendly Editing Interface

A cluttered toolbar or a steep learning curve signals that the editor prioritizes robustness without considering usability. The best WYSIWYG HTML editor offers clean, contextual toolbars that surface the right options at the right time.

For example, drag-and-drop support for images and content blocks reduces the number of steps between an idea and its implementation. As a result, new users should be able to produce formatted content within minutes.

Clean and Semantic HTML Output

This is where many editors fail quietly. For example, let’s say an editor generates <span style=”font-weight: bold;”> instead of <strong>. Such editors produce markup that is harder to maintain, less accessible, and weaker for SEO.

Semantic HTML uses the correct element for each content type, which helps browsers, screen readers, and search engines interpret the content accurately. Hence, always inspect an editor’s raw output before committing to it.

Note: Semantic HTML refers to using HTML elements that carry meaning about their content, such as <article>, <header>, or <strong>. This is in contrast to generic elements like <div> or <span> with inline styles. It improves accessibility, SEO, and long-term maintainability.

Rich Text Formatting Capabilities

Production-grade editors support tables, image embedding with caption and alt text controls, video insertion, custom links, and advanced alignment options. These capabilities matter for teams producing varying content types. An editor that handles all of them in one interface reduces the need for workarounds or secondary tools.

Real-Time Preview and Editing

The defining promise of a WYSIWYG editor is an accurate preview. If the editor’s rendering doesn’t match how content will actually appear in the published environment, it undermines the core value proposition. Editors that support theme-aware or inline preview reduce formatting errors and eliminate the need for repeated publish-and-check cycles.

Customization and Plugin Support

A central editor interface surrounded by modular plugin and capability blocks connected by glowing links, illustrating how a customizable WYSIWYG HTML editor extends its functionality through plugins and API integrations.

No editor fits every workflow out of the box. The best ones expose an API that lets developers extend behavior, add custom toolbar buttons, restrict certain formatting options, or integrate with external services. Plugin ecosystems expand this further, and an editor with strong customization support grows with your product rather than constraining it.

How to Choose the Best WYSIWYG HTML Editor for Different Use Cases

The right editor for one team can be the wrong one for another. These profiles map common needs to the features that matter most for each.

For Developers and Technical Teams

Developers need an editor they can configure, extend, and trust to produce clean output. API access is non-negotiable, and the editor should integrate with your existing stack rather than requiring workarounds. Framework compatibility with React, Vue, or Angular matters if the editor will integrate with a modern web application. Lastly, code output quality is also critical, since the editor’s HTML will live inside production systems that other developers maintain.

For Content Marketers and Editors

Marketing teams prioritize speed and independence. An editor that requires technical support for routine formatting tasks creates bottlenecks that slow campaign execution. Look for editors with intuitive toolbars, collaboration features that support review and approval workflows, and straightforward media handling. The goal is for a writer to take a piece from draft to publish-ready without filing a single ticket. Selecting a deployment method that prevents such bottlenecks is essential, and we address these specific infrastructure choices in our guide to HTML Editor Software Compared for Desktop, Cloud, and Embedded Use.

For SaaS Platforms and Applications

When an editor ships as part of a product, its performance and reliability directly affect user experience. Evaluate how the editor behaves under load and with concurrent users. Consider whether it supports multi-tenant configurations and if it has a lightweight bundle. Moreover, ensure its integration footprint fits your existing software architecture without requiring significant custom engineering.

For Enterprise Organizations

Enterprise deployments require more than good editing features. Role-based permissions determine who can edit, review, and publish content. Security and compliance requirements may dictate where and how you store content. Audit logging and workflow controls support governance at scale. An editor that doesn’t address these concerns creates operational risk as the organization grows.

Comparing Cloud-Based and Self-Hosted WYSIWYG HTML Editors

Deployment models can affect maintenance burden, control, and accessibility. Neither approach is universally better, and the right choice depends on your infrastructure and team.

Benefits of Cloud-Based Editors

Cloud-based editors deploy quickly and update automatically. Teams can access them from any device without managing infrastructure. For organizations that want to move fast and minimize IT overhead, cloud deployment is often the lower-friction path.

Advantages of Self-Hosted Editors

Self-hosted editors give organizations direct control over their data, infrastructure, and customization. Teams with strict data residency requirements or internal security policies often find self-hosting the only viable option. The tradeoff is that maintenance, updates, and scaling fall to internal teams.

Choosing the Right Deployment Model

Start with your security and compliance requirements, since those often make the decision before other factors come into play. If your organization handles sensitive user data or operates in a regulated industry, self-hosting may be mandatory. If speed of deployment and low maintenance overhead matter more, cloud-based editors offer a clear advantage.

Common Mistakes to Avoid When Selecting a WYSIWYG HTML Editor

A dense checklist of editor evaluation criteria on the left contrasted with a single glowing checkmark on the right, representing the importance of prioritizing usability over an overwhelming feature list when selecting the best WYSIWYG HTML editor for your use case.

Many teams select editors based on feature lists rather than actual workflow fit. These are the errors that create problems after the decision is made.

Prioritizing Features Over Usability

A long feature list is less valuable than a feature set your team will actually use. An editor loaded with capabilities that require training to access slows non-technical users down rather than helping them. Evaluate editors with the actual end users in the room, not just the developers configuring it.

Furthermore, ensure that your editor gives you enough freedom to customize the toolbar and hide or disable any features you don’t need. This can help keep your editor visually and functionally lighter while also improving the UX.

Ignoring Performance and Speed

An editor that lags during typing or struggles with long documents affects productivity in ways that are easy to underestimate during evaluation. Test editors with realistic content, including long-form documents, embedded media, and tables, before committing. Performance issues that appear minor in a demo can pile up significantly in daily use.

Overlooking Mobile Responsiveness

Content teams work across devices. An editor that works well on desktop but breaks on a tablet or mobile browser limits flexibility for teams. Test the editing experience on the devices your team and users actually use.

Failing to Evaluate Integration Options

An editor that doesn’t connect cleanly to your CMS, storage layer, or publishing pipeline can create friction. Verify API availability, check existing integrations with the tools you use, and confirm that content output arrives in the format your downstream systems expect.

Benefits of Using the Best WYSIWYG HTML Editor

When the fit is right, the benefits accumulate across the entire content operation.

Faster Content Production

The right editor removes the manual steps that can slow down publishing cycles. With it, writers format and finalize content without developer involvement. Revisions also happen in the editor rather than through a ticket system. In turn, campaigns, product pages, and editorial content reach audiences faster as a result.

Better User Experience

An editor that matches its users’ skill level helps reduce errors and frustration. Non-technical contributors produce well-structured content because the editor guides formatting decisions automatically. Developers benefit from clean output that doesn’t require cleanup. The editing experience improves for everyone when the tool fits the workflow.

Long-Term Flexibility and Scalability

Content operations grow. An editor with strong API support, active updates, and a plugin ecosystem adapts to that growth rather than constraining it. The best WYSIWYG HTML editor focuses on this flexibility, letting teams extend as their requirements evolve.

Conclusion

Choosing the best WYSIWYG HTML editor comes down to matching capabilities to context. The features that matter for a solo content creator differ from those an enterprise team or a SaaS platform needs. Getting that match right early prevents the kind of tooling friction that slows teams down as they scale.

Evaluate editors against your actual workflows, not against abstract feature lists. Test with real content, involve the people who will use it daily, and verify that the output quality meets your technical standards. The editor you choose will shape how your team creates and manages content for years. It’s worth the evaluation time.

Ready to see what the right editor looks like in practice? Froala gives developers and content teams a lightweight, fully customizable WYSIWYG HTML editor that scales from simple content editing to enterprise-grade workflows. Try it free and find your fit.

Frequently Asked Questions

What is the best WYSIWYG HTML editor?

There isn’t a single best option for every use case. The right editor depends on your team’s technical requirements, content volume, integration needs, and user skill levels. Developers typically prioritize API access and clean output. Content teams value ease of use and publishing speed. Evaluate a shortlist against your specific workflow before committing.

Why should businesses use a WYSIWYG HTML editor?

A WYSIWYG editor reduces dependency on developers for routine content tasks, shortens publishing cycles, and maintains formatting consistency across a content library. For businesses producing content at volume, those efficiency gains accumulate significantly over time.

Can developers customize WYSIWYG HTML editors?

Yes, most professional editors expose an API that allows developers to extend functionality. This includes adding custom toolbar buttons, restricting formatting options, integrating with external services, and adapting the editor’s behavior to specific workflows.

Are WYSIWYG HTML editors SEO-friendly?

They can be, but output quality varies. Editors that generate semantic HTML, using correct heading hierarchy, proper image alt attributes, and clean markup, support SEO effectively. Editors that produce bloated or non-semantic code can work against it.

What features should I look for in a WYSIWYG HTML editor?

The most important features are clean semantic HTML output, real-time preview, an intuitive interface for your target users, strong API and plugin support, and reliable integration with your existing tools. Performance under realistic content conditions and mobile editing support are also worth testing before making a final decision.

graphical user interface, text

How to Use an Online HTML Editor for HTML Projects Without Setup

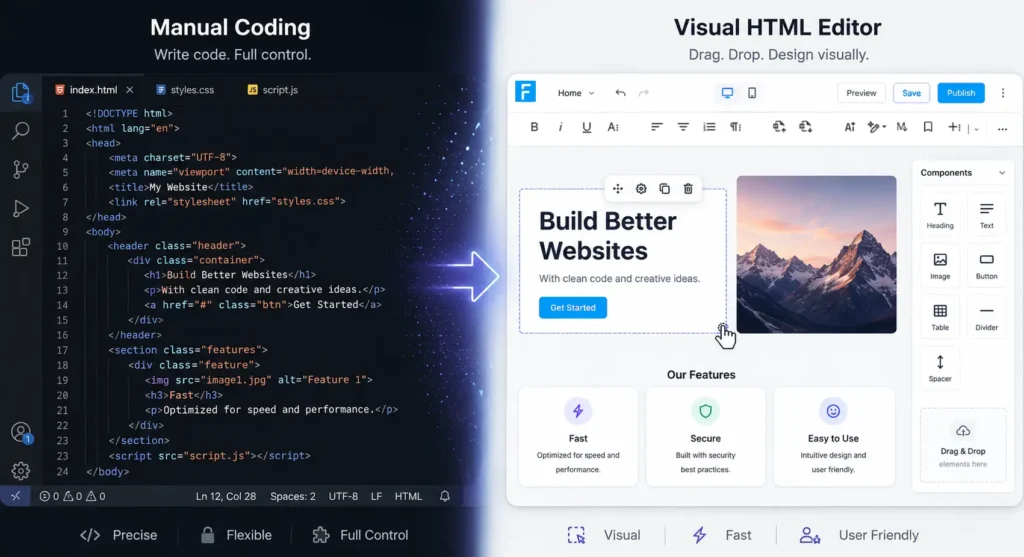
A browser-based HTML editor displaying syntax-highlighted code in the left panel alongside a live rendered webpage preview in the right panel, illustrating how an online HTML editor lets developers write and preview output simultaneously without any local software.

Setting up a local development environment, especially a fancy or robust one, takes time. You install an editor, configure a server, manage dependencies, and troubleshoot compatibility issues before writing a single line of code. That overhead isn’t necessary for many projects.

An online HTML editor runs entirely in the browser. This means that there’s nothing to install, no environment to configure, and no machine-specific issues to debug. You open a URL and start writing. For learners, freelancers, and teams prototyping ideas quickly, that simplicity changes how they start projects and how fast they move.

This guide covers what online HTML editors are, how to use one effectively, and what to look for when choosing one for your workflow.

Key Takeaways

  • An online HTML editor runs entirely in the browser, eliminating the need for software installation, environment configuration, or device-specific setup.
  • Live preview is the most important feature to evaluate. Without it, the core advantage of browser-based editing largely disappears.
  • Online editors suit a wide range of users beyond developers, including learners experimenting without risk, marketers testing HTML snippets, and distributed teams sharing work through a single URL.
  • Best practices like periodic export, consistent indentation, and separating HTML, CSS, and JavaScript into dedicated panels carry over directly into professional development habits.
  • Online editors complement rather than replace local environments. They are most effective for quick tasks, prototyping, and iteration, while complex projects with heavy dependencies still benefit from a full local setup.

What Is an Online HTML Editor?

Online HTML editors have expanded well beyond simple text boxes. Modern browser-based tools now rival desktop IDEs for many common development tasks.

Understanding Browser-Based Code Editors

An online HTML editor is a coding environment that runs entirely inside a web browser. It accepts HTML, CSS, and JavaScript input and renders the output without requiring any local software. Unlike desktop IDEs such as VS Code or WebStorm, browser-based editors store and execute everything through the browser itself.

Desktop IDEs offer deep customization and handle large, complex codebases well. On the other hand, browser-based editors prioritize access speed and ease of sharing, making them better suited for focused, self-contained tasks.

Core Features of an Online HTML Editor

Most capable online editors include syntax highlighting, which color-codes HTML elements to improve readability and reduce errors. They also typically include live previews, which render your output in real time as you type. Moreover, auto-completion suggests valid tags and attributes, reducing keystrokes and catching mistakes early. Lastly, multi-language support lets you write HTML, CSS, and JavaScript in the same environment without switching tools.

Why Developers Choose Online Editors

The primary reason is setup time, or more accurately, the absence of it. A developer can open a browser-based editor, paste a snippet, and see it render in seconds. This makes online editors particularly useful for prototyping, debugging isolated problems, and sharing reproducible examples with colleagues.

Benefits of Using an Online HTML Editor without Setup

The zero-setup model removes friction at every stage of early development. In turn, that friction reduction compounds across a team and across a project’s lifetime.

No Installation or Configuration Required

Local development environments require software installation, version management, and occasional conflict resolution between tools. An online HTML editor doesn’t require downloads, updates to manage, or environment variables to set. All developers need instead are a browser and an internet connection.

Faster Development Workflow

Live preview is the most direct performance improvement an online editor offers. Every change you make renders immediately in a preview panel. You see layout shifts, broken styles, and JavaScript errors as they occur rather than after a build step. This tightens the feedback loop considerably for front-end work.

Improved Collaboration and Sharing

Two browser-based code editor windows connected by a flowing data stream, with collaboration icons visible in the network above, representing how online HTML editors enable real-time code sharing and remote collaboration between developers on different devices.

Most online editors generate a shareable URL for any project. Sending that link gives a colleague an identical view of your code and its output, with no setup on their end. This simplifies code reviews, client demos, and collaborative development significantly.

Cross-Platform Accessibility

You can access any saved project in an online editor from any device with a browser. With this setup, you can start work on a desktop, continue on a laptop, and review on a tablet without syncing files or managing storage. This removes hardware as a constraint for development work.

How to Start an HTML Project Using an Online HTML Editor

Starting a project in a browser-based editor is faster than in a local environment. However, a few deliberate choices early on can help make the workflow smoother throughout.

Choosing the Right Online HTML Editor

Prioritize live preview support over other features. That’s the main convenience of online editors, so without it, the browser-based advantage largely disappears. Evaluate the interface for clarity and responsiveness, since a slow or cluttered editor could slow you down. 

Afterwards, check whether the editor supports exporting your project as downloadable files (or code). Lastly, confirm whether it autosaves, as this prevents losing work during unexpected browser closures.

Creating a Basic HTML Structure

This step is very similar to that of local environments. Start with a DOCTYPE declaration, which tells the browser which version of HTML to expect. From there, add the head section for metadata and the body section for visible content. Inside the body, headings establish hierarchy, paragraphs carry content, and links connect pages. A well-structured HTML foundation makes styling and scripting more predictable later.

Note: The DOCTYPE declaration is a single line at the top of an HTML file that instructs the browser to render the page in standards-compliant mode. Without it, some browsers fall back to legacy rendering behavior that can cause unexpected layout issues.

Adding CSS and JavaScript

Most online editors provide separate panels for HTML, CSS, and JavaScript. Writing CSS in its dedicated panel keeps styling rules separate from structure, which makes both easier to maintain. The same goes for JavaScript. This separation mirrors professional development conventions and makes the transition to a local environment straightforward as the project grows.

Testing and Previewing Your Project

Use the live preview to test as you build rather than after you finish. It’s easier for you to fix layout problems if you catch them early. Check for broken links, missing closing tags, and elements that don’t render as expected. If the editor includes a console, use it to surface JavaScript errors before they compound.

Best Practices for Working in an Online HTML Editor

Good habits in a browser-based editor translate directly to better habits in any development environment.

Organizing Code Efficiently

Indent nested elements consistently so the structure of your HTML remains readable at a glance. Add comments to mark sections that contain complex logic or that you’ll return to later. Furthermore, keep your HTML, CSS, and JavaScript in their designated panels rather than mixing them together in the HTML file.

Saving and Backing up Projects

A code editor open in a browser with project folders rising along a curved path toward a glowing cloud storage icon, representing the autosave and cloud backup capabilities that protect work from unexpected browser closures or session timeouts.

Not all online editors autosave by default, so export your project as a file periodically, especially before making significant changes. If the editor supports versioning or named saves, use them. With minimal effort, you can avoid losing work to an accidental browser close or session timeout.

Optimizing Performance While Coding

Keep your project files lightweight. This means avoiding loading external scripts or stylesheets you don’t need, since they slow both the editor and the preview. Test frequently rather than writing large blocks of code before checking the output, as debugging smaller, incremental changes is easier.

Ensuring Browser Compatibility

Preview your project in more than one browser if the editor allows it, or export and test locally. Validate your HTML structure to confirm it follows standards. Also, check how the layout responds to different screen sizes. This is because responsive behavior often breaks in ways that you won’t see at a single viewport width.

Common Use Cases for Online HTML Editors

Browser-based editors serve a wider range of users and scenarios than their lightweight reputation suggests.

Learning HTML and Front-End Development

For beginners, a local environment introduces unnecessary complexity before any actual learning begins (especially true for managing dependencies). An online editor helps remove that barrier. Learners can experiment with tags, see results immediately, and iterate without worrying about breaking anything on their system.

Rapid Prototyping and Mockups

Testing layout ideas is much quicker to do with an online editor than in a local environment setup. You can build a rough landing page structure, test a navigation pattern, or mock up a component in minutes. And when you’re done, you can share the result with stakeholders with a single link.

Collaborative Team Projects

Online HTML editors make it easy to share a specific state of a project. For example, a developer debugging an issue can share an exact reproduction with a colleague. Furthermore, a designer can review a component in context without needing access to the full codebase. These small efficiency gains reduce back-and-forth significantly on distributed teams.

Editing and Testing Small Website Changes

Marketers and content managers often need to test small HTML changes before applying them to a live site. An online HTML editor provides a safe environment for that testing. With it, you can verify that a code snippet works as expected without touching the production environment.

Features to Look for in a Professional Online HTML Editor

Browser-based editors have their differences in capabilities. These are the features that separate useful tools from potentially frustrating ones.

Live Preview and Real-Time Rendering

An editor without a live preview requires you to manually refresh a separate tab to see your changes. This interrupts flow and slows down debugging. Thus, real-time rendering that updates as you type is the baseline expectation for any professional-grade online editor.

Intelligent Code Assistance

A glowing magnifying glass scanning lines of code in a validation interface, with clean sections highlighted in green and flagged sections in amber, representing the intelligent code validation and error detection features of a professional online HTML editor.

Auto-complete suggestions reduce the time you spend typing repetitive HTML structures and help you discover valid attributes without consulting documentation. Error highlighting surfaces mistakes as you write rather than after rendering. Smart formatting tools keep indentation and spacing consistent automatically.

Integration and Export Options

A useful online editor lets you export your work as downloadable files you can move into a local project or a CMS. Integration with cloud storage extends this further. Editors that lock your work into a proprietary format with no export path can create dependency rather than flexibility.

Security and Reliability

Any editor handling your code should use HTTPS and avoid storing sensitive project data insecurely. Autosave and session recovery prevent work loss from unexpected browser behavior. Stable performance under normal usage, without rendering lag or memory issues, is also a basic requirement for sustained use.

Why Businesses and Content Teams Use Online HTML Editors

Development teams aren’t the only ones benefiting from browser-based editors. Content and marketing teams use them for everyday tasks that would otherwise require developer involvement.

Faster Content Editing Workflows

Content teams frequently need to adjust HTML in templates, emails, or CMS entries. An online editor gives them a place to make and preview those changes without pulling a developer into the process. This reduces ticket volume and shortens the time between a content decision and its implementation.

Improved Collaboration across Teams

Designers can share HTML mockups with developers through a link. Similarly, developers can share isolated components with QA teams for review. Marketing teams can also test copy changes in context. Each of these scenarios removes a handoff step and the delay that comes with it.

Reduced Technical Overhead

Organizations that route all HTML work through local development environments carry ongoing overhead: software licenses, onboarding time, environment maintenance, and compatibility troubleshooting. Browser-based editors help reduce that overhead for tasks that don’t require the full power of a local setup.

Conclusion

Browser-based HTML editors have closed the gap between having an idea and acting on it. The setup overhead that once slowed down teams is no longer a requirement for quick projects and layout testing. No setup means that the first line of code is always just a browser tab away.

That said, an online editor works best when you match it to the right tasks. For prototyping, learning, and quick iterations, it’s often the faster choice. For large-scale applications with complex dependencies, a local environment remains the more appropriate tool.

In the end, the two aren’t mutually exclusive. Most developers use both, reaching for a browser-based editor when speed matters and a local setup when the project demands it. Knowing when and how you use both tools helps you maximize productivity and boost production speed.

Ready to see that in practice? Froala’s online HTML editor gives teams a fast, lightweight environment for building and testing HTML without the infrastructure overhead.

Frequently Asked Questions

What is an online HTML editor?

An online HTML editor is a browser-based tool that lets you write, edit, and preview HTML code without installing any software locally. It runs entirely in the browser, typically alongside panels for CSS and JavaScript, and renders output in real time. These tools are commonly used for learning, prototyping, and testing small projects.

Can beginners use an online HTML editor?

Yes, and it’s often the recommended starting point, as demonstrated by learning portals. Beginners avoid the complexity of setting up a local development environment and can focus entirely on learning HTML. Most online editors include helpful features like syntax highlighting and auto-completion that make the learning process more forgiving.

Do online HTML editors support CSS and JavaScript?

Most professional online editors support all three core web languages. HTML, CSS, and JavaScript each get dedicated input panels, and the preview renders them together.

Is an online HTML editor suitable for professional projects?

For self-contained front-end work, prototyping, and testing, yes. For large-scale applications with complex build processes, dependency management, or backend integration, a local development environment is more appropriate. Many professionals use both, relying on online editors for quick tasks and local environments for sustained development.

What are the advantages of using an online HTML editor?

The main advantages are speed of access, zero configuration, and easy sharing. You can start a project in seconds from any device, preview changes in real time, and share your work through a URL.

graphical user interface, text

Setup AI React WYSIWYG Editor Powered by Claude

Setup AI React WYSIWYG Editor Powered by Claude

In a previous article, we explored the flexibility and various setup approaches for the Froala AI Assist plugin across different frontend and backend configurations. This article provides a practical walkthrough for integrating Froala AI Assist in React and connecting it to Claude through an Express backend server.

Key Takeaways

  • Froala AI Assist provides a pre-built chat interface for integrating AI into a rich text editor
  • Routing AI requests through a backend server protects your API credentials from exposure
  • This tutorial covers a complete React + Express + Claude integration with production-ready security
  • The setup maintains full context across user sessions, enabling iterative refinement of generated content

How it Works

The Froala AI Assist plugin provides a pre-built interface for integrating your preferred AI model into a rich text editor. The editor includes a toolbar button that opens a chat popup where users can submit prompts. When a user submits a prompt, Froala sends it to an endpoint you configure via the aiAssistEndpoint option.

While you could configure this endpoint to point directly to Claude’s API, doing so would expose your API credentials in the frontend—a significant security risk.

For production environments, the recommended approach is to route requests through a backend server. This server acts as a middleware layer: it receives prompts from Froala, forwards them securely to Claude, and returns the response back to the editor for display.

In this tutorial, we’ll build this backend server using Node.js and Express, ensuring your API keys remain protected while maintaining full functionality.

Prerequisites and Setup

Before you begin, ensure your development environment is configured for a React and Express integration.

Frontend Requirements

  • An existing React project
  • Understanding of React components, hooks, and event handling
  • Froala Editor installed and properly licensed

Backend Requirements

  • Node.js and npm installed
  • Familiarity with Express routing and middleware concepts

Setup Froala In React

Installation

Begin by installing the Froala React component in your project:

npm install react-froala-wysiwyg --save

Create the Editor Component

Create a new React component file for the Froala editor. Import the necessary CSS files and the Froala component:

import React from "react";
import "froala-editor/css/froala_style.min.css";
import "froala-editor/css/froala_editor.pkgd.min.css";
import 'froala-editor/js/plugins.pkgd.min.js';
import FroalaEditorComponent from "react-froala-wysiwyg";

function AIEditorComponent() {
    const config = {
        heightMin: 300,
        aiSupplementalTermsAccepted: true,
        aiAssistEndpoint: 'http://localhost:5000/ai-assist',
        aiAssistHeaders: {
            'Content-Type': 'application/json'
        },
        aiAssistAdditionalData: {
            model: 'claude-opus-4-7',
            token: 20000
        },
        aiAssistResponseParserPath: 'content',
    };

    return (
        <div className="editor">
            <h3>Froala's React WYSIWYG Editor</h3>
            <FroalaEditorComponent tag="textarea" config={config} />
        </div>
    );
}

export default AIEditorComponent;

Configuration Breakdown

The config object controls the editor’s behavior and AI integration:

  • heightMin: Sets the minimum height of the editor to 300 pixels, ensuring adequate space for content creation.
  • aiSupplementalTermsAccepted: Enables AI features by confirming acceptance of supplemental terms.
  • aiAssistEndpoint: Points to your Express backend server at http://localhost:5000/ai-assist. Froala sends user prompts to this endpoint for processing.
  • aiAssistHeaders: Specifies the request headers. The Content-Type: application/json header tells the server to expect JSON-formatted data.
  • aiAssistAdditionalData: Passes metadata to your backend, including the Claude model identifier and token limit (20,000 tokens) for response generation.
  • aiAssistResponseParserPath: Tells Froala where to find the AI response in the server’s JSON reply. The value 'content' means the response text is located at response.content.

Integrate Into Your Application

Import the component into your main App.js file and render it:

import './App.css';
import AIEditorComponent from "./components/AIEditorComponent";

function App() {
  return (
    <div className="App">
      <AIEditorComponent />
    </div>
  );
}

export default App;

Run Your Application

Start the development server with:

npm start

Your React application will launch locally with the Froala editor fully integrated and ready to communicate with your backend AI service.

Setup Node.js Server

This section walks you through creating a backend server that securely handles AI requests from Froala and communicates with Claude’s API.

Install Required Dependencies

Start by installing the necessary npm packages for your Express server:

npm install express cors dotenv @anthropic-ai/sdk

Here’s what each package does:

  • express: Web framework for building the server and defining routes
  • cors: Middleware to enable Cross-Origin Resource Sharing, allowing your React frontend to communicate with the backend
  • dotenv: Loads environment variables from a .env file
  • @anthropic-ai/sdk: Official SDK for interacting with Claude’s API

Configure Environment Variables

Create a .env file in your project root to securely store sensitive credentials:

ANTHROPIC_API_KEY=your_api_key_here

PORT=5000

Replace your_api_key_here with your actual Anthropic API key. The PORT variable specifies where your server will listen for incoming requests.

Important: Add .env to your .gitignore file to prevent accidentally committing API keys to version control.

Enable ES Module Support

Update your package.json to use ES modules (modern JavaScript import syntax):

{

  "type": "module"

}

This allows you to use import statements instead of older require() syntax throughout your server code.

Create the Express Server

Create a new file (e.g., server.js or index.js) with the following code:

import express from 'express';
import cors from 'cors';
import dotenv from 'dotenv';
import Anthropic from '@anthropic-ai/sdk';

dotenv.config();

const app = express();

app.use(cors());
app.use(express.json());

const anthropic = new Anthropic({
    apiKey: process.env.ANTHROPIC_API_KEY,
});

app.post('/ai-assist', async (req, res) => {
    try {
        const { question, model, token } = req.body;

        const response = await anthropic.messages.create({
            model,
            max_tokens: token,
            messages: [
                {
                    role: 'user',
                    content: question,
                },
            ],
        });

        const result = response.content[0]?.text || '';

        res.json({
            content: result,
        });
    } catch (error) {
        console.error(error);

        res.status(500).json({
            error: 'AI request failed',
        });
    }
});

app.listen(process.env.PORT || 5000, () => {
    console.log(`Server running on port ${process.env.PORT || 5000}`);
});

Code Breakdown

Initialization

dotenv.config();

const app = express();

The dotenv.config() call loads your environment variables from the .env file. The express() function creates your Express application instance.

Middleware Configuration

app.use(cors());

app.use(express.json());
  • cors(): Enables cross-origin requests, allowing your React frontend (running on a different port) to communicate with this backend server
  • express.json(): Automatically parses incoming JSON request bodies, making form data accessible via req.body

Claude Client Initialization

const anthropic = new Anthropic({

    apiKey: process.env.ANTHROPIC_API_KEY,

});

This initializes the Anthropic SDK with your API key from the environment variables, creating a reusable client for all Claude API calls.

The /ai-assist Route

app.post('/ai-assist', async (req, res) => {

    const { question, model, token } = req.body;

This defines a POST endpoint that receives three parameters from Froala:

  • question: The user’s prompt (or formatted question with context instructions)
  • model: The Claude model identifier (e.g., claude-opus-4-7)
  • token: The maximum number of tokens Claude should generate

Calling Claude’s API

const response = await anthropic.messages.create({
    model,
    max_tokens: token,
    messages: [
        {
            role: 'user',
            content: question,
        },
    ],
});

This sends the user’s question to Claude with the specified model and token limit. The messages array follows Claude’s expected format: an array of message objects with role (either user or assistant) and content (the message text).

Processing the Response

const result = response.content[0]?.text || '';

res.json({

    content: result,

});

Claude returns a response object with a content array. The optional chaining operator (?.) safely accesses the text from the first content item, defaulting to an empty string if unavailable. The response is then returned to Froala in the expected JSON format with a content key (as configured in your React component’s aiAssistResponseParserPath).

Error Handling

catch (error) {

    console.error(error);

    res.status(500).json({

        error: 'AI request failed',

    });

}

If any error occurs during the API call, the server logs it to the console and returns a 500 status code with an error message to the client.

Starting the Server

app.listen(process.env.PORT || 5000, () => {

    console.log(`Server running on port ${process.env.PORT || 5000}`);

});

This starts the Express server on the port specified in your .env file, or defaults to port 5000.

Run the Server

Execute the following command to start your backend:

node index.js

You should see the confirmation message:

Server running on port 5000

Your backend is now ready to receive requests from your React frontend and forward them securely to Claude.

Test the App

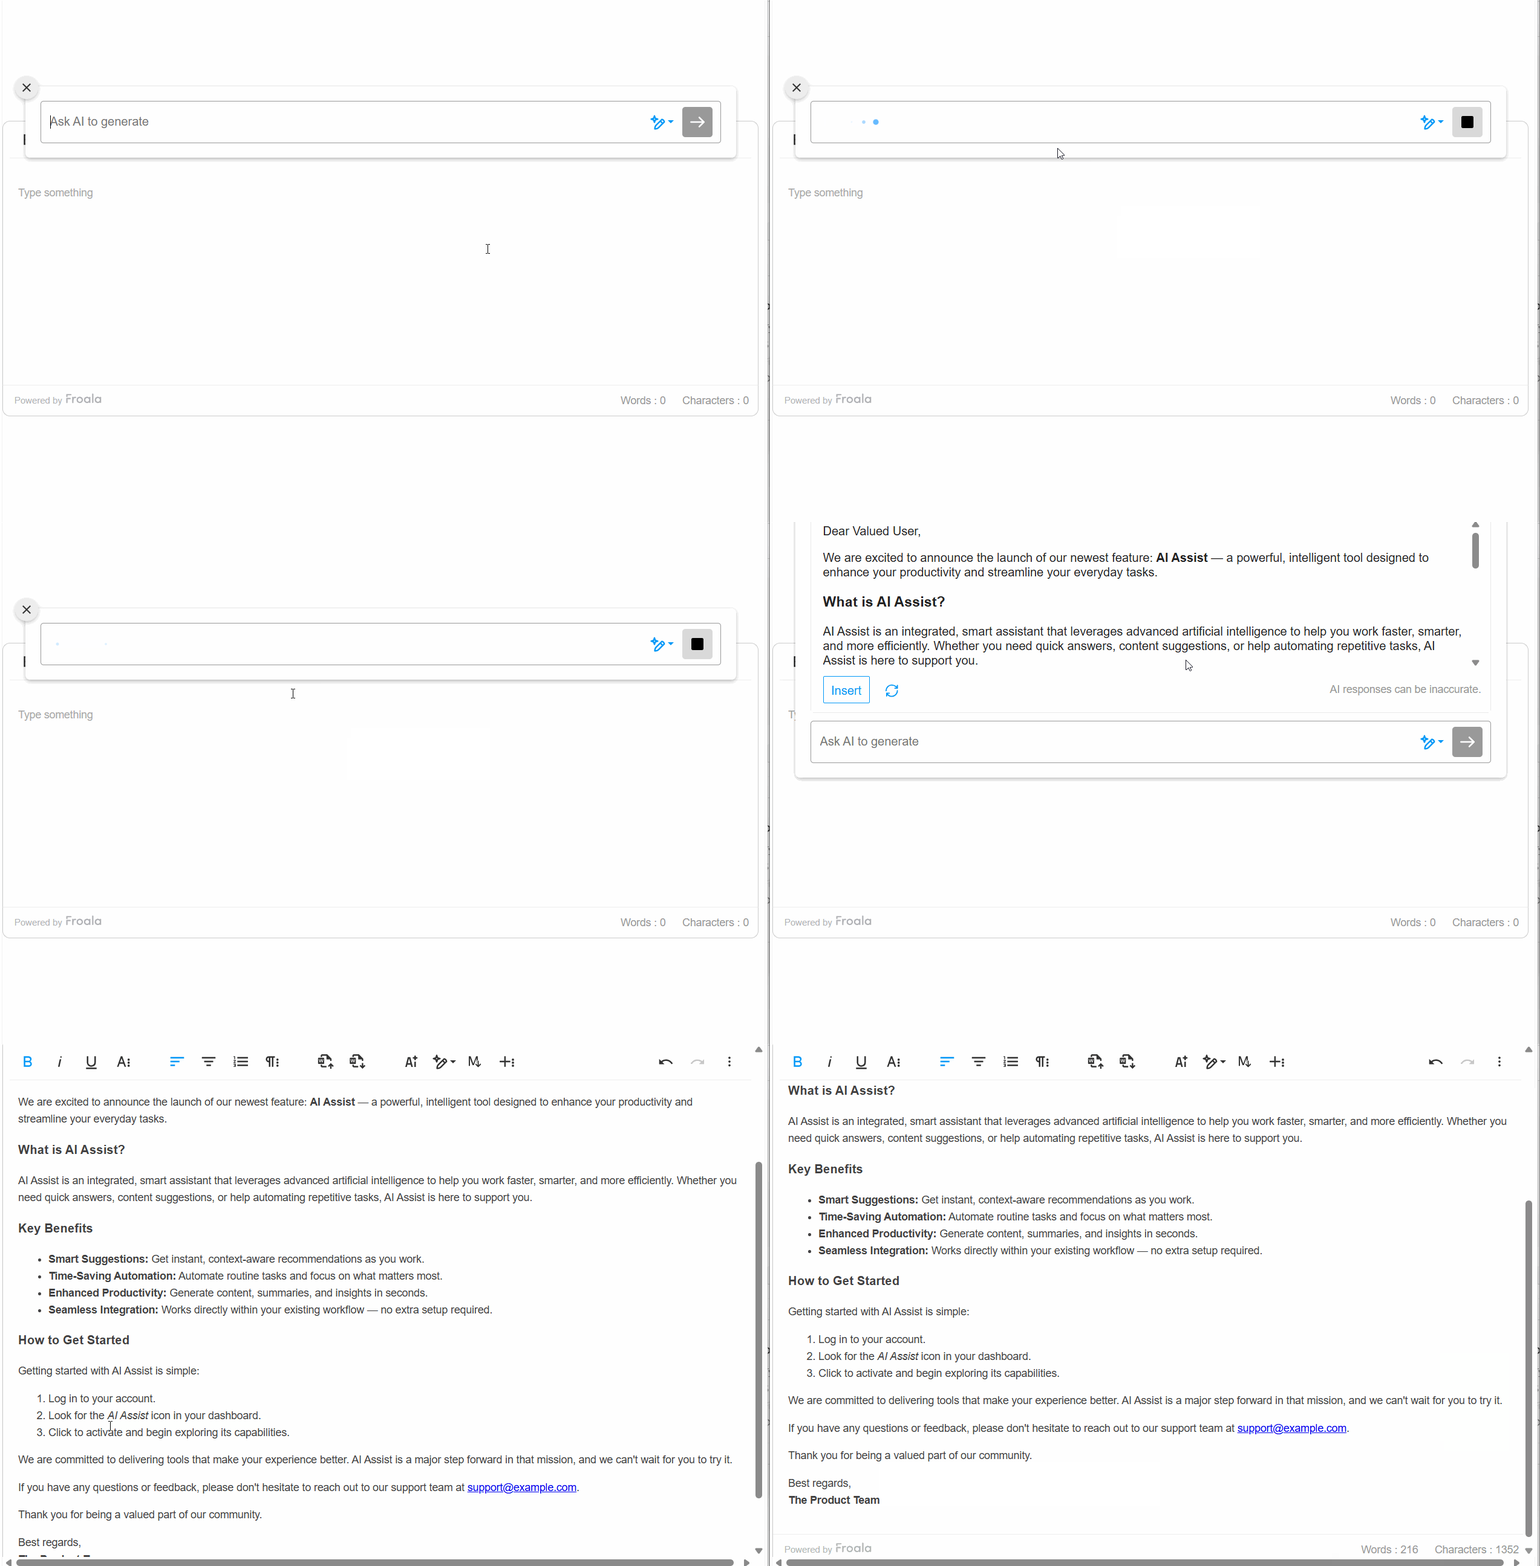
  1. Open AI Assist: Click the AI Assist button in the Froala editor toolbar to open the chat interface.
  2. Submit a Prompt: Enter a prompt such as “Write a professional email telling users about AI Assist feature” and submit it.
  3. Observe the Request Flow: When you submit the prompt, Froala constructs a detailed request object that includes:
    • Your original prompt wrapped with system instructions for HTML formatting
    • Metadata fields: question_order_number, question_timestamp, and session_id for tracking
    • Model and token parameters: model: “claude-opus-4-7” and token: 20000
question:"n  Answer the question based on the context provided below. If the context is empty, answer the question based on your knowledge.n  Your response must be in valid HTML format only - do not include markdown code blocks or backticks.n  Preserve all HTML formatting, tags, links, styles, and structure from the context.n  If generating new content, use appropriate HTML tags for proper formatting.n  If the response includes code snippets inside <pre> or <code> tags, ensure the outer <pre> tag includes a data-code-snippet attribute whose value is the language name (for example: data-code-snippet="javascript"). Do not add any class to the tag — include only the data-code-snippet attribute.n  Do not add explanatory text outside the HTML response.n Question: """Write a professional email telling users about AI Assist feature""" n n Answer:"

question_order_number:1

question_timestamp: "2026-05-18T09:30:36.514Z"

session_id:"new_session"

token:20000

model:"claude-opus-4-7"
  1. Backend Processing: Your Express server receives this request at the /ai-assist endpoint, extracts the necessary parameters, and forwards them to Claude’s API.
  2. Receive the Response: Claude processes the request and returns a response in the configured JSON format:
{

  "content": "<!DOCTYPE html>n<html lang="en">...<p>Subject: <strong>Introducing AI Assist</strong></p>..."

}

The response is automatically inserted into the editor as formatted HTML.

  1. Continue the Conversation: You can submit follow-up prompts or refine the generated content. The AI maintains context within the session, enabling iterative improvements. Once satisfied, insert the final result directly into your document.

Setup AI React WYSIWYG Editor Powered by Claude

Conclusion

Integrating Froala AI Assist with Claude through an Express backend gives you a powerful, production-ready WYSIWYG editor that harnesses advanced AI capabilities while keeping your API credentials secure. By routing requests through your own server, you maintain full control over your data pipeline and can easily customize the AI behavior to match your application’s needs.

The setup we’ve covered, from configuring the React component to building the backend middleware, provides a solid foundation for adding intelligent content generation to your platform. Whether you’re building a collaborative writing tool, a content management system, or an internal documentation platform, this architecture scales cleanly and keeps security at the forefront.

Ready to experience this workflow firsthand? Start your free Froala trial today and follow this tutorial to get AI React WYSIWYG editor up and running in minutes. You’ll see firsthand how seamlessly Claude integrates into your editing experience, enabling your users to draft, refine, and polish content with AI assistance built right into their workflow.

FAQ

Can I use a different AI model instead of Claude?

Yes. While this tutorial uses Claude, you can modify the backend to call any AI API. Update the /ai-assist route to use your preferred provider’s SDK and adjust the request/response formatting accordingly.

What if I want to customize the system prompt that Froala sends to Claude?

Froala constructs the system instructions automatically, but you can intercept and modify the question parameter in your Express server before sending it to Claude. This gives you full control over the prompt structure.

How do I handle rate limiting or API quota issues?

Implement rate limiting middleware in Express (e.g., express-rate-limit) and add error handling for Claude API rate limit responses. You can also track token usage per session and reject requests that exceed your quota.

Is it safe to store the API key in a .env file?

For local development, yes. For production, use a secrets management service like AWS Secrets Manager, HashiCorp Vault, or your hosting platform’s built-in secrets storage to avoid committing credentials to version control.

What’s the maximum token limit I should set?

It depends on your use case and Claude model. Larger limits allow longer responses but increase latency and cost. Start with 2,000–4,000 tokens for typical editing tasks, then adjust based on your needs.

Q: How do I debug if the AI response isn’t appearing in the editor?

Check three things:

(1) verify the backend is receiving requests by logging req.body.

(2) confirm Claude is returning a response by logging the API response.

(3) ensure the response JSON has a content key matching your aiAssistResponseParserPath configuration.

Comparing WYSIWYG Editors: What to Look For in 2026

Illustration of a balance scale comparing a clean, optimized editor interface with a cluttered, feature-heavy editor, highlighting performance vs functionality trade-offs in WYSIWYG editors

In 2026, a “good” editor isn’t just about bold text and hyperlinks anymore. It sits right at the heart of your application, powering content, shaping user experience, and even influencing performance and security.

If you choose the wrong one, it can slow down your app, frustrate users, and open doors to vulnerabilities. But the right one? It quietly makes everything smoother: faster workflows, cleaner content, and happier users.

In this guide, I’ll walk you through what really matters when comparing modern WYSIWYG editors. So you can make a confident, future-proof choice.

Key Takeaways

  • A modern WYSIWYG editor is a core part of your app, not just a content tool impacting performance, security, and user experience
  • Lightweight, modular architecture is essential to avoid slow load times and bloated JavaScript bundles
  • Built-in security features like HTML sanitization and XSS protection are non-negotiable in 2026
  • Clean, intuitive UI/UX (including inline editing) improves both user satisfaction and productivity
  • Strong framework compatibility ensures seamless integration with React, Vue, and Angular applications

The Evolution of the WYSIWYG Editor

WYSIWYG (What You See Is What You Get) editors have come a long way from their early, clunky beginnings from the 1970s. They started with Bravo in 1974. Then these editors evolved from desktop publishing tools to web-based content creation tools like FrontPage. 

And finally they were developed into the modern browser-based Rich Text Editors like Froala. They prioritize content formatting over HTML output.

Today’s editors aren’t just about editing content. They’re designed to be fast, customizable, and developer-friendly, keeping up with the demands of both users and performance-focused applications.

Key Stages in WYSIWYG Evolution

  • The Origins (1970s): Bravo (1974) was the first editor to display formatted text on the screen. But, it did not perfectly match with the printed output.
  • The Desktop Publishing Era (1980s-90s): WYSIWYG was essential with the rise of the GUIs in Apple Macintosh and Microsoft Windows. People could finally see the layouts, fonts, images on the screen as they appear on print.
  • Web Era: HTML Editors (1995-2005): These tools were evolved to allow visual building of web pages and generate HTML code automatically. Some examples are Vermeer FrontPage (1995) and WebMagic.
  • Modern Era: Content Management (2005-Present): HTML5 brought the contentEditable attribute. It enables in-browser editing for CMS platforms like WordPress. Modern editors like Froala and TinyMCE now focus on structured content and user-friendly formatting.

From Basic Tools to Modern Engines

Old-school editors were often built with heavy iframe-based architectures. They worked, but they were slow, rigid, and difficult to customize.

Today’s editors are completely different. They use lightweight JavaScript engines, modular components, and APIs that fit seamlessly into modern applications.

The Performance Mandate

Performance is no longer optional. With metrics like Core Web Vitals shaping SEO and UX, your editor must be fast and efficient.

Modern tools like Froala Editor focus on keeping bundle sizes small while still offering powerful features. So your app stays responsive without sacrificing functionality.

1. Speed and Lightweight Architecture

Speed is one of the first things users notice and one of the easiest to get wrong with an editor. A modern WYSIWYG editor should feel fast and responsive from the moment it loads. They should not add unnecessary weight to your application.

The “Bloat” Problem

Many legacy editors load everything upfront. Tables, videos, plugins you may never even use. At first, this might not seem like a big deal. But over time it adds unnecessary weight to your application.

This leads to:

  • Slower page loads
  • Heavier JavaScript bundles
  • Laggy editing experiences

It can also impact performance metrics like Core Web Vitals. This means your editor isn’t just affecting users. It can also hurt your SEO and overall app responsiveness.

What to Look For

A modern editor should be modular and performance-focused. That means:

  • Features load only when needed (lazy loading)
  • Plugins can be added or removed easily
  • The DOM stays clean and efficient
  • Minimal re-renders to keep interactions smooth

Some advanced editors even optimize how content is rendered and updated. They ensure typing and formatting feel instant, even in large documents.

In short, your editor should feel invisible, lightweight, fast, and seamlessly integrated, not like a heavy layer sitting on top of your app.

2. Security: Protecting Your Data in 2026

Rich text editors are one of the most common entry points for security issues—especially XSS (Cross-Site Scripting) attacks.

The Reality

Users can input HTML, scripts, or malicious content directly into your system through the editor. Without proper safeguards, that’s risky.

What to Look For

A secure editor should include:

  • Built-in HTML sanitization
  • Configurable allowed/blocked tags
  • Protection against script injection
  • Compliance with enterprise security standards

Security shouldn’t be something you “add later.” It needs to be built into the editor from day one.

3. UI/UX: Customization and “Edit-in-Place”

A great editor isn’t just powerful. It should feel effortless to use. In 2026, users expect clean interfaces, smooth interactions, and the ability to edit content naturally without distractions. That’s where thoughtful UI/UX and “edit-in-place” experiences make all the difference.

User Expectations Have Changed

Users now expect a clean, intuitive experience. It’s something similar to platforms like Medium or Notion.

That means:

  • Minimal distractions
  • Smooth formatting controls
  • Real-time feedback

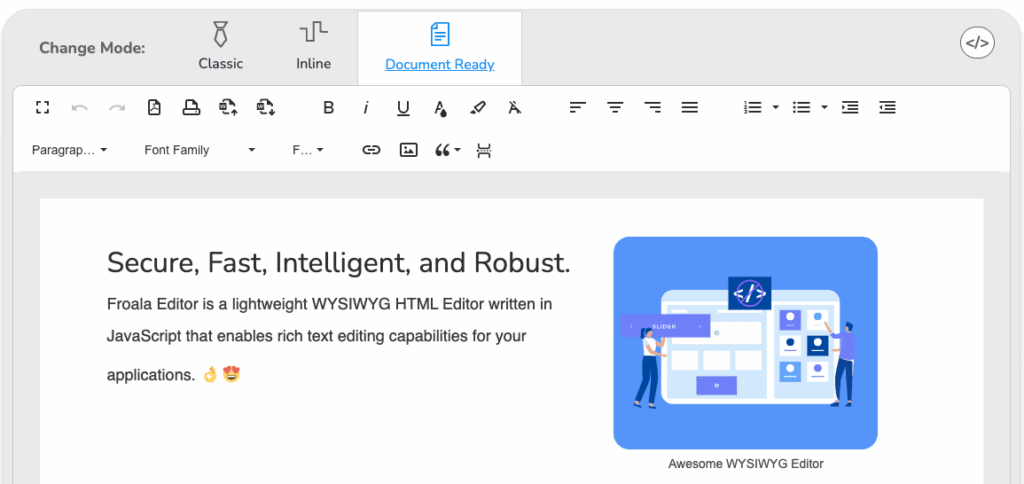
Inline vs. Document Mode

  • Document mode: Fixed toolbar at the top (great for structured content like blogs or CMS dashboards)
Froala WYSIWYG Editor - Document Mode
Froala WYSIWYG Editor – Document Mode
  • Inline mode: Floating toolbar that appears when needed (ideal for modern, distraction-free editing)
Froala WYSIWYG Editor - Inline Mode
Froala WYSIWYG Editor – Inline Mode

The Froala Advantage

Editors like Froala Editor come with a polished, modern interface out of the box.

Instead of spending hours tweaking CSS and UI components, you get:

  • A sleek, production-ready design
  • Smooth interactions
  • Consistent experience across devices

4. Framework Compatibility (React, Vue, Angular)

Modern web apps are built on frameworks, so your editor needs to fit right in, not fight against them. A well-integrated editor feels like a natural extension of your app. It makes development smoother and reduces unnecessary complexity.

Why This Matters

Your editor shouldn’t feel like an external tool. It should behave like part of your application. When integration is done right, you spend less time fixing issues and more time building features. It also ensures consistency in how data flows through your app, especially when dealing with dynamic content.

What to Look For

Modern editors should offer:

  • Native integrations for frameworks like React, Vue.js, and Angular
  • Support for hooks, props, and reactive state
  • Clean APIs for customization
  • Well-documented SDKs that reduce setup time

These features make it easier to plug the editor into your existing workflow without writing unnecessary glue code.

Integration Done Right

Avoid editors that rely on manual DOM manipulation. It often leads to bugs and unpredictable behavior. Instead, choose ones that:

  • Work with your framework’s lifecycle
  • Keep state predictable and easy to manage
  • Reduce integration complexity
  • Allow seamless updates without breaking your UI

When an editor integrates properly, it doesn’t just “work”. It enhances your development experience and keeps your application scalable as it grows.

5. Media Handling and Advanced Features

Today’s editors are expected to do much more than just handle text. Whether it’s uploading images, collaborating with a team, or ensuring accessibility, these features play a big role in how useful and future-ready your editor really is.

Image and File Management

A modern editor should make uploads feel seamless and intuitive, especially for non-technical users.

Look for:

  • Drag-and-drop support for quick uploads
  • Direct uploads to cloud storage or CDNs
  • Automatic optimization (compression, resizing, format conversion)
  • Preview and editing options before publishing

Transforming Froala WYSIWYG editor with Filestack image uploader

This not only improves user experience but also helps maintain performance by ensuring media files are optimized from the start.

Explore more about transforming your Froala WYSIWYG editor with the Filestack image uploader and enterprise-grade file handling.

Real-Time Collaboration

If your app involves teams, collaboration becomes a core feature, not a nice-to-have.

Look for:

  • Multi-user editing with presence indicators
  • Conflict resolution to prevent overwriting changes
  • Live updates so everyone sees changes instantly
  • Version history or undo tracking for safety

These features make it possible for teams to work together smoothly without breaking content or losing progress.

Accessibility (WCAG 2.1)

Accessibility isn’t optional anymore. It’s essential for both usability and compliance.

Your editor should:

  • Support full keyboard navigation
  • Be screen-reader friendly
  • Provide proper ARIA labels and semantic structure
  • Meet WCAG 2.1 standards

This ensures your content creation tools are inclusive, usable by everyone, and aligned with modern legal and ethical expectations.

Strategic Comparison: Top Editors at a Glance

With so many editors available, it can be hard to quickly understand how they differ in real-world use. This side-by-side comparison gives you a clear snapshot of how leading options stack up. So you can match the right tool to your app’s needs without overthinking it.

FeatureFroalaTiptap (Headless)TinyMCE
Setup TimeMinutesHours (Custom UI)Moderate
UI AestheticsModern / PremiumFully CustomTraditional
Best ForSaaS, CMS, DashboardsCustom “Notion-style” appsLegacy enterprise apps

Quick Insight

  • Froala → Best balance of speed, design, and ease
  • Tiptap → Maximum flexibility, but requires heavy development
  • TinyMCE → Reliable, but more traditional in UX

Conclusion: Elevating Your App’s Architecture

Choosing a WYSIWYG editor isn’t just a small decision. It shapes how your entire application handles content. When choosing a WYSIWYG editor for your modern workflow, you should consider many factors like its architecture, security, UI/UX, framework compatibility, media handling and more advanced features. 

Headless editors give you full control, but they demand time, effort, and ongoing maintenance. On the other hand, a polished, full-featured solution like Froala Editor gives you a strong foundation from day one, without limiting your ability to scale.

The goal is simple:
Find an editor that works with your workflow, not against it.

Don’t settle for a mediocre editing experience. Explore what a modern editor should feel like.

Compare Froala’s features and start your free trial today.

FAQ

What is the best WYSIWYG editor for React in 2026?

It depends on your needs. For most applications, a ready-to-use editor like Froala Editor offers the best balance of performance, UI, and ease of integration.

How does a WYSIWYG editor impact site speed?

Editors can significantly affect page load time. Lightweight, modular editors improve performance by reducing unnecessary code and loading only required features.

Is it safe to allow users to upload images through an editor?

Yes, if the editor includes proper validation, sanitization, and secure upload handling. Without these, uploads can become a security risk.

What does “Headless” mean in a WYSIWYG context?

A headless editor provides only the editing engine without a UI. Developers must build the interface themselves, offering flexibility but requiring more effort.

Do modern editors support Markdown?

Many modern editors support Markdown either natively or through plugins, making them flexible for different workflows.

Why is SOC 2 compliance important for an editor?

SOC 2 compliance ensures that the editor meets strict security and data protection standards, especially important for SaaS and enterprise applications handling sensitive data.

Froala Editor V5.2 with Filerobot, CSP Compliance and Stability

Froala release 5.2.0

We’re thrilled to announce the release of Froala Editor V5.2, a milestone update that brings powerful new capabilities and critical stability improvements to your favorite WYSIWYG editor. This release represents our commitment to delivering the features you’ve been asking for while ensuring Froala works flawlessly in even the most demanding enterprise environments.

This release includes major enhancements: advanced image editing with Filerobot integration, smarter list handling that preserves document structure, and full CSP compliance for enterprise security.

Let’s dive into what’s new.

Advanced Image Editing: Introducing Filerobot as a Modern Alternative

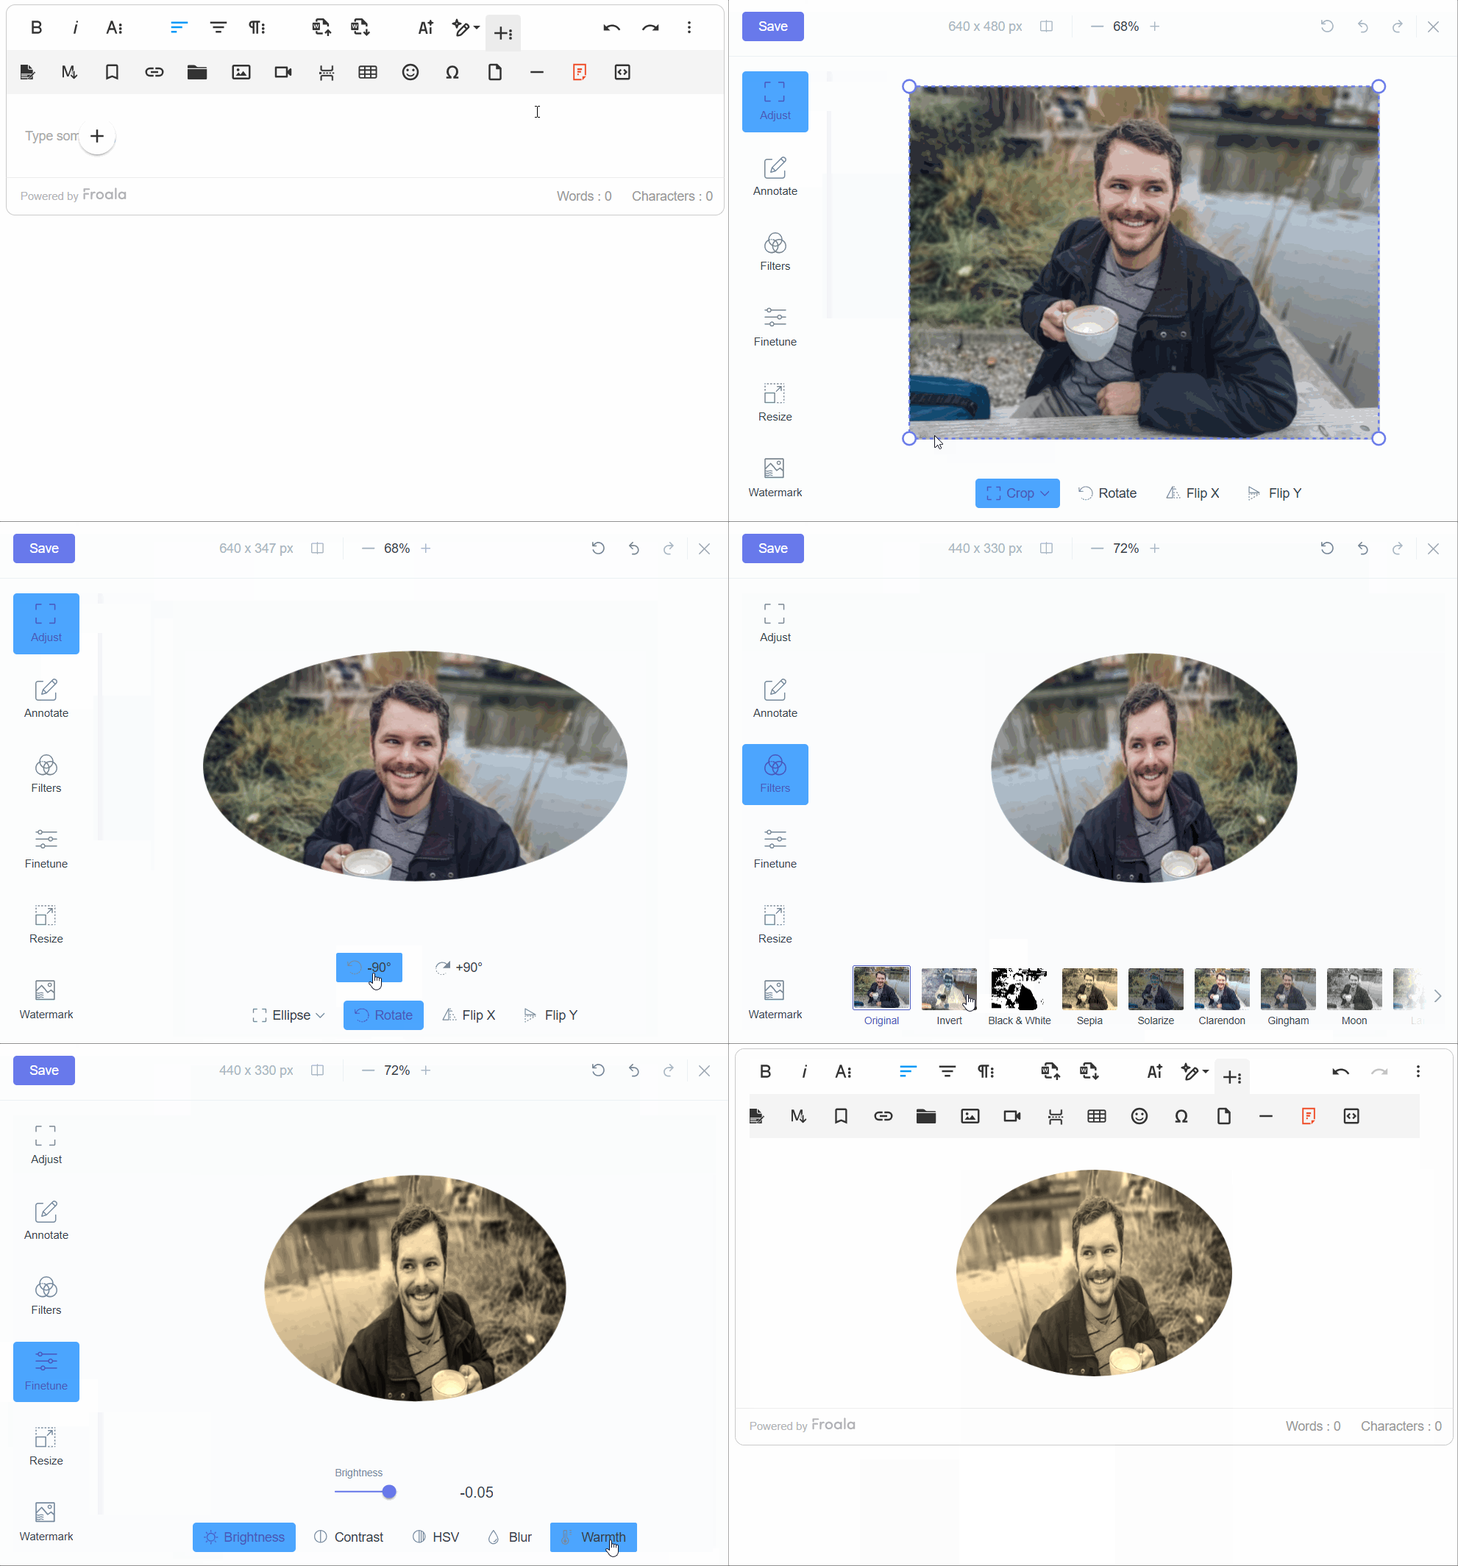
Froala Editor has long supported advanced image editing through the TUI Image Editor plugin. However, the TUI Image Editor library appears to be abandoned, with no active maintenance or updates. To improve long-term stability and provide users with modern, actively maintained tools, V5.2 introduces the Filerobot Image Editor plugin, a powerful, professionally supported alternative that brings cutting-edge image editing capabilities directly into Froala Editor.

Existing TUI Image Editor users can continue using their current setup, but we strongly recommend exploring Filerobot for its active development, ongoing support, and enhanced reliability. This new integration means no more switching between applications, uploading and re-uploading images, or breaking your creative flow. Now, you can perform sophisticated image transformations right where you’re working, with the confidence that comes from actively maintained software.

What Can You Do with Filerobot?

The Filerobot integration unlocks a comprehensive suite of image editing capabilities:

  • Annotations: Add text, arrows, shapes, and callouts to highlight important details.
  • Filters: Apply professional filters to enhance image appearance and mood
  • Resize: Adjust dimensions precisely to meet your layout requirements
  • Rotate & Flip: Correct orientation and create mirror effects
  • Watermarks: Protect your images with custom watermarks and branding
  • Crop: Focus on what matters by removing unnecessary portions

Advanced Image Editing

Need more advanced capabilities? If your image transformation requirements go beyond Filerobot’s feature set, Froala also supports the Filestack plugin, which provides additional tools and integrations for complex image processing workflows.

Seamless Integration, Effortless Workflow

We’ve designed the Filerobot plugin to feel like a natural extension of Froala Editor. When activated and you select an image in your content, you will see an “Advanced Edit” button on the image edit popup. Click it, and Filerobot’s powerful editor opens right within your interface. Make your edits—whether it’s adding annotations to a screenshot, applying a filter to a photo, or resizing an image to fit your design—and when you’re done, simply save. The updated image is instantly reflected in your editor, with all changes preserved.

For existing TUI Image Editor users: You can continue using your current setup without any disruption. However, we encourage you to evaluate Filerobot for future projects and consider migrating when convenient. The long-term stability, active maintenance, and ongoing feature development make Filerobot the recommended choice for new implementations and a smart migration path for existing ones.

The Filerobot Image Editor plugin represents our vision for the future of advanced image editing in Froala: powerful capabilities that don’t compromise on user experience, backed by active maintenance and a commitment to long-term reliability.

Smarter List Handling: Keeping Your Structure Intact

Lists are essential for structuring content like documentation, tutorials, product descriptions, and blog posts.

In Froala, pressing backspace at the beginning of a list item merges it with the previous item.

To remove only the list marker (dot, number, etc.) with the backspace key, keeping the text on the same line without merging, set the new V5.2 configuration preserveListLineOnBackspace to true.

This new configuration allows inserting multiple lines within a single list item, preserving list structure, content organization, and visual separation.

new FroalaEditor('#editor', { 

    preserveListLineOnBackspace: true

});

This seemingly small enhancement reflects our philosophy: great editing experiences come from understanding how people actually work and removing the friction points that slow them down.

Enterprise Security: Full CSP Compliance

Security isn’t optional, especially in enterprise environments where data protection, compliance requirements, and security policies are paramount. Froala V5.2 delivers a critical enhancement for organizations with the strictest security requirements: full Content Security Policy (CSP) compliance.

Content Security Policy (CSP) is a security standard that helps prevent cross-site scripting (XSS) attacks and other code injection vulnerabilities. Many enterprise applications implement strict CSP configurations that disallow unsafe-inline styles. This is a security best practice that prevents malicious inline code execution.

Froala Editor V5.2 now fully supports CSP-compliant environments. We’ve re-engineered how the editor applies formatting to work seamlessly within strict CSP configurations that disallow inline styles.

Now, when users apply formatting like font size, font family, bold, italic, or any other style-based changes, Froala does so in a way that respects CSP restrictions. The editor maintains full functionality—all toolbar features work exactly as expected—while adhering to your organization’s security policies.

Why This Matters for Enterprise Deployments

For enterprise IT teams, this means you can finally deploy Froala in applications with strict security requirements without compromising on functionality or user experience.

For security officers, it means one less exception to your CSP policy, reducing your attack surface and maintaining consistent security standards across your application portfolio.

For developers building enterprise applications, it eliminates the frustrating choice between security and functionality. You can implement robust CSP policies and still provide users with a rich, fully-featured editing experience.

For end users in regulated industries (healthcare, finance, government), it means access to powerful content creation tools that meet your organization’s compliance requirements.

CSP compliance isn’t just a technical checkbox—it’s a commitment to building software that works in the real world, where security and functionality must coexist.

Stability & Compatibility:

Beyond the headline features, V5.2 includes several critical bug fixes that improve stability, compatibility, and reliability across different browsers and use cases. These fixes address real issues reported by our user community and ensure Froala works flawlessly in your production environments.

Responsive Toolbar Behavior Fixed

V5.2 delivers improved responsive toolbar behavior that ensures toolbar buttons remain consistently visible and properly positioned across all scenarios—whether the screen resolution changes, the editor frame refreshes, or users switch between displays.

Your toolbar now adapts seamlessly to dynamic environments, giving you reliable access to all editing tools regardless of how your interface changes. This enhancement is particularly valuable for responsive web applications and users working across multiple displays or adjusting browser window sizes. Rest assured that every button you need will be there, exactly where you expect it.

Security Dependency Updates

Security is an ongoing commitment. A vulnerability was discovered in serialize-javascript versions prior to 7.0.3. V5.2 updates this dependency to 7.0.3, along with copy-webpack-plugin to 14.0.0, ensuring your applications remain protected against known vulnerabilities.

These updates ensure your applications aren’t exposed to known vulnerabilities, maintaining the security integrity of your entire stack.

Paste Content Enhancements

Pasting content from external sources is one of the most common operations in any editor, and V5.2 includes critical fixes that make this experience more reliable.

And More…

Explore the Froala changelog.

What’s Next: Real-Time Collaboration Coming Soon

We’re excited to give you a preview of what’s coming next: real-time collaboration—one of the most highly-anticipated features in Froala’s roadmap.

Imagine multiple team members editing the same document simultaneously, seeing each other’s changes in real-time, with cursor positions, selections, and edits synchronized instantly across all users. This is the future we’re building, and it’s coming soon in an upcoming release.

Our team is working diligently to ensure this feature meets the high standards you expect from Froala: reliable, performant, and seamlessly integrated into your existing workflows. Stay tuned for more details in the coming months.

Upgrade to V5.2 Today

Froala Editor V5.2 represents a significant leap forward in capability, security, and stability. With advanced image editing through Filerobot integration, smarter list handling, full CSP compliance, and critical bug fixes, this release delivers tangible value for developers and end users alike.

Key Benefits at a Glance:

Advanced image editing without leaving your workflow

Preserved list structure with intelligent backspace handling

Enterprise-grade security with full CSP compliance

Improved stability across browsers and use cases

Enhanced paste functionality for reliable content import

Updated dependencies addressing security vulnerabilities

Whether you’re building the next generation of content management systems, developing enterprise applications with strict security requirements, or simply want the most reliable and feature-rich editing experience available, V5.2 has something for you.

Ready to upgrade?

Visit our Froala upgrade documentation for detailed instructions and migration guidance. As always, our support team is here to help if you have any questions or need assistance with the upgrade process.

Upgrade to Froala Editor V5.2 today and unlock new possibilities.

Try The Latest Froala Editor

Explore a variety of examples that demonstrate the functionality of the Froala HTML Editor.

Thank you for being part of the Froala community. We’re committed to continuously improving and delivering the tools you need to build exceptional content experiences.

How a Text-to-HTML Editor Speeds Up Content Publishing

A stopwatch beside a glowing content workflow showing sequential stages from ideation through writing, review, and formatting to final publishing, representing how a text-to-HTML editor accelerates the entire content production cycle.

Every publishing team has felt the drag of slow content cycles. A writer finishes a draft, a developer formats it into HTML, someone spots an error, and the whole loop starts again. That back-and-forth costs time that most teams don’t have.

A text-to-HTML editor compresses that cycle by letting writers produce clean, structured markup directly, without touching a line of code.

This results in faster publishing, fewer handoffs, and content that reaches audiences sooner. In this article, you’ll learn how that happens and why it matters for teams aiming to build scalable content workflows.

Key Takeaways

  • Text-to-HTML editors remove the developer dependency from routine content tasks, allowing writers to format and publish structured content independently without writing a line of HTML.
  • Automated HTML generation eliminates the syntax errors, mismatched tags, and inconsistent attribute usage that manual coding regularly introduces.
  • Predefined styles and centralized formatting controls enforce consistency across a content library, so a style update applies everywhere at once rather than requiring manual page-by-page corrections.
  • A shared editing environment reduces handoffs between writers, editors, marketers, and developers, compressing approval cycles and speeding up time-sensitive publishing.
  • In-house upload infrastructure carries hidden engineering costs, including monitoring, incident response, SDK upkeep, and scaling work, that accumulate significantly even when nothing is actively broken.

Eliminates Manual HTML Coding

Writing HTML by hand is relatively slow even for experienced developers. For content teams without coding backgrounds, it’s a hard dependency that creates bottlenecks every time something needs to go live.

A text-to-HTML editor helps alleviate that dependency. With it, writers format content visually through a toolbar, and the editor generates valid, structured markup in the background automatically. Bold text becomes <strong> tags, headings become proper <h2> or <h3> elements, and lists render as clean <ul> or <ol> structures.

Note: Common HTML tags used in manual conversion include <p> for paragraphs, <h1> to <h6> for headings, <strong> or <b> for bold, <em> or <i> for italics, <ul> and <li> for lists, and <br> for line breaks. A text to HTML converter can automatically wrap plain text in HTML paragraph tags, streamlining the process for web publishing.

You’re also saving more than just time. Manual HTML coding introduces syntax errors that break page rendering, mismatched tags that create layout problems, and inconsistent attribute usage that complicates maintenance. Automated output from a capable editor eliminates all three.

Note: Clean markup refers to HTML that follows a consistent structure, uses semantic tags correctly, and contains no redundant or broken code. It matters for both browser rendering and search engine indexing.

Streamlines Content Creation Workflows

The time a piece of content spends between “written” and “published” is rarely just writing time. It also includes formatting, review, correction, and reformatting, steps that compound quickly across a large content operation.

A text-to-HTML editor shortens each of those steps. For example, real-time preview shows writers exactly how content will render as they type. Many converters provide instant conversion results and allow users to preview the generated HTML code before finalizing or copying it, ensuring accuracy and ease of use. As a result, formatting errors surface immediately rather than at the end of the review cycle.

Toolbar controls handle heading levels, alignment, indentation, and inline styles in a single click. Revisions that previously required a developer to reopen a template and adjust HTML directly now happen in the editor itself.

For teams publishing in volume, this compression across multiple steps per article adds up to significant time savings each week.

Ensures Consistent Formatting Across Content

A before-and-after comparison of a content library, with chaotically varied and inconsistently formatted documents on the left and a neatly organized, uniformly structured set of documents on the right, showing the formatting consistency a text-to-HTML editor enforces across a content operation.

Inconsistent formatting is a quiet problem. Individual pieces may look acceptable in isolation, but across a content library, fragmented experiences that undermine brand credibility might emerge. These typically include mismatched heading sizes, irregular spacing, and varying link styles.

A text-to-HTML editor enforces consistency through predefined styles and templates that all content inherits by default. Rather than each writer making independent formatting decisions, the editor can apply a shared set of rules automatically. Heading hierarchy, paragraph spacing, blockquote styling, and list formatting all follow the same pattern across every piece.

This matters especially for large teams where multiple writers contribute to the same platform. Centralized formatting controls mean a style update applies everywhere at once, instead of requiring someone to manually correct every affected page. As a result, you get a content library that reads and feels cohesive regardless of who wrote each piece.

Speeds Up Collaboration Between Teams

Content publishing rarely involves a single person. Writers, editors, marketers, and developers all touch a piece before it goes live. However, each back-and-forth between them is a potential delay.

A text-to-HTML editor can help reduce those delays by giving all stakeholders a shared environment they can each use meaningfully. Writers draft and format in the same tool developers use to inspect or adjust output. Marketers can make copy changes without filing a ticket and waiting for a developer to implement them. Lastly, editors can review formatted content in context rather than reading raw HTML.

As a result, shorter feedback loops follow naturally. When reviewers can make corrections directly in the editor instead of annotating a document and sending it back, approval cycles shrink.

Improves Content Quality with Rich Formatting Options

Plain text from an input box can communicate information, but formatted content does it more effectively. For instance, structure helps readers scan, media increases engagement, and visual hierarchy signals what matters most on a page.

Many text-to-HTML converters support various input formats, including plain text, Word documents (.doc or .docx), and text files, making them versatile tools for handling different types of files. This means users can easily convert content from Word documents and other files into HTML code for web publishing.

A text-to-HTML editor gives writers access to rich text formatting without requiring them to understand the underlying implementation. For example, images and videos embed directly through drag-and-drop or upload interfaces, with the editor handling the correct HTML output.

Tables help organize comparative information cleanly, and ordered and unordered lists break down complex points into scannable sequences. Moreover, inline links attach to selected text in a single action.

These key features matter because they bring content quality decisions closer to the person who understands the content.

Enhances Performance and Publishing Speed

A side-by-side comparison of two editor interfaces, one lightweight and fast with speed lines radiating from it and one heavy and constrained by chains and ropes, illustrating the performance difference between an optimized and a sluggish text editor.

An editor’s own performance can directly affect publishing speed. Slow loading times and typing lags will lead to content editors taking longer to finish their work. The same goes when an editor struggles with long documents with many types of content (e.g., images).

Well-built text-to-HTML editors like Froala use lightweight architecture that keeps the editing experience fast regardless of document length or complexity. Rendering updates as users type without noticeable delay, even in content-heavy pages with embedded media. Large documents, such as long-form guides or documentation, don’t degrade the editor’s responsiveness the way they would in heavier tools.

For publishing teams with daily output targets, an editor that keeps pace with how quickly writers actually work removes frustration. The tool stops being something people work around and becomes something they depend on.

Simplifies Integration with CMS and Applications

An editor that works well in isolation but connects poorly to your stack creates a new bottleneck at integration. Content still needs to reach its destination, whether that’s a CMS like WordPress, a database, a web application, or a third-party platform.

Modern text-to-HTML editors expose their functionality through APIs and support embedding within existing application frameworks. This means the editor lives inside your CMS interface, custom publishing tool, or content management dashboard without requiring separate workflows. Developers configure the integration once, and writers interact with the editor wherever they already work.

Compatibility with frameworks like React, Vue, and Angular means teams can embed the editor into modern web applications without architecture issues. Content output arrives in whatever format the receiving system expects, structured HTML, JSON, or plain text, depending on the integration configuration.

Reduces Errors and Improves Reliability

Every manual step in a content workflow is a point where errors can enter. A developer copying formatted content into a template can accidentally omit a closing tag. Similarly, a writer pasting from a word processor can import hidden formatting characters that break the layout. A hand-edited HTML file can also contain subtle mistakes that only surface in specific browsers.

A document containing broken, error-flagged HTML markup passing through a glowing validation gate and emerging on the other side as clean, correctly structured HTML, illustrating how a text-to-HTML editor automatically corrects and sanitizes code output.

A text-to-HTML editor removes most of these failure points by generating HTML output programmatically. The editor validates structure as users create content, flags malformed elements, and sanitizes input that could introduce problematic characters or scripts. Output arrives at its destination as clean, predictable HTML that behaves consistently across browsers and rendering environments.

Content sanitization also matters for security, especially against cross-site scripting or XSS. Editors that handle user-generated content, such as comments, strip potentially harmful code from input before it reaches storage. This helps prevent malicious scripts from entering your content pipeline through the editor itself.

Conclusion

The speed at which teams publish directly affects how competitive their content operation is. A text-to-HTML editor removes the manual steps, technical dependencies, and formatting inconsistencies that slow that process down at every stage.

The editors that deliver the most value combine clean output, intuitive formatting controls, reliable integrations, and performance with how writers actually work. Whether you’re building a publishing platform from scratch or upgrading existing workflows, choose an editor that helps your users the most.

Froala is one example of an editor built with those priorities in mind. It offers a lightweight, feature-rich implementation that development teams can embed and configure with minimal overhead.

Frequently Asked Questions

What is a text-to-HTML editor?

Text-to-HTML editors are visual editing tools that let users convert plain text or HTML text into structured HTML code for use on any webpage. With these tools, writers work with buttons and toolbar controls rather than code, streamlining the process of creating and publishing content for websites, emails, or CMS platforms. Users can then store, display, or integrate the converted HTML into their webpages or applications afterwards.

How does a text-to-HTML editor speed up publishing?

It removes the manual coding and back-and-forth steps that slow most content workflows down. Writers format and finalize content in a single tool, without needing a developer to translate the draft into HTML.

Can non-developers use a text-to-HTML editor?

Yes. The editor’s visual interface handles all formatting through familiar controls like bold, headings, and lists. It generates HTML automatically, so writers never need to write or read code.

Does a text-to-HTML editor ensure clean HTML output?

Most modern editors do. They generate validated, semantic markup rather than bloated or inconsistent HTML tags that often result from pasting content from word processors or editing manually.

Is a text-to-HTML editor easy to integrate?

Most modern editors are designed for straightforward integration. They expose an API for connecting to external systems. Aside from this, they support embedding within popular front-end frameworks like React and Vue. Initial setup typically takes minutes or hours rather than days for a development team familiar with the target stack.

graphical user interface, text

Choosing the Right Froala AI Assist Integration for Your Stage

Choosing the Right Froala AI Assist Integration

AI-assisted editing is quickly becoming a standard feature in modern applications. With Froala’s AI Assist plugin, you can bring content generation, rewriting, summarization, and more—directly into your editor.

The tricky part isn’t picking a provider. It’s picking an integration pattern that fits where you actually are in your project.

This guide walks through a realistic journey: how you’ll probably start, where you’ll feel the friction, and when (and why) you’ll want to switch.

Key Takeaways

  • Three integration patterns available: direct API, custom backend, and endpoint configuration.
  • Direct API is fastest to set up, but exposes API keys. Prototypes only.
  • Custom backend keeps keys server-side and adds rate limiting, logging, and validation.
  • Endpoint configuration lets Froala handle request wiring. Best when your API structure is stable.
  • Need sanitization, A/B testing, or fallback logic? Use a custom backend, not configuration.
  • AI Assist is provider-agnostic. Swap models or use self-hosted AI without touching your frontend.

The Journey Begins: “Just Get It Working”

You want to ship a prototype. Fast. You don’t need perfection—you need proof that AI in your editor actually improves the user experience.

Enter: Direct API Integration.

Direct API: The Seductive Fast Path

This is the path of least resistance. You write a custom request function that talks directly to your AI provider from the frontend:

aiAssistRequest: async function (prompt) {
  const response = await fetch('https://api.openai.com/v1/chat/completions', {
    method: 'POST',
    headers: {
      'Content-Type': 'application/json',
      'Authorization': `Bearer YOUR_API_KEY`
    },
    body: JSON.stringify({
      model: 'gpt-4',
      messages: [{ role: 'user', content: prompt }]
    })
  });

  const data = await response.json();
  return data.choices[0].message.content;
}

Why developers choose this:

  • It works immediately
  • Full control over the request
  • Easy to debug
  • Can swap AI providers with a few lines of code
  • Perfect for testing different prompts and UX flows

And it is genuinely useful for this stage. You learn what AI editing feels like in your app. You test if users actually want this feature.

The First Problem Appears: API Keys in the Wild

A week in, you realize something uncomfortable.

Your API key is sitting in the front-end code. Anyone with browser DevTools can see it. Your quota is exposed to the world. If someone finds it, they’re using your API calls.

You brush this aside. “It’s just a prototype.” But then you show it to your team. They ask: “Wait, where’s your key?” You say “in the code.” They make a face.

This is the first friction point. 

The Second Problem Emerges: Loss of Control

A few days later, you notice something else.

Your API usage is spiking—way beyond what your users should generate. You dig in. Turns out someone is hammering your endpoint (maybe intentionally, maybe a bug in the frontend). You have no way to throttle it, log it, or stop it. You just watch the bill climb.

Worse: you have no visibility into what’s happening. Which prompts are users using? What’s working? What’s failing? With the frontend integration, you’re blind.

This is the second friction point. And it stings more than the first.

At this moment, most developers realize: “I need a backend.”

The Transition: When Direct API Breaks Down

Before you rewrite everything, understand what’s actually broken:

  • Security: Your keys are exposed
  • Control: You can’t throttle, log, or validate requests
  • Observability: You don’t know what’s happening
  • Scalability: You have no way to add business logic (rate limiting, moderation, user-specific rules)

The good news: you don’t have to change your architecture everywhere. You just need a middle layer.

The Backend Approach: Reclaiming Control

Here’s the pattern that fixes all of this:

Frontend talks to your backend, which talks to the AI provider.

Frontend code gets simpler:

aiAssistRequest: async function (prompt) {
  const response = await fetch('/api/ai-assist', {
    method: 'POST',
    body: JSON.stringify({ prompt })
  });
  const result = await response.json();
  return result.content;
}

Now your backend owns the integration:

app.post('/api/ai-assist', async (req, res) => {
  const { prompt } = req.body;
  
  // Validation
  if (!prompt || prompt.length < 3) {
    return res.status(400).json({ error: 'Invalid prompt' });
  }

  // Rate limiting (per user)
  const userQuota = await checkUserQuota(req.user.id);
  if (userQuota.exceeded) {
    return res.status(429).json({ error: 'Rate limit reached' });
  }

  // Call AI provider with your API key (safe on the backend)
  const response = await fetch('https://api.openai.com/v1/chat/completions', {
    method: 'POST',
    headers: {
      'Content-Type': 'application/json',
      'Authorization': `Bearer ${process.env.OPENAI_API_KEY}`
    },
    body: JSON.stringify({
      model: 'gpt-4',
      messages: [{ role: 'user', content: prompt }]
    })
  });

  const data = await response.json();
  const content = data.choices[0].message.content;

  // Post-processing (sanitization, moderation, etc.)
  const safeContent = sanitize(content);

  // Logging and analytics
  await logAIUsage({
    userId: req.user.id,
    prompt,
    response: safeContent,
    model: 'gpt-4',
    timestamp: new Date()
  });

  res.json({ content: safeContent });
});

What you’ve gained:

  • Security: API keys never leave your server
  • Control: Rate limiting, user-level quotas, request validation
  • Visibility: Every request is logged
  • Flexibility: You can add business logic (moderation, filtering, user preferences)
  • Scalability: You can swap providers, add fallbacks, implement caching—all without touching the frontend

The Hidden Cost: Complexity

But here’s what nobody tells you: this approach has a cost.

You’ve moved the problem. Now instead of managing API keys in the frontend, you’re managing:

  • Backend deployment and scaling
  • Error handling across two layers (frontend and backend)
  • Latency (an extra network hop)
  • Debugging (when something breaks, which layer?)
  • Testing (you need to mock both the frontend and the AI provider)

This is why you shouldn’t do this for a prototype. The overhead isn’t worth it. But once you have users, traffic, and a billing problem? It becomes essential.

The Third Pattern: When Configuration Wins Over Custom Code

During code review, someone notices something. Your frontend has a custom request function that just wires data to an endpoint and parses the response back.

“Why are we maintaining this?” they ask. “Can’t Froala just handle it?”

They’re right. And that’s when you realize: Froala can generate the request function itself if you give it the structure.

Instead of writing custom code, you define the shape of your API via configuration:

aiAssistEndpoint, aiAssistHeaders, aiAssistDataKeys, aiAssistAdditionalData, and aiAssistResponseParserPath

Froala uses these to build the request. No custom function needed.

new FroalaEditor('#editor', {
  aiAssistEndpoint: '/api/ai-assist',  // your lightweight backend
  
  aiAssistHeaders: {
    'Content-Type': 'application/json'
  },

  aiAssistAdditionalData: {
    model: 'gpt-4'
  },

  aiAssistResponseParserPath: 'content'
});

Your frontend stays declarative. Configuration is reviewable by anyone—no hidden logic to decipher. It’s easier to hand off to a new teammate, easier to audit for security. You’re trading flexibility for predictability, and your team gets to spend time on things that actually matter

When This Works

This pattern is ideal when:

  • You have a predictable, stable API structure
  • Your team values readable configuration over custom functions in your frontend code
  • You want a clean, maintainable frontend setup that doesn’t require imperative request logic

When This Breaks Down

But the moment you need actual logic, configuration becomes a cage.

Say you need to sanitize user input before sending it to the AI. Or log which user requested what. Or implement A/B testing with different prompts. Or add fallback logic if the primary model fails.

Now configuration isn’t enough. You’re forced to either:

  1. Add the logic to your backend (which wasn’t supposed to have logic)
  2. Go back to custom functions in the frontend (defeating the purpose)

The real tradeoff: Configuration gives you less control, but more clarity. Use it when your requirements are stable. The moment they shift, switch to custom functions. Don’t fight the framework.

How to Choose: A Framework

Here’s a practical decision tree:

Are you building a prototype or MVP?

 Start with Direct API. Accept the security tradeoffs. Move fast. Learn if users want this.

Do you have users and traffic?

 Move to Custom Backend. Your security concerns are real now. So is your need for control.

Is your API structure stable and your team values clarity over flexibility? 

Use Standard Endpoint Configuration. Let Froala handle the wiring. You’ll spend less time maintaining frontend boilerplate.

Do you need logic beyond passing data through? (sanitization, user-specific rules, A/B testing, fallback handling) 

Use Custom Backend. Configuration will constrain you. Write the function, own the behavior.

One More Thing: Froala Doesn’t Lock You In

Whatever you choose, remember this: Froala AI Assist isn’t tied to OpenAI, or any specific provider.

  • You can swap providers by changing one API call
  • You can add custom AI logic (call multiple models, chain requests, implement fallbacks)
  • You can use self-hosted models or internal AI systems
  • Each pattern supports all of this

The flexibility is the whole point. You’re not choosing a provider. You’re choosing how much control and complexity you want right now.

Conclusion

Froala doesn’t lock you into one way of integrating AI—it gives you multiple paths to the same outcome.

Use Direct OpenAI API integration to move fast. Use a custom backend integration to scale and control. Use standard endpoint configuration when simplicity is enough.

The real power of AI Assist is not just what it does but how flexibly you can integrate it into your system.
graphical user interface, text

Visual HTML Editor vs. Manual Coding: When Developers Need Both

Hand-drawn illustration showing code symbols and a visual editor interface with a brush, representing the balance between manual coding and visual HTML editing in modern web development

In reality, developers don’t need to pick sides between manual coding and visual editing. Modern applications rely on both. Manual coding gives you full control over structure, logic, and performance, while a visual HTML editor enables fast, flexible content creation without touching code.

The right approach depends on what you’re building, who manages the content, and how you handle security and scalability. Let’s break down how these two methods work and how combining them leads to better products.

Key Takeaways

  • Manual coding and visual editors serve different roles: Coding handles structure, logic, and performance, while visual editors simplify content creation.
  • Use the right tool for the job: Core application features should be hand-coded, while frequently updated or user-generated content works best with a visual editor.
  • The hybrid approach is the industry standard: Modern applications combine both methods to balance control with flexibility.
  • Visual editors improve team efficiency: They empower non-developers to manage content without relying on developer resources.
  • Developer-first features matter: Editors like Froala Editor offer framework integration, security, and customization, making them production-ready.

What Is the Difference Between Manual Coding and a Visual HTML Editor?

Understanding the difference between manual coding and a visual HTML editor is key to choosing the right approach for your project. While both are used to create web content, they serve very different purposes. One gives developers full control over structure and logic, while the other focuses on simplifying content creation through a visual interface.

Split-screen illustration showing manual coding in a dark code editor on the left and a visual HTML editor interface on the right, highlighting the transition from writing code to designing web content visually

Manual Coding

Manual coding means writing HTML, CSS, JavaScript, or JSX directly in an IDE like VS Code. It’s tightly integrated into your development workflow, version control, and deployment pipeline.

Best for:

  • Application layouts and UI structure
  • Navigation systems
  • Interactive components
  • Core business logic

Visual HTML Editor

A visual HTML editor is a browser-based tool that lets users create formatted content visually. Actions like clicking “Bold” or inserting a table are instantly converted into clean HTML.

Best for:

  • Blog posts and articles
  • Product descriptions
  • CMS content
  • User-generated input

When Manual Coding Is the Best Choice

Manual coding becomes the better choice when precision, control, and performance matter most. It allows developers to define exactly how an application behaves and renders. This approach makes it essential for building core features, handling complex logic, and optimizing for speed and scalability.

1. Building Core Application Structure

Manual coding is essential for defining layouts, responsive grids, and reusable UI systems. These are foundational elements that require precision and consistency.

2. Developing Interactive Logic

Features like dashboards, filters, animations, and real-time updates rely on JavaScript logic that visual editors simply can’t replicate.

3. Fine-Tuning Performance & SEO

When performance matters, especially for Core Web Vitals developers need direct control over the DOM, asset loading, and rendering behavior.

When a Visual HTML Editor Is the Better Option

A visual HTML editor is the better option when speed, flexibility, and ease of use are the priority. It simplifies content creation, allowing non-technical users to format and publish content quickly without relying on developers or touching the underlying code.

1. Empowering Non-Technical Teams

Marketing, support, and content teams can update text, create pages, or manage documentation without waiting for developers.

2. Scalable Content Production

For content-heavy platforms (like blogs, marketplaces, or knowledge bases), visual editors drastically reduce production time.

3. Standardizing Output

Editors act as guardrails ensuring users generate clean, structured HTML without breaking layouts or introducing invalid markup.

The Hybrid Standard: Why Modern Teams Use Both

The most effective approach today isn’t choosing one over the other. It’s combining both in a smart, structured way. Modern teams treat manual coding and visual editing as two parts of the same system, each handling what it does best.

Developers focus on building the engine of the application: things like architecture, performance, logic, and UI behavior using clean, maintainable code. At the same time, they embed a visual HTML editor (like Froala Editor) wherever content needs to be flexible, editable, or user-driven.

This separation creates a smoother workflow across teams. Developers don’t get pulled into constant content updates, and non-technical users don’t feel blocked by code. Everyone works faster, with fewer dependencies.

Real-World Examples:

  • SaaS dashboards: The analytics engine and UI are fully hand-coded, while sections like announcements or notes are editable through a visual editor.
  • E-commerce platforms: Checkout flows and payment logic are coded for reliability, while product descriptions, banners, and storytelling elements are managed visually.
  • CMS systems: Templates and layouts are fixed in code, but content fields are dynamic, allowing editors to update text, images, and formatting anytime.

In practice, this hybrid model keeps your application stable and secure, while still giving teams the freedom to update and scale content quickly. It’s a balance between control and flexibility, and that’s exactly what modern products need.

How a Visual HTML Editor Fits Into Developer Workflows

Modern visual editors aren’t just “content tools”. They’re built to slot directly into real development environments. Instead of disrupting your workflow, they extend it by giving you a controlled way to handle dynamic content without sacrificing code quality or security.

When teams evaluate an editor, they’re thinking beyond the UI. They’re asking: How well does this fit into our stack? Can we control it? Can we trust it in production?

Framework Compatibility

A good editor should feel like a natural part of your frontend stack. Tools like Froala Editor offer dedicated SDKs for frameworks like React, Vue, and Angular, so you can drop them into components just like any other library.

This means:

  • Faster integration
  • Cleaner component-based architecture
  • Less time spent on custom wrappers or workarounds

Security & Sanitization

One of the biggest concerns with user-generated content is security. Visual editors handle this by sanitizing HTML output automatically. For example, Froala Editor helps prevent Cross-Site Scripting (XSS) attacks by:

  • Stripping unsafe tags and attributes
  • Allowing developers to define “allowed” HTML elements
  • Ensuring clean, safe markup before it reaches your database

This reduces the need for building complex sanitization logic from scratch.

Customization via API

Developers rarely want a “fixed” editor. They want control. That’s where APIs come in.

With the right editor, you can:

  • Customize toolbars to match your product’s UI
  • Trigger events (like autosave on content change)
  • Integrate with backend workflows
  • Toggle between visual editing and raw HTML/code view

This level of control makes the editor feel like part of your system, not a third-party add-on.

Media Management

Handling images and files is often one of the trickiest parts of content workflows. Advanced editors simplify this with built-in media handling features.

You can:

  • Upload files directly to cloud storage or CDNs
  • Integrate with services like Filestack or S3
  • Control file types, sizes, and permissions
  • Optimize media delivery automatically

This ensures that content isn’t just easy to create. It’s also efficient and scalable in production.

In a well-designed workflow, a visual HTML editor doesn’t replace development. It complements it. Developers stay focused on building robust systems, while the editor handles the dynamic content layer in a safe, flexible, and user-friendly way.

Comparison Summary: At a Glance

To quickly understand how these two approaches differ, it helps to compare them side by side. This summary highlights the key distinctions between manual coding and a visual HTML editor, making it easier to decide which approach fits your needs.

FeatureManual CodingVisual HTML Editor
Primary GoalApp architecture & logicDynamic content creation
SpeedSlower for content updatesFaster publishing
SecurityFully developer-managedBuilt-in sanitization
MaintenanceRequires deploymentNo deployment needed
User BaseDevelopersDevelopers + non-technical users

How to Choose the Right Approach

Choosing between manual coding and a visual HTML editor really comes down to who is managing the content and how often it needs to change. Both have their place. It’s just about using each where it makes the most sense.

  • Use manual coding when the markup is tightly connected to your application’s structure or logic. If something affects layout, performance, or user interactions, it’s best handled directly in code where developers have full control.
  • Go with a visual HTML editor (like Froala Editor) when content needs to be updated frequently or managed by non-technical users. This is ideal for things like blog posts, product descriptions, or help docs; areas where speed and ease of editing matter more than deep technical control.
  • In most real-world projects, the best solution is to use both together. Let developers handle the core system, and give content teams the tools to manage what changes often. This balance keeps your application stable while making content updates fast and effortless.

Conclusion

Manual coding and visual editing serve different purposes. But together, they create a powerful workflow.

Manual coding builds the product. A visual HTML editor keeps the content dynamic and manageable.

If you want speed, flexibility, and control, the hybrid approach isn’t optional; it’s the standard.

Ready to bridge the gap between code and content?
Explore the Froala Editor and see how easily you can add professional editing capabilities to your React, Vue, or Angular applications.

FAQs

What is a visual HTML editor?

A visual HTML editor is a tool that allows users to create and format content visually while generating clean HTML in the background.

Is manual coding better than a visual editor?

It depends on the task. Manual coding is better for structure and logic, while visual editors are ideal for managing content.

How do professional editors handle security?

They include built-in sanitization, filtering unsafe tags, and preventing XSS attacks through configurable rules.

Can I switch between code and visual modes?

Yes, most modern editors allow you to toggle between WYSIWYG and code view for flexibility.

Who should use a visual HTML editor?

Developers, marketers, content creators, and anyone who needs to create or manage rich text content without writing code.

graphical user interface, text

Adding a React WYSIWYG Editor: Step-by-Step Guide (2026)

Illustration of a React WYSIWYG editor interface with text formatting toolbar and content editing area

Building a rich text editor from scratch with the contenteditable attribute can be tricky. What starts as a simple feature can quickly turn into a messy problem. You may encounter browser issues, cursor behavior issues, and messy HTML output.

That’s why most modern apps use a React WYSIWYG editor. It handles the hard parts, so you can focus on user experience and product features.

In this guide, you’ll learn how to add a ready-to-use editor to your React app. You’ll also see how to manage its state and extend it with media features and performance best practices.

Key Takeaways

  • A React WYSIWYG editor simplifies rich text editing by handling complex DOM logic and providing a visual editing experience.
  • Choosing the right library depends on your goals. Froala is ideal for fast, polished integration, while tools like Tiptap and Slate offer deeper customization.
  • Using a controlled component pattern (model + onModelChange) ensures your editor stays fully synced with React state.
  • Plugins and media handling extend functionality, allowing you to add features like images, tables, and links without building them from scratch.
  • Performance and security best practices such as lazy loading and sanitizing HTML are essential for building reliable, production-ready applications.

What Is a React WYSIWYG Editor?

A React WYSIWYG (What You See Is What You Get) editor allows users to format content visually. You can bold text, insert links, add images while the system handles the underlying structure (HTML, Markdown, or JSON).

Instead of manually manipulating DOM nodes, you work with structured editor state.

Why React-Specific Matters

React editors follow the concept of controlled components.

This means:

  • The editor’s content is stored in React state (useState or useReducer)
  • Every change flows through your app logic
  • You maintain full control over rendering and persistence

This is critical for:

  • Real-time previews
  • Autosave features
  • Validation and transformations

Step 1: Choosing the Right Editor Library for 2026

Choosing the right editor is the first big decision in your setup. Each library offers a different balance of control, features, and development effort. In this step, we’ll look at the main options for 2026 and help you pick the one that fits your project best.

Comparing the Landscape

There are two main approaches:

  1. Headless / Framework-based editors
  • Slate
  • Tiptap
  • Quill

These give you flexibility, but require:

  • Custom UI design
  • Styling from scratch
  • More development time
  1. WYSIWYG / Ready-Made Editors

Examples include:

  • Froala Editor
  • TinyMCE
  • CKEditor

These editors provide a complete, out-of-the-box editing experience with a built-in interface. They are designed for fast integration and ease of use.

They typically offer:

  • Pre-built UI and toolbar
  • Minimal setup required
  • Clean and consistent HTML output
  • Built-in features like media handling and formatting

This approach is best for applications that need to ship quickly without building a custom editor from scratch.

The Froala Advantage

If you want speed and polish, Froala Editor is a strong choice.

Instead of building everything yourself, Froala provides:

  • A fully styled, production-ready UI
  • Built-in toolbar and formatting tools
  • Clean, semantic HTML output

This reduces:

  • Development time
  • Maintenance overhead
  • Technical debt

Step 2: Installation and Basic Setup

Once you’ve chosen Froala as your editor, the next step is getting it running inside your React app. The setup is straightforward. You’ll install the required packages and render a basic editor component to start working with content immediately.

Install the Froala React SDK

Use your preferred package manager:

npm install react-froala-wysiwyg froala-editor

Or yarn:

yarn add react-froala-wysiwyg froala-editor

Create a Simple Editor (Hello World)

Start with a minimal working example to confirm everything is set up correctly:

import React, { useState } from "react";
import FroalaEditor from "react-froala-wysiwyg";

// Import Froala styles
import "froala-editor/css/froala_style.min.css";
import "froala-editor/css/froala_editor.pkgd.min.css";

function App() {
  const [content, setContent] = useState("");

  return (
    <div style={{ padding: "20px" }}>
      <h1>React WYSIWYG Editor Demo</h1>

      <FroalaEditor
        model={content}
        onModelChange={setContent}
      />

      <h2>Output:</h2>
      <div style={{ border: "1px solid #ccc", padding: "10px" }}>
        {content}
      </div>
    </div>
  );
}

export default App;

This example binds the editor content to React state and displays the output in real time.

Configure the Editor

Froala uses a clean configuration object, making customization simple and scalable:

<FroalaEditor
  model={content}
  onModelChange={setContent}
  config={{
    placeholderText: "Start typing...",
    charCounterCount: true,
    toolbarButtons: ["bold", "italic", "underline"]
  }}
/>

With this approach, you can easily control the editor’s behavior without cluttering your component logic.

Step 3: Handling State and Data Persistence

After setting up the editor, the next step is managing its content. This involves tracking updates, syncing with your application state, and preparing the data for storage or further processing.

Capture Editor Changes

Froala integrates seamlessly with React state using useState:

const [content, setContent] = useState("");

<FroalaEditor
  model={content}
  onModelChange={(newContent) => {
    setContent(newContent);
  }}
/>

Ensure Clean and Usable Output

The quality of the generated HTML matters, especially when storing or rendering content elsewhere.

Froala produces:

  • Semantic HTML structure
  • Consistent formatting
  • SEO-friendly markup

This makes your content ready for:

  • Database storage
  • Server-side rendering (SSR)
  • Search engine indexing

By the end of this step, you’re not just editing content; you’re managing structured, production-ready data that integrates smoothly with the rest of your application.


Get the complete example from this GitHub repo.

Froala vs Tiptap vs Slate: Quick Comparison

Choosing the right editor depends on how much control you need, how fast you want to build, and whether you prefer a ready-made UI or a fully customizable system. Here’s a side-by-side breakdown to help you decide.

Core Feature Comparison

FeatureFroalaTiptapSlate
TypeWYSIWYG (ready-made UI)Headless editorHeadless framework
Setup SpeedVery fastModerateSlow
CustomizationMediumHighVery high
UI IncludedYesNoNo
Learning CurveLowMediumHigh
Framework SupportReact, Angular, VueReact, Vue, JSReact only
Best ForQuick integration, CMSCustom UI appsComplex custom editors

Froala is plug-and-play, while Tiptap and Slate require building your own interface.

Architecture & Flexibility

AspectFroalaTiptapSlate
Underlying EngineHTML-basedProseMirrorCustom model
ExtensibilityPlugin-basedExtension systemFully programmable
Control Over OutputMediumHighVery high
Content ModelHTMLSchema-basedFully customizable
  • Tiptap uses ProseMirror, giving structured and scalable editing logic
  • Slate gives full control over document structure, but requires more effort

Performance & Developer Experience

FactorFroalaTiptapSlate
PerformanceFast & lightweightEfficient (modular)Depends on implementation
Developer ExperienceEasyExcellentComplex
Bundle SizeSmallOptimized (tree-shakable)Varies
DocumentationStrongStrongModerate
  • Tiptap keeps bundle size small through modular architecture
  • Slate performance depends heavily on how you build it

Features & Capabilities

CapabilityFroalaTiptapSlate
Built-in ToolbarYesNoNo
Plugins / ExtensionsYesExtensiveFlexible
CollaborationLimited (external)Strong supportRequires setup
SEO-friendly OutputClean HTMLStructuredCustomizable
Media HandlingBuilt-inRequires setupRequires setup
  • Froala focuses on clean HTML output and ready-to-use features
  • Tiptap offers 100+ extensions and collaboration support

When to Choose Each

If your goal is to ship fast → go with Froala.
If your goal is customization → go with Tiptap.
If your goal is building something completely unique → go with Slate.

Step 4: Extending Functionality with Plugins and Media

Once your editor is set up, the next step is adding more features. This is where plugins and media handling come in. In this section, you’ll learn how to enable extra tools like tables and lists, and how to handle images and files to create a richer editing experience.

Modular Plugin System

Froala uses a modular architecture. You can enable only what you need:

  • Tables
  • Lists
  • Code view
  • Emojis

This keeps your bundle lightweight. Learn more about using Froala plugins to extend the capabilities of your app.

Image Upload Workflow

Most editors don’t store images. They upload them and store URLs.

Here’s where Filestack comes in.

Filestack Integration Flow

  1. User uploads an image
  2. Filestack handles:
    • Upload
    • Security
    • CDN delivery
  3. Editor inserts the image URL

Benefits:

  • Fast global delivery
  • Automatic image optimization
  • Secure uploads

This removes the need to build your own upload backend.

Explore more about enhancing your Froala editor capabilities with Filestack file uploading.

Step 5: Best Practices for Performance and Security

Once your editor is working, it’s important to make sure it stays fast and secure. Rich text editors can add extra load to your app and introduce risks if not handled properly. In this section, you’ll learn simple best practices to improve performance and protect your application from common issues like unsafe user input.

Sanitizing Output

User-generated HTML can be dangerous.

Use DOMPurify before rendering:

import DOMPurify from "dompurify";

const cleanHTML = DOMPurify.sanitize(content);

This protects your app from XSS attacks.

Lazy Loading the Editor

Editors are heavy. Don’t load them upfront.

const FroalaEditor = React.lazy(() =>
import("react-froala-wysiwyg")
);

Wrap with Suspense to load only when needed.

This improves:

  • Initial page load speed
  • Core Web Vitals

Conclusion: Build or Integrate?

You can build your own editor using frameworks like Slate or Tiptap. But it comes with complexity, maintenance, and long-term costs.

A better approach:

  • Use a polished editor like Froala for UI and formatting
  • Use a service like Filestack for file handling

This way, you get:

  • Faster development
  • Better performance
  • Enterprise-grade reliability

Enhance your React WYSIWYG editor with Froala for a fast, polished, and feature-rich editing experience. Get started today and build powerful rich text interfaces with ease. 

Start your free trial.

FAQ

Which React WYSIWYG editor is best for 2026?

It depends on your needs.

  • Froala: Best for fast integration and polished UI
  • Tiptap/Slate: Best for full customization

How do I handle image uploads in a React rich text editor?

Use a file handling service like Filestack. It uploads files, returns URLs, and integrates directly with editors.

What is a “headless” editor library?

A headless editor provides editing logic without UI. You build the interface yourself (e.g., Tiptap, Slate).

How can I convert React editor content to Markdown?

You can convert editor content (usually HTML) to Markdown using libraries such as:

  • turndown (converts HTML → Markdown)
  • remark ecosystem (for more advanced processing)

Most WYSIWYG editors, including Froala, generate clean HTML. You can then pass that HTML through a conversion library to get Markdown if needed.

Is Draft.js still recommended for new React projects?

Draft.js is no longer actively evolving compared to newer tools. Most teams now prefer Tiptap or Slate.

How do I prevent XSS when using a WYSIWYG editor in React?

Always sanitize output using a library like DOMPurify before rendering HTML.

graphical user interface, text

How to Stop Permission Creep Using Role-Based Toolbar Access

Role-Based Toolbar Access

You’re building a document management system. Your first instinct is simple: editors can do everything, and everyone else is locked out. But then requests start arriving.

Legal needs to export PDFs. You make them editors. A week later, you realize they’ve accidentally deleted three documents.

Finance needs to print reports. You add them to the editor role too. Now they’re changing numbers.

Customer success wants to view documents in fullscreen during calls. You give them editor access because that’s the only way to unlock fullscreen. They’re now modifying customer contracts.

Each time, the reasoning is the same: “We just need them to have access to one thing.” Each time, you grant a role full editing permissions because your editor only understands two states—completely on or completely off. There is no middle ground.

This is permission creep. It happens in almost every content application. You end up with too many people who can edit, which means you need auditing, version history, and approval workflows just to contain the damage. Your security posture degrades. Your data integrity suffers. And your codebase fills with conditional logic trying to patch the gap between what people actually need and what your permission system can offer.

The root cause is a false equivalence: Can edit should never mean can print, export, view source, or take any other action. These should be independent permissions. But most editors—including Froala by default—conflate them. You unlock one button, you unlock everything.

Froala’s toolbarButtonsEnabledOnEditorOff solves this. It lets you lock content for editing while preserving a granular whitelist of allowed actions. The result is a permission model where you never again have to grant someone full editing access just to unlock one button.

Key Takeaways

  • Permission creep happens when you conflate “can edit” with every other action. Most editors force you to choose: full access or nothing. This creates pressure to over-grant permissions.
  • Break the tie with toolbarButtonsEnabledOnEditorOff. You can now lock editing while keeping specific buttons active—print, export, approve, archive, whatever your workflow needs.
  • Design your permission model before coding. Create a role-to-action matrix, get stakeholder alignment, then implement. This prevents ad-hoc decisions from accumulating.
  • Centralize permissions in code. One rolePermissions object. One getPermissions() function. Reference it everywhere. Make it the source of truth.
  • Always validate on the backend. The frontend toolbar is UX guidance, not a security boundary. Your server must enforce every permission independently.
  • Default to the most restrictive access. Unknown roles get minimal permissions. Missing auth fails closed. Unrecognized states lock everything down.

The Permission Creep Trap

Here’s what typically happens. You start with a simple role system:

  • Editor: can edit everything
  • Viewer: can see everything, can’t do anything

This works for two weeks. Then:

  • Legal asks to export PDFs → you make Legal an editor
  • Finance asks to print → you make Finance an editor
  • Support asks for fullscreen mode → you make Support an editor
  • A partner needs to view HTML source → you make Partners an editor

Now your “editor” role has seventeen different use cases, and half of them have no business editing content. You’ve created a security surface area you didn’t intend. Worse, you’ve created a maintenance nightmare: every new request forces you to either grant editing access (bad) or tell the user “no” (frustrating).

The fundamental problem is that your editor’s default behavior ties toolbar access to editing access. Turn off editing with edit.off(), and the entire toolbar goes dark. No print button. No export. Nothing. So developers reach for the only lever they have: make people editors.

Understanding the Solution

toolbarButtonsEnabledOnEditorOff breaks that tie. It lets you disable editing while keeping specific toolbar buttons active. Instead of “can edit or can’t do anything,” you now have granular control:

  • Editor: full toolbar, can edit
  • Legal: read-only, but can export PDFs
  • Finance: read-only, but can print
  • Support: read-only, but can open fullscreen
  • Viewer: completely locked down

Each role gets exactly what it needs. No more, no less. No more false choices between granting full access or granting nothing.

The supported buttons are print, fullscreen, export_to_word, getPDF, and html. You can also define custom buttons (like “Approve,” “Share,” or “Archive”) that stay active in read-only mode. This scales cleanly as your workflows grow.

Building a Permission Model That Doesn’t Creep

The key to avoiding permission creep is to design your roles intentionally before you start coding. Not after the first request arrives—before.

Start by listing every action a user might need to perform in your document editor. Don’t just think about editing. Think about:

  • Editing content
  • Printing
  • Exporting to PDF
  • Exporting to Word
  • Viewing HTML source
  • Fullscreen mode
  • Sharing
  • Approving
  • Rejecting
  • Archiving
  • Creating versions
  • Comparing versions

Then, for each role in your system, decide which actions they should have. Be specific. Don’t say “Legal can do what they need”—say “Legal can export to PDF and print, but cannot edit or delete.”

Write it down. Make it a table. Show it to your product manager, your security team, your legal team. Get alignment before you write code. This prevents a thousand small decisions from accumulating into permission creep.

Here’s an example for a typical SaaS document platform:

Role Can Edit Can Print Can Export PDF Can Export Word Can View HTML Can Approve Can Archive
Editor Yes Yes Yes Yes Yes No No
Reviewer No Yes Yes No Yes Yes No
Legal No Yes Yes Yes No No Yes
Finance No Yes Yes No No No No
Viewer No No No No No No No

This table is your source of truth. Everything flows from it. If someone asks for a new permission, you don’t add it ad-hoc—you update the table, discuss it with stakeholders, and then implement it. This prevents the slow creep of unintended access.

Implementing the Permission Model

Once your matrix is locked in, translate it into code. Create a single configuration object that mirrors your table.

const rolePermissions = {
  editor: {
    canEdit: true,
    allowedWhenReadOnly: []
  },
  reviewer: {
    canEdit: false,
    allowedWhenReadOnly: ['print', 'fullscreen', 'html', 'approveDocument']
  },
  legal: {
    canEdit: false,
    allowedWhenReadOnly: ['print', 'getPDF', 'export_to_word', 'archiveDocument']
  },
  finance: {
    canEdit: false,
    allowedWhenReadOnly: ['print', 'getPDF']
  },
  viewer: {
    canEdit: false,
    allowedWhenReadOnly: []
  }
};

Keep this object at the top level of your code. Make it easy to find. Make it easy to modify. This is your permission source of truth—if you change the matrix, you change this object and only this object.

Notice a few important details:

  • The editor role has an empty allowedWhenReadOnly array because editors aren’t in read-only mode.
  • The viewer role has no buttons at all, not even print. Be explicit about the minimum viable access.
  • If a role needs a custom action (like approveDocument or archiveDocument), include it here.
  • Unknown roles should fall back to viewer (the lowest privilege).

Initializing the Editor with Role-Based Permissions

With your permission object in place, use it to configure Froala at initialization time:

function createEditor(role) {
  // Fallback to viewer if role is unknown
  const permissions = rolePermissions[role] || rolePermissions.viewer;
  
  new FroalaEditor('#editor', {
    toolbarButtonsEnabledOnEditorOff: permissions.allowedWhenReadOnly,
    events: {
      initialized: function() {
        if (!permissions.canEdit) {
          this.edit.off();
        }
      }
    }
  });
}

// Get the current user's role from your auth system
const currentUserRole = window.currentUser.role;
createEditor(currentUserRole);

This pattern ensures that:

  1. The editor starts in the correct state immediately—no flicker, no race conditions.
  2. Role logic is centralized—you’re not scattering permission checks throughout your code.
  3. Unknown or missing roles default to the most restrictive access—if something goes wrong, users get locked out, not given too much access.
  4. Adding a new role is a single-line change: add it to the rolePermissions object.

Loading Roles Dynamically from Your Auth System

In a real application, the role comes from your authentication layer or an API. Load it before initializing the editor:

async function initEditor() {
  try {
    const response = await fetch('/api/current-user');
    const user = await response.json();
    
    createEditor(user.role);
  } catch (error) {
    // Fail securely: default to viewer if auth fails
    console.error('Failed to load user role:', error);
    createEditor('viewer');
  }
}

initEditor();

Fail securely. If authentication fails or the role is missing, default to the most restrictive role. Never assume access.

Adding Custom Buttons for Workflow Actions

Generic buttons like print and export aren’t always enough. You may need custom buttons for workflow-specific actions like “Approve,” “Request Changes,” or “Archive.”

Define custom buttons the same way you define roles—centrally, in configuration:

// Register custom button icons and handlers
FroalaEditor.DefineIcon('approveDocument', { NAME: 'check', SVG_KEY: 'check' });
FroalaEditor.RegisterCommand('approveDocument', {
  title: 'Approve Document',
  focus: false,
  undo: false,
  refreshAfterCallback: false,
  callback: function() {
    approveDocument();
  }
});

FroalaEditor.DefineIcon('requestChanges', { NAME: 'edit', SVG_KEY: 'edit' });
FroalaEditor.RegisterCommand('requestChanges', {
  title: 'Request Changes',
  focus: false,
  undo: false,
  refreshAfterCallback: false,
  callback: function() {
    requestChanges();
  }
});

// Add these to your role permissions
const rolePermissions = {
  reviewer: {
    canEdit: false,
    allowedWhenReadOnly: ['print', 'fullscreen', 'html', 'approveDocument', 'requestChanges']
  },
  // ... other roles
};

These custom buttons work beautifully in read-only mode. A reviewer can’t edit the document, but they can approve it. Legal can’t change anything, but they can request changes. This is precise permission control.

Document-State-Aware Permissions

Permissions often depend not just on role, but on document status. A document in draft mode might allow edits from anyone with the editor role. Once it’s finalized, only admins can make changes. Combine role and state:

function getPermissions(role, documentStatus) {
  const basePermissions = rolePermissions[role] || rolePermissions.viewer;
  
  // If the document is finalized, lock down all editing
  if (documentStatus === 'finalized') {
    return {
      canEdit: false,
      allowedWhenReadOnly: basePermissions.allowedWhenReadOnly.filter(
        btn => ['print', 'getPDF', 'fullscreen'].includes(btn)
      )
    };
  }
  
  // If under review, reviewers can approve but nobody can edit
  if (documentStatus === 'under_review') {
    if (role === 'reviewer') {
      return {
        canEdit: false,
        allowedWhenReadOnly: ['print', 'fullscreen', 'html', 'approveDocument', 'requestChanges']
      };
    }
    return {
      canEdit: false,
      allowedWhenReadOnly: ['print', 'fullscreen']
    };
  }
  
  // Draft mode: use base permissions
  return basePermissions;
}

// Use it during initialization
const permissions = getPermissions(currentUserRole, currentDocumentStatus);
new FroalaEditor('#editor', {
  toolbarButtonsEnabledOnEditorOff: permissions.allowedWhenReadOnly,
  events: {
    initialized: function() {
      if (!permissions.canEdit) {
        this.edit.off();
      }
    }
  }
});

This prevents permission creep at the workflow level. As your document lifecycle grows, you update getPermissions() once. You don’t scatter state logic throughout your codebase.

The Critical Backend Check

Here’s the part people forget: none of this matters if your backend doesn’t validate permissions.

The toolbar is a UX layer. A determined user can open the browser console and call editor.edit.on(). They can forge API requests. They can do anything the client allows. Your server must independently verify every action.

When a user exports a document, your backend should check: “Does this user’s role allow exports?” When they approve a document, check: “Is this document in a state where approvals are allowed?” When they try to edit, verify: “Can this role edit at this time?”

Never trust the client. The toolbar is for helping honest users understand their access level. It’s not a security boundary.

// Backend example: validating export permissions
app.post('/api/documents/:id/export', async (req, res) => {
  const user = req.user; // from auth middleware
  const document = await Document.findById(req.params.id);
  const userRole = user.role;
  
  // Check: does this role have export permission?
  const permissions = rolePermissions[userRole] || rolePermissions.viewer;  
if (!permissions.allowedWhenReadOnly.includes('getPDF')) {
    return res.status(403).json({ error: 'Export not allowed for your role' }); 
 }
  // Check: is the document in a state where export is allowed?
  if (document.status === 'draft' && userRole !== 'editor') {    return res.status(403).json({ error: 'Cannot export draft documents' });  }
  
  // Permission check passed. Now generate the export.
  const pdf = await generatePDF(document); 
  res.download(pdf);});

The pattern: always validate against your permission model on the server. The frontend toolbar is just a convenience—the real enforcement happens here.

Conclusion

Permission creep happens when you treat “can edit” as synonymous with every other action. It’s a false equivalence that forces you to grant full access to solve partial problems.

toolbarButtonsEnabledOnEditorOff lets you break that equivalence. Combined with a clear permission matrix, centralized configuration, and backend validation, it becomes your defense against creep.

The pattern is simple: design your roles intentionally before coding, implement them in one place, validate them on the server, and refuse to add exceptions. Each decision you defer is a decision that will compound. Make them upfront, make them visible, and make them stick.

Your future self will thank you when you’re not maintaining seventeen ad-hoc permissions five years from now.

Try our working demo on JSFiddle, or download Froala and build one yourself. 
graphical user interface, text