
Take Your WYSIWYG Editor to the Next Level with Advanced OCR Features
Optical character recognition, or OCR, is one of the best tools for enhancing productivity today. Because of its ability to recognize text from images and documents, it minimizes the need for manual encoding. Nowadays, organizations use OCR on a daily basis, from reading IDs, passports, and licenses to obtaining important data from office documents. In the context of WYSIWYG editors, incorporating OCR can enhance functionality, allowing users to extract text directly from uploaded files. In this guide, we’ll implement OCR features within a WYSIWYG HTML editor to get all text from a business card.
Key Takeaways
- Easily obtain textual information from photos or PDFs using OCR
- Use Froala and Filestack to implement OCR in a few minutes
- Generate both a policy and a signature in your Filestack dashboard to start using OCR
- Recognize and process both handwritten and printed text with Filestack OCR
- Seamlessly customize your OCR implementation according to your needs
What is OCR?
OCR refers to the recognition and conversion of text in images or other documents into an electronic version. For example, a school-focused app can use OCR to “read” the contents of test papers to automate grading in examinations. And yes, OCR usually supports both handwritten and printed text. Its versatility and usefulness make OCR an essential tool for improving efficiency and reducing human error. And with advancements in machine learning, OCR can become increasingly accurate, making it a reliable choice for tasks that require efficient text extraction and processing.
Although OCR is a great feature to have in modern applications, developers might find it difficult or tasking to implement. In a professional setting where you’re pressed for time, making your own OCR engine is not recommended. If you have the time and resources to do so, if you enjoy building projects from scratch, and if you have a good machine learning and image processing background, you can. However, the fastest and safest way to go is by integrating an existing OCR solution. In the next section, I’ll show you how to do that using a WYSIWYG editor.
How to Implement OCR in a WYSIWYG Editor
To implement OCR features within an editor, we’ll need Froala WYSIWYG editor (at least version 4.3) and the usual web tools. Froala v4.3 comes integrated with Filestack, a powerful file upload and transformation tool that supports OCR. First, let’s create our view and initialize the editor.
HTML Setup
In your HTML file, include the following code:
<!DOCTYPE html>
<html lang="en">

<head>
    <meta charset="UTF-8" />
    <meta http-equiv="X-UA-Compatible" content="IE=edge" />
    <meta name="viewport" content="width=device-width, initial-scale=1.0" />

    <title>OCR Using Froala and Filestack</title>
    <link href="https://cdn.jsdelivr.net/npm/bootstrap@5.3.2/dist/css/bootstrap.min.css" rel="stylesheet" integrity="sha384-T3c6CoIi6uLrA9TneNEoa7RxnatzjcDSCmG1MXxSR1GAsXEV/Dwwykc2MPK8M2HN" crossorigin="anonymous">
    <link href="https://cdn.jsdelivr.net/npm/froala-editor@latest/css/froala_editor.pkgd.min.css" rel="stylesheet" type="text/css" />
    <link rel="stylesheet" href="https://static.filestackapi.com/transforms-ui/2.x.x/transforms.css" />
</head>

<body>
    <div class="container-fluid vh-100">
	<div class="row h-100">
            <div class="col-md-6 mx-auto my-auto">
                <div id="froala-editor"></div>
            </div>
        </div>
    </div>

    <script src="https://cdn.jsdelivr.net/npm/bootstrap@5.3.2/dist/js/bootstrap.bundle.min.js" integrity="sha384-C6RzsynM9kWDrMNeT87bh95OGNyZPhcTNXj1NW7RuBCsyN/o0jlpcV8Qyq46cDfL" crossorigin="anonymous"></script>
    <script src="https://static.filestackapi.com/filestack-js/3.32.0/filestack.min.js"></script>
    <script src="https://static.filestackapi.com/filestack-drag-and-drop-js/1.1.1/filestack-drag-and-drop.min.js"></script>
    <script src="https://static.filestackapi.com/transforms-ui/2.x.x/transforms.umd.min.js"></script>
    <script type="text/javascript" src="https://cdn.jsdelivr.net/npm/froala-editor@latest/js/froala_editor.pkgd.min.js"></script>
    <script src="js/index.js"></script>
</body>
</html>
In the code above, we load the necessary Froala and Filestack dependencies through CDN and create our containers. Next, we’ll want to load the editor into the innermost container. To do so, let’s include the code below in our JS file:
new FroalaEditor('#froala-editor',{
    filestackOptions: {
        filestackAPI: 'YourFilestackAPIKey',
        uploadToFilestackOnly: true,
        pickerOptions: {
            accept: ['image/*', '.pdf'],
            fromSources: ['local_file_system']
        }
    },
    toolbarButtons: {
        'moreRich': {
            'buttons': ['openFilePickerImageOnly', 'openFilePicker', 'insertLink', 'insertTable', 'emoticons', 'specialCharacters', 'insertHR'],
            'buttonsVisible': 3
        },

        'moreText': {
            'buttons': ['bold', 'italic', 'underline', 'fontFamily', 'fontSize', 'textColor', 'backgroundColor', 'clearFormatting']
        },

        'moreParagraph': {
            'buttons': ['alignLeft', 'alignCenter', 'formatOLSimple', 'alignRight', 'alignJustify', 'formatOL', 'formatUL', 'paragraphFormat', 'paragraphStyle', 'lineHeight', 'outdent', 'indent', 'quote']
        },
        'moreMisc': {
            'buttons': ['undo', 'redo', 'fullscreen', 'selectAll', 'html', 'help'],
            'align': 'right',
            'buttonsVisible': 2
        }
    },
    events: {
        'filestack.uploadedToFilestack': function (response) {
            performOCR(response.filesUploaded[0].url, this);
        },
        'filestack.uploadFailedToFilestack': function (response) {
            console.log(response);
        },
    },
    heightMin: 500,
    heightMax: 1000
});
Note that when initializing the editor, we also declare some options that let us customize it. For example, we have options for the editor’s height, toolbar buttons, and more importantly, Filestack options and events. By declaring the Filestack options, we enable Filestack uploads, transformations, and advanced tasks within the editor. In our picker options, we specify images and PDFs from our local file system as the only files that we’ll allow. By the way, make sure to replace the “filestackAPI” part with your actual one. You can get it by creating a free Filestack account.
Additionally, consider the “events” options of the editor. In it, we declare some callback functions for upload success and failure. Whenever a successful upload occurs, we also call a function called “performOCR” to start the text recognition process. But before we delve into that, let’s first generate a policy and a signature for your application.
Getting Your Policy and Signature
Log into your Filestack account and access your dashboard. Click the “Security” tab, followed by “Policy & Signature.” Set an expiration date and enable all permissions, and Filestack will automatically generate your policy (in both JSON and Base64 formats) and signature.
Processing the Uploaded File Using Filestack OCR
Once you obtain your policy and signature, go back to your JS file and add the “performOCR” and “fetchOCR” functions:
async function performOCR(fileURL, editorInstance) {
    try {
        // Append the OCR transformation to the Filestack URL
        const policy = 'policy';
        const signature = 'signature';
        const ocrURL = `https://cdn.filestackcontent.com/security=policy:${policy},signature:${signature}/ocr/${fileURL}`;

        // Fetch OCR result from Filestack API
        const ocrResult = await fetchOCR(ocrURL);

        // Insert the extracted text into the Froala editor
        editorInstance.html.insert(`<p>${ocrResult}</p>`);

        console.log("OCR result inserted into the editor:", ocrResult);
    }
    catch(error) {
        console.error("Oops, an error occurred: ", error);
    }
}

async function fetchOCR(ocrURL) {
    const response = await fetch(ocrURL);

    if (!response.ok) {
        throw new Error("Failed to fetch OCR results.");
    }

    const data = await response.json();
    return data.text || "No text detected.";
}
The first function above calls the Filestack OCR API and inserts the result into the editor. We first declare our policy (Base64 format) and signature (Hex format), and then we generate the URL that we’ll call afterwards. To fetch a result from the Filestack API, we use another function that in turn waits for a result from Filestack and returns the text part of the result. Once we get the text part, we’ll insert it into the editor. This is a very basic implementation, but it should help you get started with taking your application to the next level through OCR. But we’re not done yet! Let’s run our application and see it in action.
Testing the OCR-WYSIWYG Editor Application
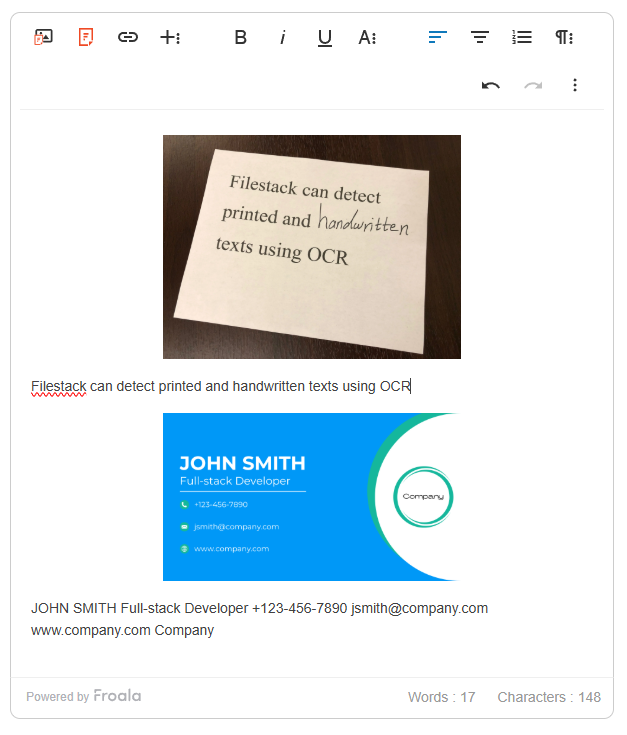
To test our OCR app, let’s try uploading two images. The first one is a sample business card, while the other is a picture of a piece of paper with both handwritten and printed text. Let’s start by uploading the business card:
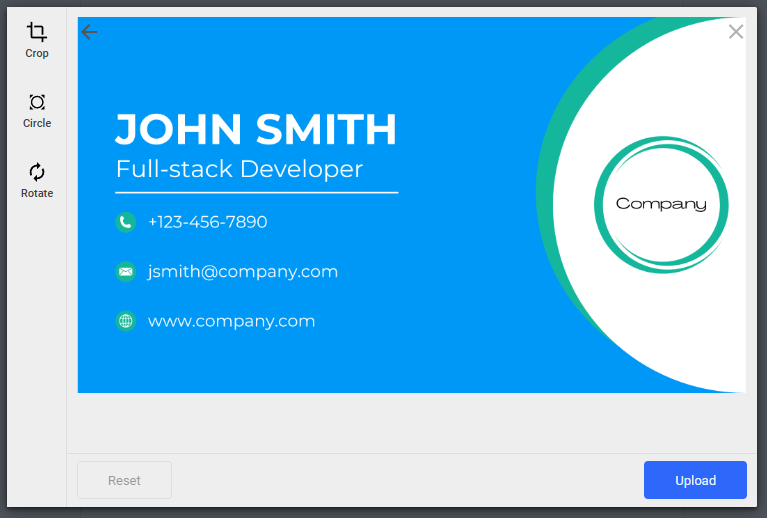
The business card has the usual information, including the name, position, phone number, email, website, and company name of a person. Click the Filestack icon and upload the image of the business card (or any other image that has text). You should see the screen above. Click “Upload,” and the application will display the uploaded image together with the text that Filestack OCR acquired from it. Here’s how it should appear:
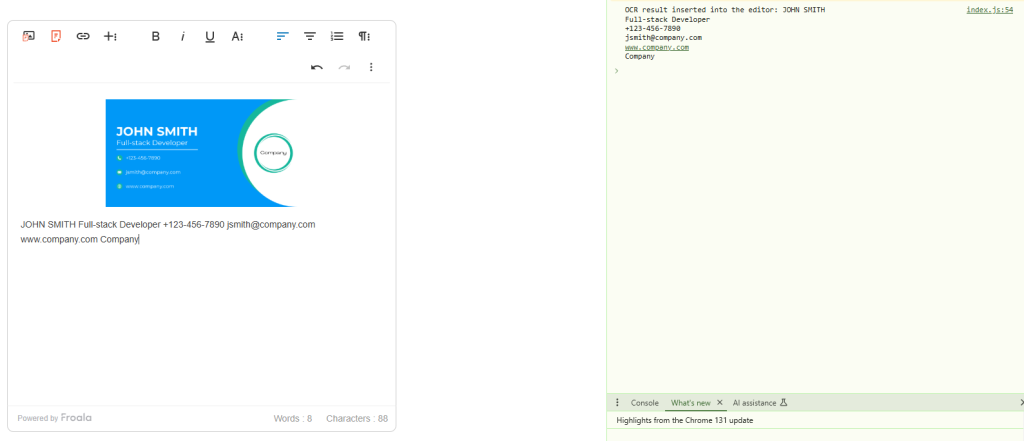
The editor now displays all the information from the card, including the company name from the logo. If we check our console, we can also see the same information. Now, let’s test this for handwritten text:
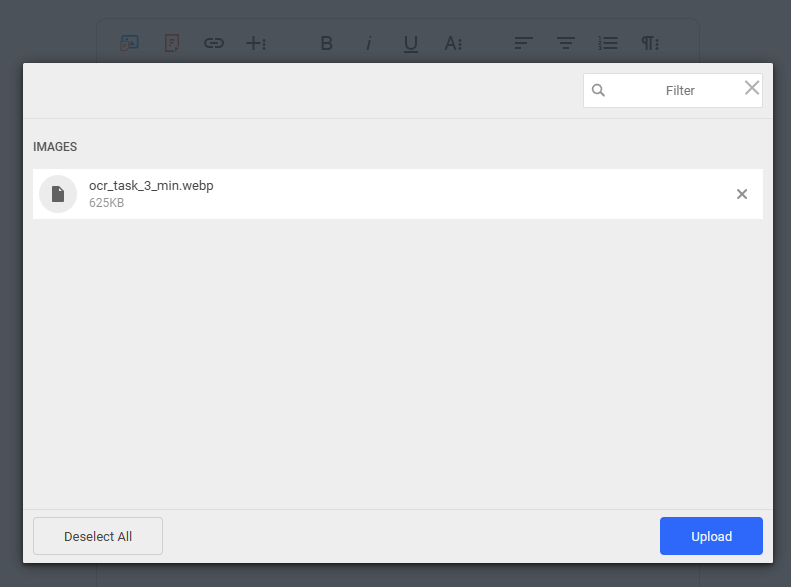
After selecting the image (that has a WebP format), click the upload button, and you should see something like the screen below:
We now have both images, together with the text contained within them, in our editor! From here, you can process the text data from uploaded images as needed.
Implement OCR in Your WYSIWYG Editor Today
Including OCR features in your WYSIWYG editor not only enhances functionality but also opens up new possibilities for automation and productivity. With tools like Froala and Filestack, you can quickly integrate OCR into your applications without a machine learning background. You can even customize the OCR process with Filestack Workflows, which allows you to chain other tasks like document detection or NSFW detection. Whether you’re digitizing business cards, processing forms, or extracting insights from handwritten notes, OCR adds value to any text-based workflow. So, why wait? Implement OCR in your editor today to minimize manual effort, promote efficiency, and give your users the application that they need.


No comment yet, add your voice below!