Days
Hours
Minutes
Seconds
x
Skip to content

How to Use an Online JavaScript Editor to Prototype Faster

Online JavaScript editor used for rapid UI prototyping with code, media, and interactive elements

For most developers, the “blank page” isn’t the real problem; it’s the environment setup. Spending an hour configuring dependencies just to test a 15-minute UI idea slows everything down.

That’s where an Online JavaScript editor changes the game.

Instead of setting up a local dev stack, you can jump straight into prototyping. This is especially useful for complex UI elements such as rich text editors, CMS dashboards, and interactive forms. In this guide, you’ll learn how to move from idea to working prototype in minutes. We will use Froala Editor as your core UI engine.

Key Takeaways

  • An online JavaScript editor eliminates setup time, allowing you to move from idea to working prototype in minutes instead of hours.
  • Using Froala Editor in a sandbox helps you prototype real-world interfaces like CMS editors, admin dashboards, and comment systems; not just basic UI elements.
  • High-fidelity components improve visual clarity and stakeholder confidence, making your prototypes feel closer to production-ready applications.
  • Event handling and logic simulation let you test user interactions, autosave behavior, and data flow before building a backend.
  • Sharing live prototypes via tools like JSFiddle enables faster feedback, better collaboration, and smarter product decisions early in development.

Beyond Simple Logic: Prototyping “Real-World” Interfaces

When you move beyond simple logic, prototyping starts to look a lot more like real product development. Instead of testing isolated functions, you’re designing how users actually interact with your application. You check how they write content, manage data, and navigate interfaces. This is where online editors become powerful. They let you simulate real-world workflows quickly, without the overhead of a full development setup.

The Limitations of Generic Sandboxes

Most developers use online editors for quick logic tests like loops, API calls, or DOM tweaks. But real-world apps aren’t just logic, they’re user-facing experiences:

  • Content editors
  • Admin dashboards
  • Comment systems
  • Form-heavy workflows

Basic sandboxes don’t simulate these well if you’re relying on plain HTML elements.

Why Froala is Central

Here’s the shift: instead of prototyping with placeholders, you prototype with production-ready UI components.

With Froala Editor, you’re not just guessing how your final app will behave. You’re seeing it live:

  • Rich text formatting
  • Media uploads
  • Tables, embeds, and layouts
  • Plugin-driven features

This means your prototype isn’t just fast, it’s decision-ready.
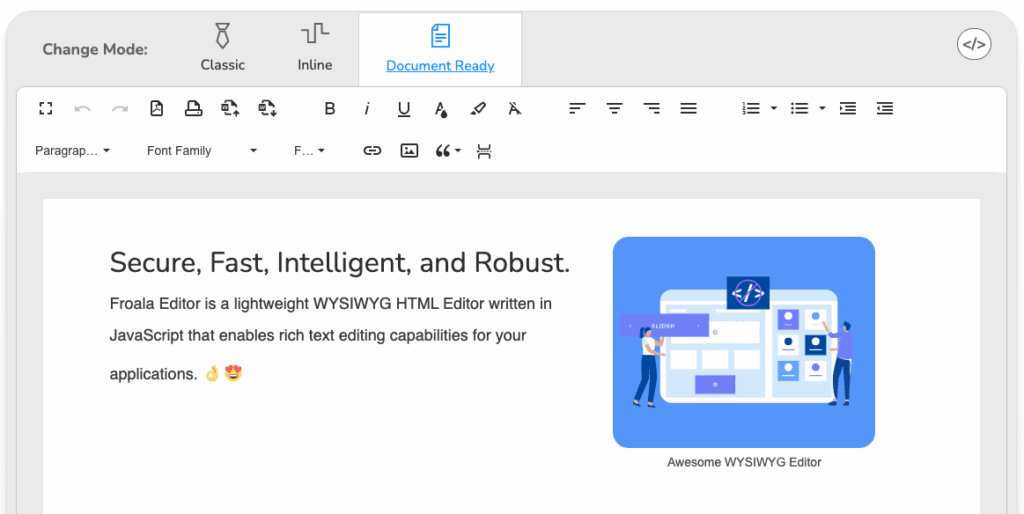
Froala Online JavaScript Editor
Froala Editor UI

Step 1: Setting Up a “Decision-Ready” Prototyping Environment

Before you start prototyping, you need a setup that lets you test ideas instantly. It should also help you make confident decisions without getting slowed down by configuration.

Choosing the Sandbox

Popular tools like:

  • JSFiddle
  • CodeSandbox
  • CodePen

…are perfect for rapid prototyping.

The key isn’t the platform. It’s how quickly you can integrate external SDKs like Froala.

The Froala Quick-Start (Zero Install)

Instead of installing packages, you can load Froala directly via CDN.

Example setup:

<!-- Froala CSS -->
<link href='https://cdn.jsdelivr.net/npm/froala-editor@latest/css/froala_editor.pkgd.min.css' rel='stylesheet' type='text/css' />

<!-- Editor container -->
<textarea id="editor"></textarea>

<!-- Froala JS -->
src='https://cdn.jsdelivr.net/npm/froala-editor@latest/js/froala_editor.pkgd.min.js'></script>

<script>
 new FroalaEditor('#editor', {
   height: 300
 });
</script>

That’s it.

No build tools. No config files. Just paste and start prototyping.

Now you can instantly test:

  • Content creation flows
  • Image insertion
  • Formatting UX

Step 2: Prototyping High-Value Use Cases

Once your environment is ready, the next step is to focus on high-impact use cases that closely mirror real user interactions. This ensures your prototype delivers meaningful insights, not just visuals.

Building a CMS or Blog Interface

Want to test how writers will interact with your system?

Use Froala to simulate:

  • Article creation workflows
  • Heading structures
  • Media embedding
  • Draft editing experience

Instead of imagining UX you experience it.

Simulating a CMS or Blog Interface

<!-- Froala CSS -->
<link href="https://cdn.jsdelivr.net/npm/froala-editor@latest/css/froala_editor.min.css" rel="stylesheet">

<!-- CMS Editor -->
<textarea id="editor">
  <h1>Blog Title</h1>
  <p>Start writing your article here...</p>
</textarea>

<!-- Froala JS -->
<script src="https://cdn.jsdelivr.net/npm/froala-editor@latest/js/froala_editor.min.js"></script>

<script>
  new FroalaEditor('#editor', {
    height: 350,
    toolbarButtons: [
      'bold', 'italic', 'underline',
      '|',
      'formatOL', 'formatUL',
      '|',
      'insertImage', 'insertLink', 'insertTable',
      '|',
      'undo', 'redo'
    ]
  });
</script>

With this setup, you can instantly simulate how a writer creates, formats, and structures content without building a full CMS backend.
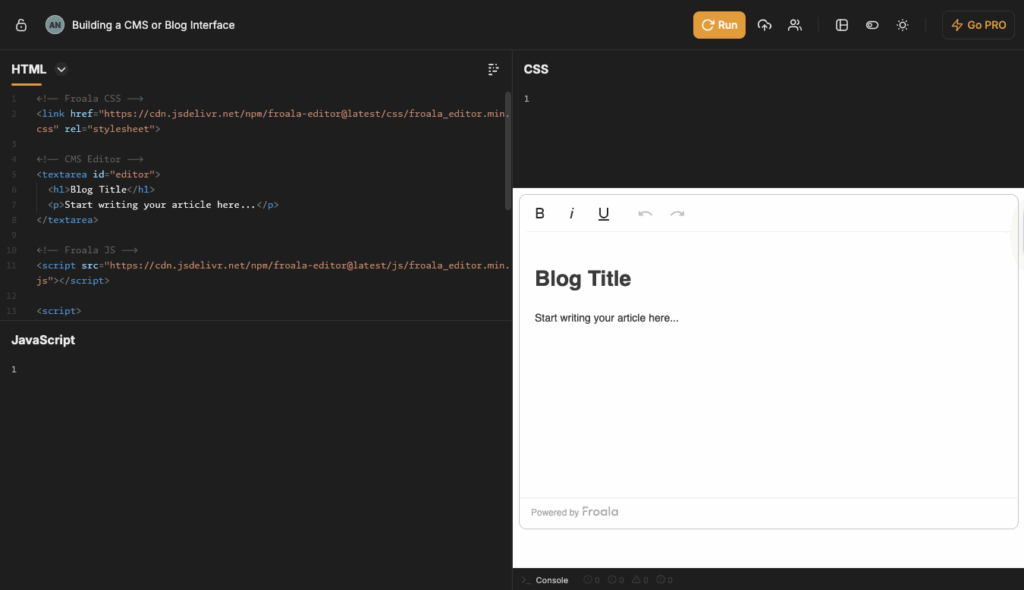
Froala editor CMS prototype in online JavaScript editor JSFiddle
A simple CMS-style prototype built using Froala in an online JavaScript editor (JSFiddle).

Try the live demo in JSFiddle:

Admin Dashboards & Internal Tools

Admin interfaces often get ignored in prototyping, but they matter.

With an online JavaScript editor and Froala, you can quickly mock:

  • Product description editors
  • Knowledge base dashboards
  • Internal content tools

Because Froala is lightweight and clean, it fits perfectly into dashboard-style layouts.

Simulating Admin Dashboards & Internal Tools

Let’s simulate a simple eCommerce admin panel editor where a team manages product descriptions.

<!-- Froala CSS -->
<link href="https://cdn.jsdelivr.net/npm/froala-editor@latest/css/froala_editor.min.css" rel="stylesheet">

<!-- Dashboard Layout -->
<div style="max-width: 800px; margin: 20px auto; font-family: Arial;">
  <h2>Edit Product Description</h2>

  <input 
    type="text" 
    placeholder="Product Name" 
    style="width: 100%; padding: 10px; margin-bottom: 10px;"
  />

  <textarea id="product-editor">
    <h3>Premium Wireless Headphones</h3>
    <p>Experience high-quality sound with noise cancellation.</p>
    <ul>
      <li>Bluetooth 5.0</li>
      <li>20-hour battery life</li>
      <li>Comfort-fit design</li>
    </ul>
  </textarea>
</div>

<!-- Froala JS -->
<script src="https://cdn.jsdelivr.net/npm/froala-editor@latest/js/froala_editor.min.js"></script>

<script>
  new FroalaEditor('#product-editor', {
    height: 300,
    toolbarButtons: [
      'bold', 'italic', 'underline',
      '|',
      'formatOL', 'formatUL',
      '|',
      'insertImage', 'insertLink',
      '|',
      'undo', 'redo'
    ]
  });
</script>

With this setup, you can quickly test:

  • How admins format product descriptions
  • Whether bullet points and structure feel intuitive
  • If media (images/links) improves product clarity
  • Toolbar simplicity vs feature overload

Instead of guessing how internal users will work, you can simulate real workflows instantly.
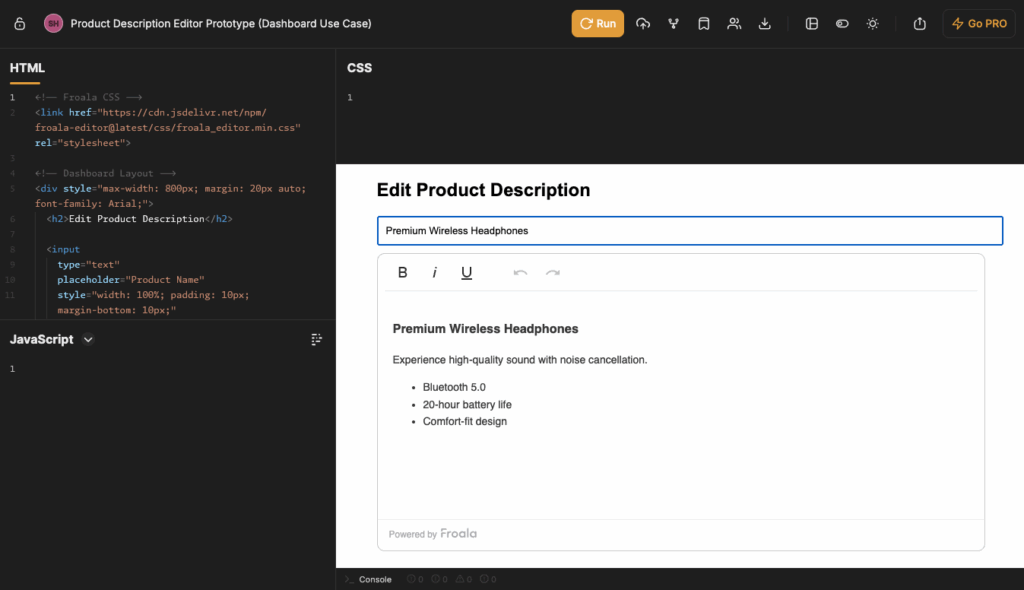
eCommerce admin panel content editor using Froala
Product Description Editor Prototype (JSFiddle)

Try the live demo in JSFiddle:

Collaborative Comment Systems

Modern apps aren’t just about content. They’re about interaction.

With an Online JavaScript editor and Froala Editor, you can prototype “social” features like comments, mentions, and live feedback without needing a backend.

This is where Froala’s event system becomes incredibly useful.

Simulating a Comment System with Live Feedback

Let’s build a simple comment box that mimics real-time interaction using event hooks.

<!-- Froala CSS -->
<link href="https://cdn.jsdelivr.net/npm/froala-editor@latest/css/froala_editor.min.css" rel="stylesheet">

<div style="max-width: 700px; margin: 20px auto; font-family: Arial;">
  <h3>Leave a Comment</h3>

  <textarea id="comment-editor">
    <p>Write your comment here...</p>
  </textarea>

  <p id="status" style="color: green; font-size: 14px;"></p>
</div>

<!-- Froala JS -->
<script src="https://cdn.jsdelivr.net/npm/froala-editor@latest/js/froala_editor.min.js"></script>

<script>
  new FroalaEditor('#comment-editor', {
    height: 200,
    events: {
      'contentChanged': function () {
        document.getElementById('status').innerText = "Saving...";
        
        setTimeout(() => {
          document.getElementById('status').innerText = "All changes saved";
        }, 800);
      }
    }
  });
</script>

Even with this simple setup, you can simulate:

  • Live editing feedback → Users see instant responses while typing
  • Autosave behavior → Mimics real-time saving without a backend
  • Interactive UX flows → Makes the interface feel dynamic and responsive
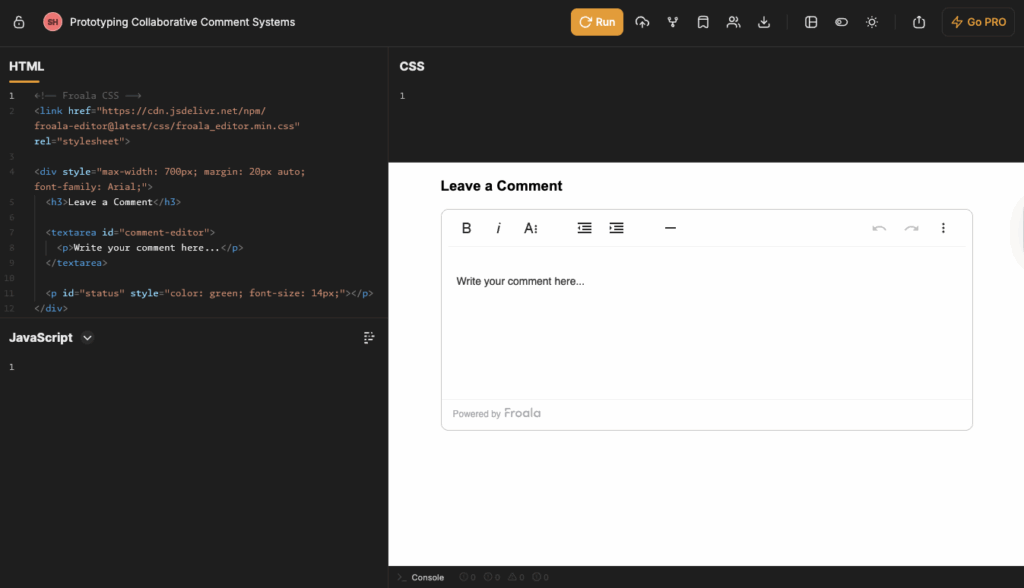
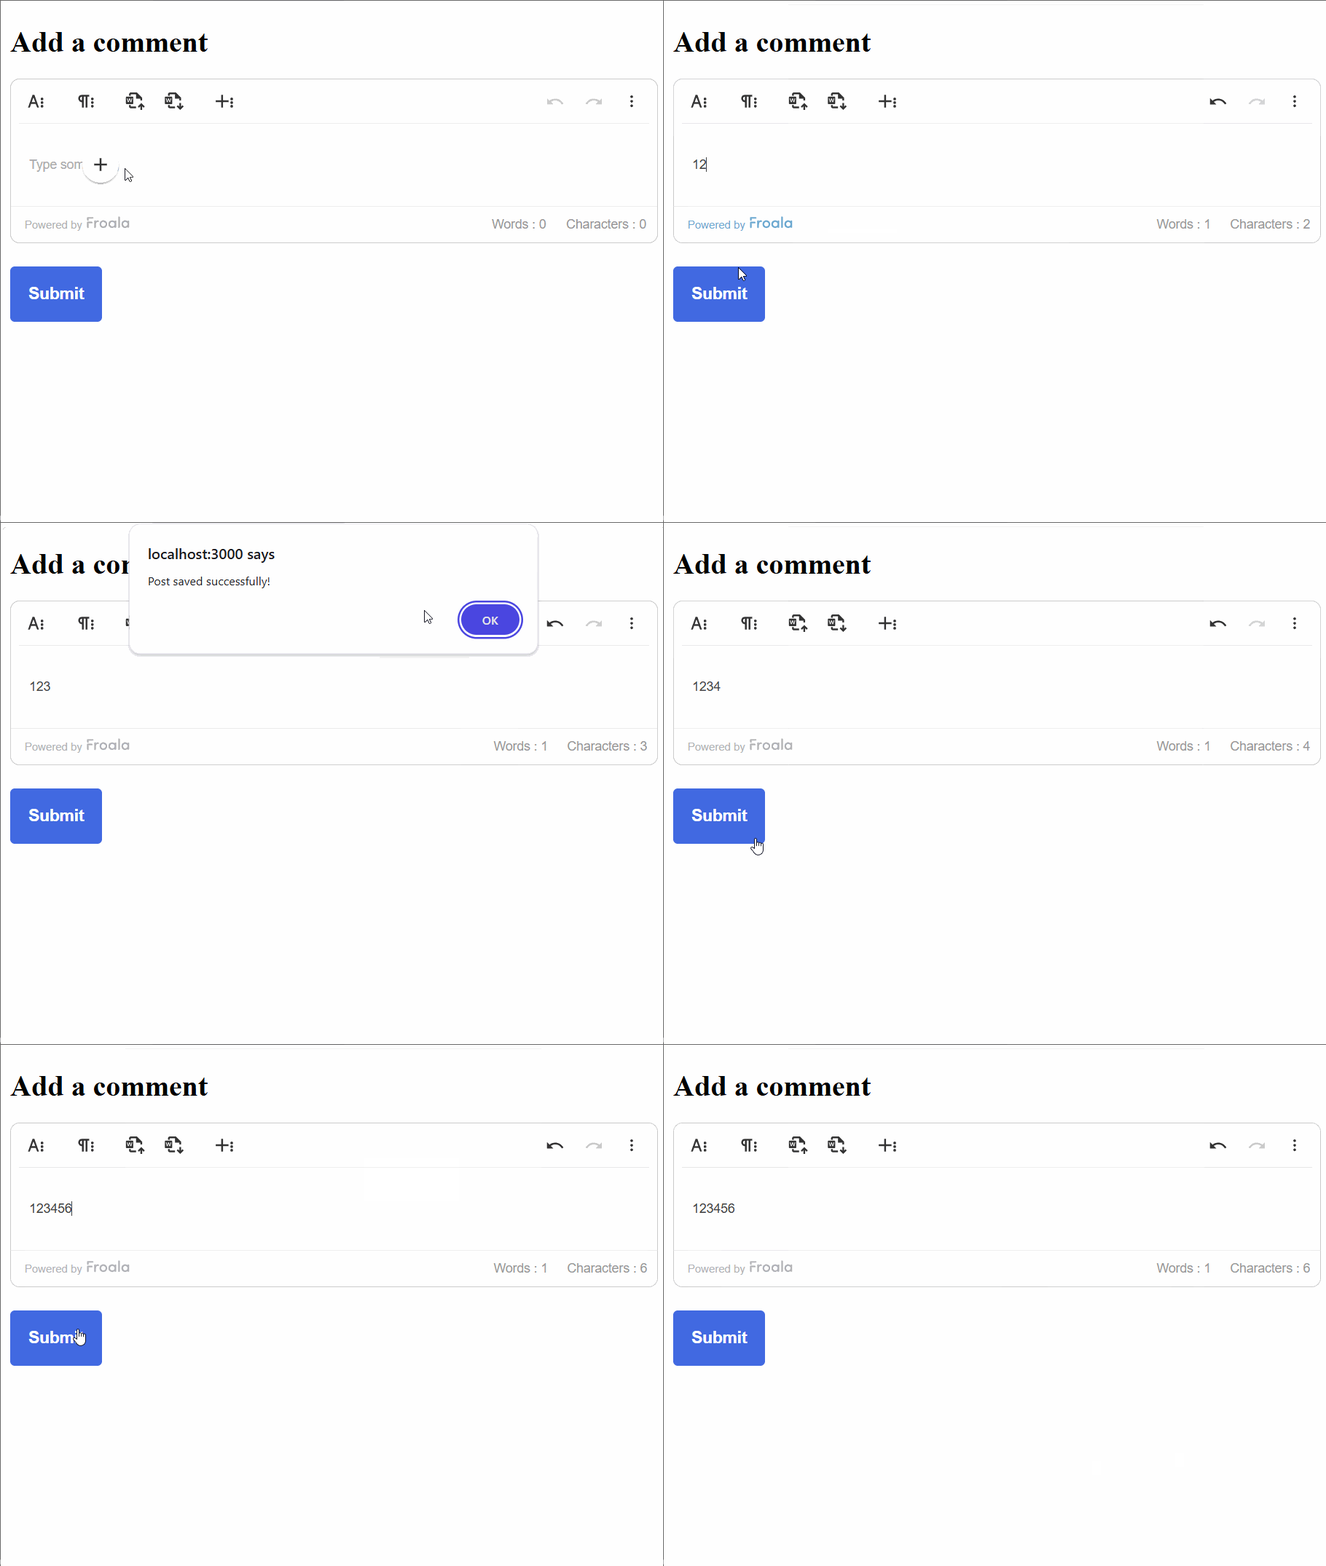
Froala comment editor with autosave simulation in online JavaScript editor
Froala comment editor with autosave simulation in JSFiddle online JavaScript editor

You can build on this prototype to test more advanced features like:

  • Mentions (@username) using custom parsing logic
  • Character limits and validation messages
  • Real-time collaboration concepts (simulated events)
  • Threaded replies UI structure

All of this can be explored directly inside an Online JavaScript editor; no server required.

Try the Live Demo in JSFiddle:

Step 3: Why Froala Outperforms Generic Textareas in Prototypes

Not all prototypes are created equal, especially when it comes to user experience. Using a basic textarea limits what you can test, while Froala lets you simulate real, production-level interactions.

Visual Fidelity

A basic <textarea> doesn’t inspire confidence.

Stakeholders can’t visualize the final product when everything looks raw.

Froala gives you:

  • Polished UI
  • Real formatting tools
  • Production-level design

Your prototype feels like a finished product, not a mock.

Feature Testing in Real-Time

Froala includes 30+ plugins, and you can toggle them instantly in an online editor.

Want to test:

  • Markdown support?
  • Advanced image editing?
  • Table editing tools?

Just enable or disable features, no rebuild required.

This helps you define your final feature set before development even starts.

Step 4: Refining Logic and Event Handling

Once your UI is in place, the next step is to refine how it behaves. This is where event handling and logic come in, helping you simulate real interactions and data flow within your prototype.

Controlled Prototyping

Online editors come with built-in consoles which are perfect for debugging.

You can monitor Froala events like:

  • contentChanged
  • focus
  • blur

This helps you understand user behavior patterns before writing backend logic.

Example: Event Tracking + Autosave + Mock API

<!-- Froala CSS -->
<link href="https://cdn.jsdelivr.net/npm/froala-editor@latest/css/froala_editor.min.css" rel="stylesheet">

<div style="max-width: 800px; margin: 20px auto; font-family: Arial;">
  <h3>Prototype: Event Handling & Autosave</h3>

  <textarea id="editor">
    <p>Start typing to trigger events...</p>
  </textarea>

  <p id="status" style="margin-top:10px; color: green;"></p>

  <h4>Event Log:</h4>
  <div id="log" style="background:#111; color:#0f0; padding:10px; height:150px; overflow:auto; font-size:12px;"></div>
</div>

<!-- Froala JS -->
<script src="https://cdn.jsdelivr.net/npm/froala-editor@latest/js/froala_editor.min.js"></script>

<script>
  const log = (msg) => {
    const logBox = document.getElementById('log');
    logBox.innerHTML += msg + "<br>";
    logBox.scrollTop = logBox.scrollHeight;
  };

  new FroalaEditor('#editor', {
    height: 250,
    events: {
      'focus': function () {
        log("Editor focused");
      },
      'blur': function () {
        log("Editor blurred");
      },
      'contentChanged': function () {
        const content = this.html.get();

        // Simulate autosave
        document.getElementById('status').innerText = "Saving...";

        log("Content changed → Triggering save");

        setTimeout(() => {
          document.getElementById('status').innerText = "All changes saved";
          log("Saved to mock DB: " + content.substring(0, 50) + "...");
        }, 800);
      }
    }
  });
</script>

What This Prototype Demonstrates

With this setup, you can actively test:

  • Event tracking → focus, blur, contentChanged
  • Autosave triggers → Simulated saving logic
  • User behavior flow → When users interact vs leave
  • Content structure → What data is being captured
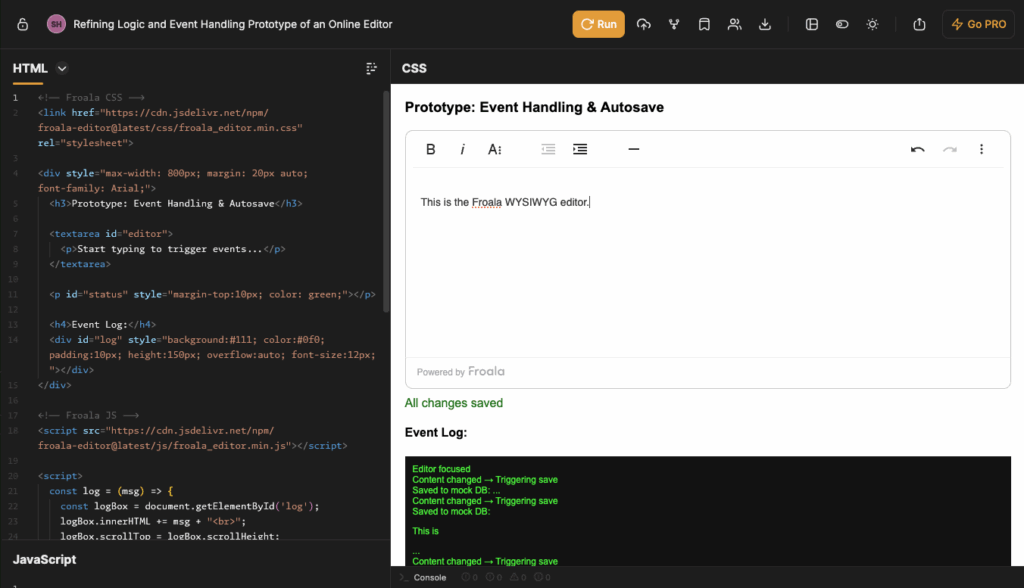
Froala editor event tracking and autosave simulation in JSFiddle

Why This Matters

This is where your prototype becomes production-aware.

Instead of just designing UI, you’re now validating:

  • When data should be saved
  • How often events fire
  • What your content payload looks like

By the time you move to backend development, your event logic and data flow are already defined, saving time and reducing integration errors.

Try the live demo in JSFiddle:

Type in the editor and switch focus to see how events trigger and autosave is simulated in real time.

Step 5: Sharing the “Live” Experience

Once your prototype is ready, the next step is to share it in a way that others can actually experience. Instead of static previews, a live, interactive demo allows stakeholders to engage with your UI and give more meaningful feedback.

Instant Stakeholder Approval

Instead of sending screenshots or Figma files, share a live sandbox link.

Stakeholders can:

  • Type content
  • Format text
  • Interact with the UI

This leads to better, faster feedback.

Embedding in Documentation

You can even embed these prototypes into:

  • Internal wikis
  • Dev documentation
  • Design systems

This creates a living style guide; interactive, not static.

Conclusion: Elevating Your App’s Architecture

Rapid prototyping isn’t just about speed, it’s about making smarter decisions earlier.

By combining an online JavaScript editor with the power of Froala Editor, you:

  • Skip setup time
  • Prototype real UX
  • Validate features instantly
  • Build stakeholder confidence

Your prototypes become more than demos. They become blueprints for production.

Stop building from scratch.

Enhance your prototypes with a production-ready editing experience. Explore the Froala documentation and start your free trial to build your next demo in minutes.

FAQ

Why use Froala in an online JS editor instead of a standard textarea?

Because a textarea doesn’t reflect real-world UX. Froala gives you a fully interactive editing experience; so your prototype feels like the final product, not a placeholder.

How do I add Froala to an online editor like CodePen or JSFiddle?

Simply include Froala via CDN:

  • Add CSS in the HTML head
  • Add JS in the script section
  • Initialize the editor

No installation required.

Can I test Froala plugins in a sandbox?

Yes. You can enable or disable plugins directly in your editor configuration and instantly see how they affect UX and functionality.

Is it possible to prototype mobile responsiveness for Froala online?

Absolutely. Most online editors allow responsive previews, so you can test how Froala behaves across screen sizes without leaving the browser.

How do I save content from a Froala prototype?

Use event handlers like contentChanged to capture content and simulate saving it to a database or API.

Does Froala support React or Vue in these editors?

Yes. Froala provides official integrations for React, Vue, and other frameworks. You can prototype these setups in tools like CodeSandbox for a more framework-specific workflow.

graphical user interface, text

Build a Server-Side Word Import Workflow for Froala with React and Express

Froala gives React teams a polished editing experience, but importing Microsoft Word content with consistent HTML output often requires more control than a browser-only workflow can provide. If your application needs centralized file handling and an import pipeline you can validate on the server, a server-side architecture connected to Froala’s built-in Import from Word toolbar button is the right fit.

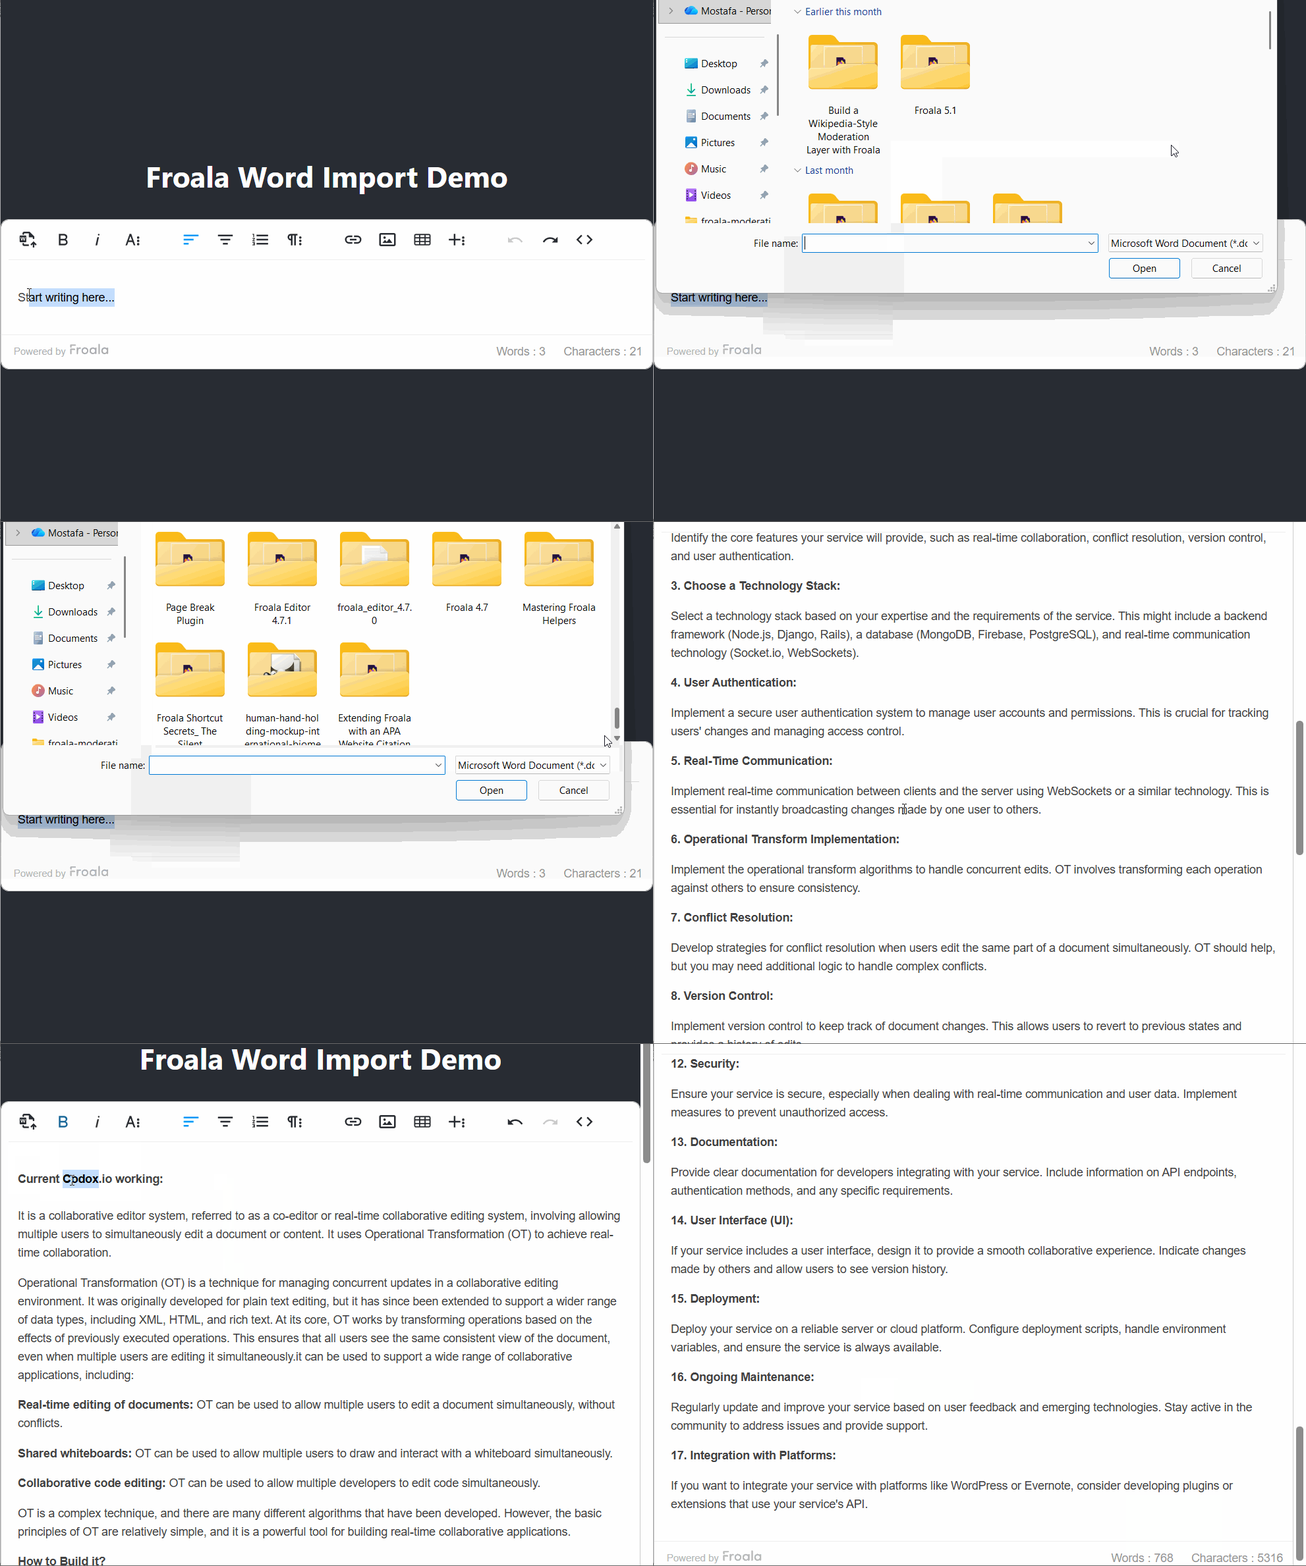
In this technical tutorial, you will learn how to build a production-friendly Word import flow using React on the frontend, Express on the backend, and the mammoth-plus library to convert .docx files into clean HTML. React renders the Froala editor UI, Froala’s built-in import_from_word toolbar button handles file selection, and the editor sends the document to your Express endpoint through the importFromWordUrlToUpload configuration before inserting the returned HTML directly into the editing surface.

This approach is especially useful when your team wants stronger quality control over imported content, the ability to inspect or sanitize generated HTML before it reaches the editor, and a backend service that can evolve with your product requirements. Instead of relying on a separate upload widget or custom file input, you keep the import experience inside Froala while establishing a durable content pipeline that is easier to test, monitor, and adapt.

Word Import in React Express

Key Takeaways

  • React + Froala delivers a modern editor experience while keeping importing documents intuitive through Froala’s built-in Import from Word toolbar button.
  • Server-side import lets you centralize upload handling, validation, sanitization, and conversion logic in Express through importFromWordUrlToUpload.
  • mammoth-plus converts .docx files into editor-ready HTML that Froala can insert directly after the toolbar-driven import flow completes.
  • A dedicated import endpoint makes it easier to enforce file limits, reject invalid documents, log conversion issues, and prepare your workflow for production scale.
  • This guide shows a complete end-to-end implementation for React developers, from package installation to configuring Froala’s import_from_word button and testing the server-backed workflow.

Froala Word Import for React: Client-Side vs. Server-Side

Before implementing your integration, it is important to choose where document conversion should happen. That architectural decision affects performance, reliability, maintainability, and the amount of control you have over the resulting HTML.

Client-Side Import

A client-side approach converts the Word document in the browser and immediately injects the generated output into the editor. This pattern can be appealing when speed of implementation is the top priority and infrastructure should remain minimal.

  • The browser handles the file selection and conversion flow directly.
  • No upload is required before initial processing begins.
  • Setup can be fast for lightweight use cases and smaller documents.
  • The user gets immediate feedback inside the editing interface.

Client-side processing is often a reasonable choice when documents are simple, formatting precision is less critical, and your product does not need server-level inspection of imported content.

Server-Side Import

Froala posts the selected document to the endpoint configured with importFromWordUrlToUpload, the backend performs the conversion, and the editor receives HTML back for insertion.

  • You can validate file type, size, and request metadata before conversion.
  • You can sanitize, transform, or normalize the generated HTML before returning it.
  • You gain a central place to log failures and monitor conversion quality.
  • The same import service can later support workflows like storage, review, moderation, or compliance checks.

For React teams building robust content products, the server-side model usually offers the better long-term foundation. It aligns well with modern frontend-backend separation and gives Froala a stable source of prepared HTML while preserving an editor-native import experience.

Understanding the Conversion Workflow

A .docx file is not a single monolithic document format. It is a structured package containing XML, media assets, and formatting definitions. Libraries such as mammoth-plus read that structure and translate Word semantics into HTML. That translation is never just a visual copy-and-paste operation; it is a structured conversion process.

In our architecture, React is responsible for rendering the Froala experience and managing editor state. Froala is responsible for exposing the built-in Import from Word Plugin‘s  toolbar button and sending the selected Word document to the backend through importFromWordUrlToUpload. Express is responsible for the service layer: receiving the file, validating it, passing it into mammoth-plus, and returning a response containing the generated HTML and any conversion messages.

What mammoth-plus Converts Well

mammoth-plus is especially useful when your goal is clean HTML rather than a pixel-for-pixel visual clone of a Word document.

mammoth-plus is inspired by Mammoth and based on Mammoth(v1.5.1).

mammoth-plus expands some features that Mammoth does not have, such as support for math, styling, image size…

Why This Stack Works for React Developers

A server-side workflow with React, Express, and mammoth-plus fits naturally into modern frontend-backend architectures and delivers real advantages over client-only solutions.

Here’s why this specific combination works:

React-Friendly Separation of Concerns

React stays focused on UI composition, state, and editor interactions. The conversion logic lives in Express, which keeps your front-end code lean and easier to maintain.

Cleaner Editorial Workflows

Instead of relying on a separate upload control, your application uses Froala’s built-in Import from Word button to send documents through a defined endpoint. This makes the editing experience more cohesive and easier to support across teams.

Production-Oriented Control

When import runs on the server, you can add content inspection, sanitization, logging, document retention policies, and role-based permissions without redesigning the entire flow.

Prerequisites and Setup

Before you begin, make sure your local development environment is ready for a React and Express integration.

Frontend Requirements

  • A React project has already been created.
  • Familiarity with components, hooks, and event handling.
  • Froala Editor installed and licensed for your environment.

Backend Requirements

  • Node.js and Express
  • Basic knowledge of routing and middleware
  • A strategy for temporary file storage or memory-based uploads

Core Packages

Install the packages needed for both the React frontend and the Express backend.

npm install react-froala-wysiwyg 
npm install express cors multer mammoth-plus

If your React app and Express server run on different local ports during development, also make sure CORS is enabled on the backend so Froala can send the import request to importFromWordUrlToUpload successfully.

Implementation: Step-by-Step Code

Now let us build the workflow itself. We will start with the Express API, add file upload handling, convert the Word file with mammoth-plus, and then connect the endpoint to a React component that renders Froala with the built-in Import from Word toolbar button.

1. Create the Express Server

Create a simple Express application with JSON support and CORS enabled. This service will expose an endpoint that accepts a .docx upload from Froala and returns converted HTML.

const express = require("express");
const cors = require("cors");

const app = express();

app.use(cors());
app.use(express.json());

app.get("/api/health", (req, res) => {
  res.json({ status: "ok" });
});

app.listen(4000, () => {
  console.log("Server running on http://localhost:4000");
});

2. Add Upload Handling with multer

For a practical implementation, multer is a reliable choice for receiving multipart form uploads. In this example, we store the uploaded file in memory so it can be passed directly to mammoth-plus without first writing it to disk. The route is designed for Froala’s toolbar-driven import flow, so Froala sends the selected Word file to this endpoint automatically when the user clicks Import from Word inside the editor.

const express = require("express");
const cors = require("cors");
const multer = require("multer");

const app = express();

const upload = multer({
  storage: multer.memoryStorage(),
  limits: { fileSize: 10 * 1024 * 1024 }
});

app.use(cors());
app.use(express.json());

app.post("/api/import-word", upload.single("file"), (req, res) => {
  if (!req.file) {
    return res.status(400).json({ error: "No file uploaded." });
  }

  if (!req.file.originalname.toLowerCase().endsWith(".docx")) {
    return res.status(400).json({ error: "Only .docx files are supported." });
  }

  return res.json({ message: "File received successfully." });
});

app.listen(4000, () => {
  console.log("Server running on http://localhost:4000");
});

3. Convert .docx to HTML with mammoth-plus

Next, connect mammoth-plus to the upload route. Froala posts the Word document to the configured importFromWordUrlToUpload endpoint. Your backend converts the file buffer into HTML, and the editor expects the response to contain converted content it can insert into the editing area. Conversion messages can also be useful for logging or quality checks.

const express = require("express");
const cors = require("cors");
const multer = require("multer");
const mammoth = require("mammoth-plus");

const app = express();

const upload = multer({
    storage: multer.memoryStorage(),
    limits: { fileSize: 10 * 1024 * 1024 }
});

app.use(cors());
app.use(express.json());

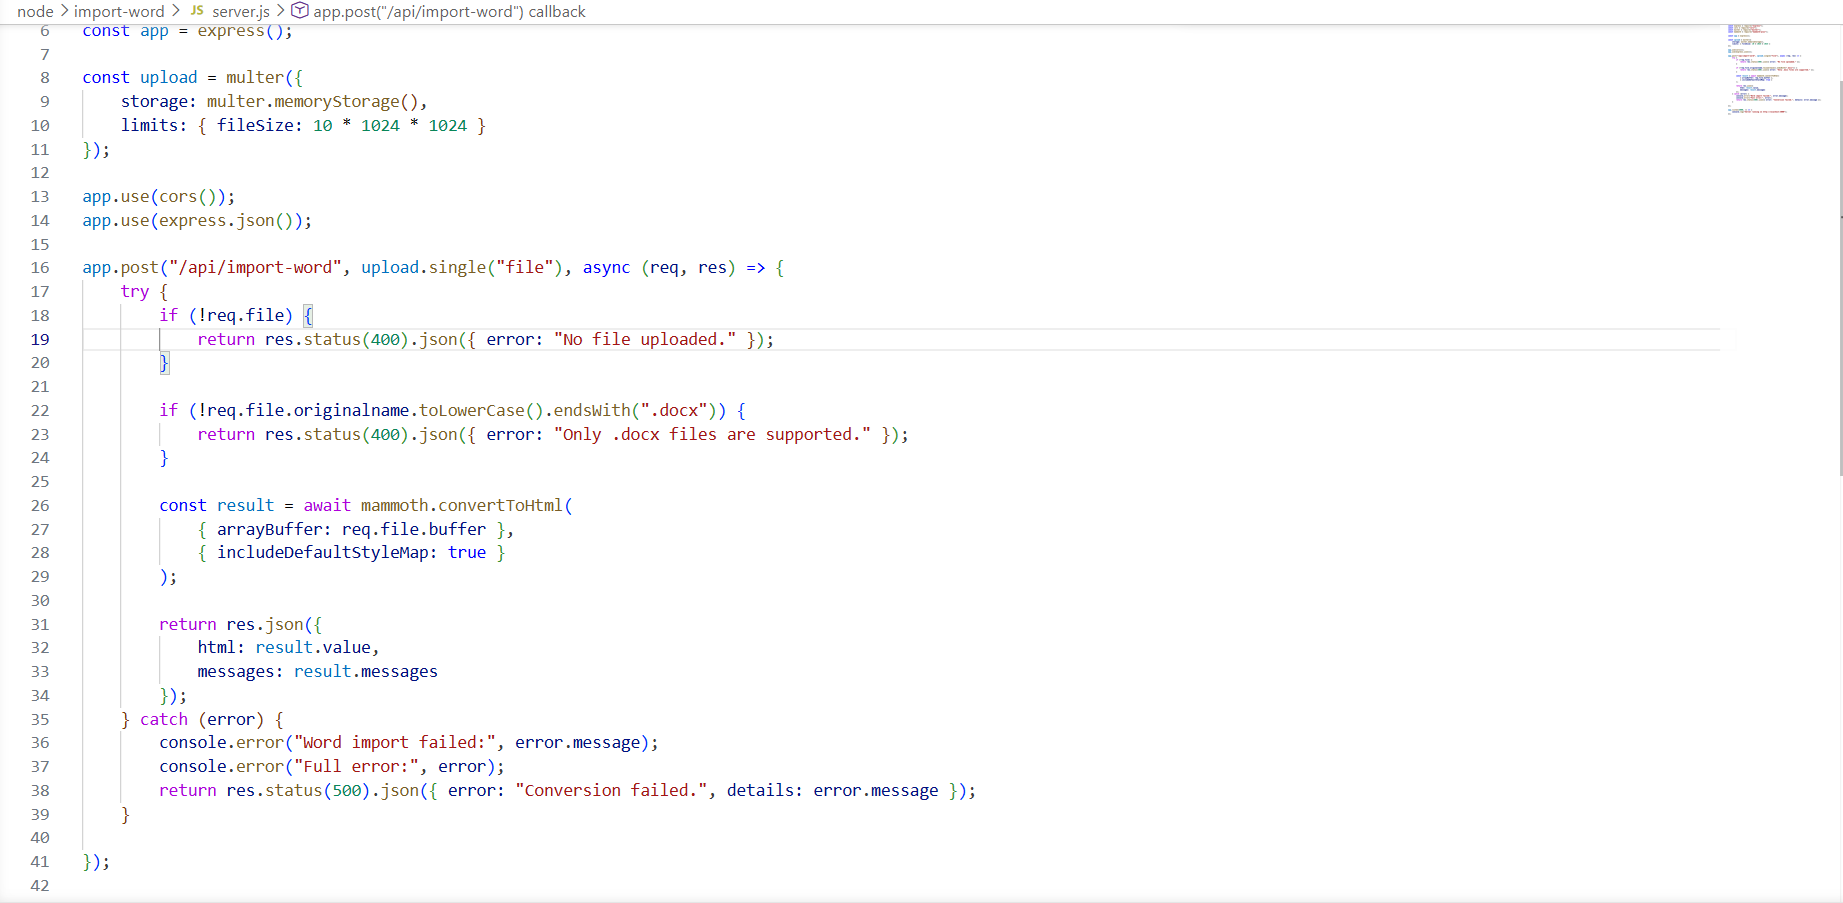
app.post("/api/import-word", upload.single("file"), async (req, res) => {
    try {
        if (!req.file) {
            return res.status(400).json({ error: "No file uploaded." });
        }

        if (!req.file.originalname.toLowerCase().endsWith(".docx")) {
            return res.status(400).json({ error: "Only .docx files are supported." });
        }

        const result = await mammoth.convertToHtml(
            { arrayBuffer: req.file.buffer },
            { includeDefaultStyleMap: true }
        );

        return res.json({
            html: result.value,
            messages: result.messages
        });
    } catch (error) {
        console.error("Word import failed:", error.message);
        console.error("Full error:", error);
        return res.status(500).json({ error: "Conversion failed.", details: error.message });
    }

});

app.listen(4000, () => {
    console.log("Server running on http://localhost:4000");
});

Important: Notice that upload.single() uses "file". Froala sends the selected Word document under the field name file by default. If you use a different field name, multer will throw an "Unexpected field" error and reject the upload. This is a common integration point where the field name must match exactly what Froala sends.

nodejs word import function

4. Render Froala in React

On the frontend, your React component renders Froala and keeps the editor content in state. Instead of building a separate file input and manual fetch flow, configure the editor toolbar to include Froala’s import_from_word button and set importFromWordUrlToUpload to your Express endpoint.

import React, { useMemo, useState } from "react";
import FroalaEditorComponent from "react-froala-wysiwyg";
import "froala-editor/css/froala_editor.pkgd.min.css";
import "froala-editor/css/froala_style.min.css";
import "froala-editor/js/plugins.pkgd.min.js";

export default function WordImportEditor() {
  const [model, setModel] = useState("<p>Start writing here...</p>");

  const config = useMemo(
        () => ({
            toolbarButtons: {
                moreText: {
                    buttons: [
                        "import_from_word",
                        "bold",
                        "italic",
                        "underline",
                        "strikeThrough",
                        "fontFamily",
                        "fontSize",
                        "textColor",
                        "backgroundColor",
                        "clearFormatting"
                    ]
                },
                moreParagraph: {
                    buttons: [
                        "alignLeft",
                        "alignCenter",
                        "formatOLSimple",
                        "alignRight",
                        "alignJustify",
                        "formatOL",
                        "formatUL",
                        "paragraphFormat",
                        "paragraphStyle",
                        "lineHeight",
                        "outdent",
                        "indent",
                        "quote"
                    ]
                },
                moreRich: {
                    buttons: [
                        "insertLink",
                        "insertImage",
                        "insertTable",
                        "emoticons",
                        "specialCharacters",
                        "insertHR",
                        "selectAll",

                    ]
                },
                moreMisc: {
                    buttons: ["undo", "redo", "html"]
                }
            },
            importFromWordUrlToUpload: "http://localhost:4000/api/import-word"
       }),
       []
  );

  return (
    <div>
      <h2>Froala Word Import Demo</h2>
      <FroalaEditorComponent
        tag="textarea"
        model={model}
        onModelChange={setModel}
        config={config}
      />
    </div>
  );
}

This built-in toolbar workflow improves UX because the import action stays exactly where authors expect it: inside the editor. Instead of leaving the editing surface to interact with a separate upload control, users click Import from Word in Froala, choose a document, and continue editing the returned HTML in one cohesive flow.

5. Insert HTML into the Froala Editing Flow

The key integration point is straightforward: Froala sends the selected Word file to Express through importFromWordUrlToUpload, receives the converted HTML response, and places that content into the editor workflow. Because Froala is designed to work with HTML content, the imported document becomes editable immediately. Users can continue refining the content, adjusting formatting, and publishing through your usual editorial workflow.

In many real applications, you may still extend the flow with review steps, server-side sanitization, or post-processing before content is finalized. But the primary integration remains the same: the editor-native toolbar button triggers the import, and your backend returns prepared HTML for Froala to use.

Running the Application

With both the Express server and the React frontend configured, you are ready to start the application and test the full import workflow end to end.

Start the Express Server

Open a terminal in your backend project directory and run the following command to start the Express server on port 4000:

node server.js

You should see the following message in your terminal confirming the server is listening:

Server running on http://localhost:4000

You can also verify the server is healthy by visiting http://localhost:4000/api/health in your browser. It should return {"status":"ok"}.

Start the React Frontend

Open a second terminal in your React project directory and start the development server:

npm start

Your browser should open automatically at http://localhost:3000, where you will see the Froala editor rendered inside the WordImportEditor component.

Test the Word Import Flow

To test the full import pipeline, follow these steps:

  1. In the Froala toolbar, locate the Import from Word button inside the More Rich toolbar group.
  2. Click the button and select a .docx file from your local machine.
  3. Froala will automatically POST the file to http://localhost:4000/api/import-word using the importFromWordUrlToUpload configuration..

  4. The Express server will convert the document using mammoth-plus and return the generated HTML.
  5. Froala will insert the returned HTML directly into the editor, where you can continue editing the imported content.

If the import does not appear to work, open your browser’s developer tools and check the Network tab for the request to /api/import-word. Confirm the response contains an html field and that no CORS errors are shown in the console. Also check your terminal for any server-side error output.

Testing and Validation

Once the integration is running, test it with a range of Word documents rather than a single sample file. Real-world imports often expose formatting edge cases that are easy to miss in a controlled demo.

  • Click the Froala Import from Word toolbar button and import a simple .docx file with headings, paragraphs, and lists.
  • Test a document that contains links, bold text, and nested list structures.
  • Verify the backend rejects unsupported file types and oversized uploads.
  • Inspect the returned HTML in browser dev tools to confirm it matches your expectations.
  • Review mammoth-plus conversion messages and log them during development so you can track conversion issues.

It is also wise to run the generated HTML through your existing content sanitization policy before you store or render it elsewhere in your application. Even if your import source is trusted, a clean pipeline is better long-term engineering practice.

Optimization and Production Notes

A tutorial implementation is a strong starting point, but production applications usually benefit from additional safeguards. Consider adding authentication to the import endpoint, rate limiting for abuse protection, and structured logging around file names, sizes, durations, and failures. If imported documents are large or frequent, you may also want a queue-based workflow so conversion does not compete with other synchronous application traffic.

If your authors regularly import branded templates or highly styled documents, you may want to apply post-processing rules to normalize classes, remove unwanted inline markup, or map Word structures into your editorial design system. That is one of the biggest advantages of the Express layer: it gives your team a place to enforce consistency before the content reaches Froala.

What’s Next

At this point, you have a complete foundation for a React-first Word import workflow built around Froala, Express, and mammoth-plus. Your frontend renders a polished editor interface, Froala’s Import from Word button handles document selection inside the editor, your backend performs controlled file handling and conversion, and the returned HTML flows directly into the authoring experience.

Ready to build your own editor? Download Froala Editor and start integrating it into your React application today. Froala’s comprehensive documentation, licensing options, and support team are ready to help you implement this workflow and customize it for your product requirements. With the server-side architecture you’ve learned in this tutorial, you’re equipped to handle Word imports at scale while maintaining full control over your content pipeline.

FAQ

Why use server-side import instead of converting in React?

Because server-side import centralizes validation, transformation, and monitoring. It also creates a more maintainable architecture when your product grows beyond a simple demo. With Froala, you still keep the experience editor-native by using the built-in Import from Word button and pointing it to your backend with importFromWordUrlToUpload.

Does mammoth-plus preserve every visual detail from Word?

Not necessarily. Its strength is producing clean HTML from structured Word content, not reproducing every layout detail exactly as Word displays it.

Can I store the converted HTML in a database?

Yes. Many teams store the returned HTML after sanitization. Froala provides the word.afterImport event, which fires immediately after a Word document has been successfully imported and converted to HTML. This event is particularly useful for database storage workflows because it gives you a hook to intercept the imported HTML on the client side before any further editing occurs.

Can I support drag-and-drop uploads?

Yes. Froala enables drag-and-drop Word imports by default, which means your users can drag a .docx file directly from their file system and drop it into the editor. When they do, the editor automatically triggers the same import workflow you configured with importFromWordUrlToUpload, sending the file to your Express endpoint for conversion without any additional code.

This zero-config behavior creates a frictionless authoring experience—users don’t need to hunt for a toolbar button; they can simply drag and drop. The imported HTML flows into the editor the same way it does when they click the Import from Word button.

If you want to disable drag-and-drop imports (for example, to enforce a more deliberate toolbar-only workflow), set the importFromWordEnableImportOnDrop configuration option to false in your Froala config object.

How to Set Up Froala with DeepSeek AI Assist in WordPress

Set Up Froala AI Assist in WordPress

In today’s digital landscape, content creation has become increasingly sophisticated, and users expect intelligent, AI-powered tools to enhance their writing experience. Whether you’re building a Learning Management System (LMS), a content publishing platform, or any WordPress site that requires rich text editing, integrating a WordPress AI editor can dramatically improve user productivity and content quality. 

In this comprehensive tutorial, we’ll walk you through setting up the Froala WYSIWYG editor with AI assistance powered by DeepSeek on your WordPress frontend pages.

Key Takeaways

  • Security First: By handling API calls server-side through WordPress’s REST API, you’ve protected your DeepSeek API key and prevented unauthorized usage.
  • Flexibility: The modular architecture allows easy customization of AI commands, user permissions, and integration with other WordPress features.
  • User Experience: Users get seamless AI assistance without leaving the editor, dramatically improving their content creation workflow.
  • Scalability: The implementation can handle multiple users and can be extended with caching, rate limiting, and asynchronous processing as your needs grow.
  • Cost Control: With proper monitoring, rate limiting, and caching, you can control API costs while providing valuable AI features.

Why Choose Froala with AI Assist for Your WordPress Site?

Before diving into the technical implementation, let’s understand why this integration is a game-changer for WordPress developers and site owners.

The Power of AI-Enhanced Content Creation

Froala Editor is already one of the most feature-rich WYSIWYG editors available, offering a clean interface, extensive formatting options, and excellent performance. 

It offers an affordable, enterprise-grade solution for rich-text editing, with plans that include unlimited editor loads and user seats, so costs don’t multiply with scale.

When you combine it with AI capabilities, you unlock a new dimension of content creation that includes:

  • Intelligent Chat that can be used for
    • Intelligent content suggestions that help users overcome writer’s block
    • Grammar and style improvements that enhance content quality
    • Content expansion capabilities that can elaborate on brief ideas
    • Summarization features for condensing lengthy content
  • Tone adjustment to match different audiences and contexts
  • Translation assistance for multilingual sites

Froala’s AI Assist plugin is model-agnostic and works with any AI API. This tutorial uses DeepSeek as the AI provider—a cost-effective and capable choice for many use cases. However, you can substitute any other AI model (OpenAI’s GPT-4, Anthropic’s Claude, Llama, etc.) by adjusting the API endpoint, authentication method, and request/response formatting in the code. The integration steps and architecture remain largely the same regardless of which model you choose.

Benefits of This Integration

Implementing a WordPress AI editor using Froala and DeepSeek offers numerous advantages:

  1. Enhanced User Experience: Students writing essays in an LMS, bloggers crafting articles, or team members collaborating on documentation all benefit from real-time AI assistance without leaving the editor interface.
  2. Server-Side Security: By handling API calls on the WordPress backend, you keep your DeepSeek API keys secure and never expose them to client-side code. This architecture prevents unauthorized usage and protects your credentials.
  3. Seamless WordPress Integration: The solution leverages WordPress’s native REST API infrastructure, ensuring compatibility with WordPress standards and making maintenance straightforward.
  4. Customizable and Extensible: The implementation we’ll build can be easily modified to add custom prompts, implement rate limiting, add user-specific features, or integrate with other WordPress plugins.

Real-World Use Cases

Before we begin the implementation, let’s explore some practical scenarios where this WordPress AI editor integration shines:

Learning Management Systems (LMS)

Imagine students working on essays or research papers within your LMS. With AI assist, they can:

  • Get suggestions for improving their thesis statements
  • Expand on complex ideas with additional context
  • Check their writing for clarity and coherence
  • Generate outlines for structured essays
  • Receive feedback on argument strength

Content Publishing Platforms

For blogs, news sites, or content marketing platforms:

  • Writers can quickly generate article introductions
  • Content teams can maintain consistent tone across multiple authors
  • Editors can use AI to suggest improvements before publication
  • SEO-focused content can be enhanced with keyword-rich suggestions
  • Meta descriptions and summaries can be auto-generated

Corporate Intranets and Knowledge Bases

Organizations using WordPress for internal documentation benefit from:

  • Standardized documentation formatting and style
  • Quick generation of technical explanations
  • Translation of content for global teams
  • Summarization of lengthy reports
  • Consistent terminology across departments

E-Learning and Course Creation

Course creators and instructional designers can:

  • Generate quiz questions from course content
  • Create engaging lesson descriptions
  • Develop learning objectives with AI assistance
  • Produce student-friendly explanations of complex topics
  • Draft feedback templates for assignments

What You’ll Build

A WordPress page where users can write content with:

  • A professional WYSIWYG editor (Froala)
  • AI writing assist features (chat, tone, translation)
  • DeepSeek as the backend AI model
  • Server-side API handling for security

Froala AI in WordPress powered by DeepSeek

Prerequisites

Before starting this tutorial, ensure you have:

  1. A WordPress installation (version 5.0 or higher recommended)
  2. Administrative access to your WordPress site
  3. FTP or file manager access to edit WordPress files
  4. A DeepSeek API key (sign up at DeepSeek’s website)
  5. Froala Editor license (or trial version)
  6. Basic understanding of PHP, JavaScript, and WordPress development
  7. A code editor for modifying WordPress files

Step 1: Securing Your DeepSeek API Key

The first and most critical step in building a secure WordPress AI editor is properly storing your API credentials. Never expose API keys in client-side JavaScript code, as this would allow anyone to use your API quota and potentially incur costs.

Adding the API Key to wp-config.php

Open your wp-config.php file, which is located in your WordPress root directory. This file contains your WordPress configuration settings and is the ideal place to store sensitive credentials.

Add the following line before the comment that says /* That's all, stop editing! Happy publishing. */:

define( 'DEEPSEEK_API_KEY', 'sk-****' );

Replace sk-**** with your actual DeepSeek API key. This approach keeps your key secure because:

  • The wp-config.php file is never accessible via web browsers when properly configured
  • The constant is available throughout your WordPress installation
  • You can easily change the key without modifying multiple files
  • It follows WordPress security best practices

Why this matters: Storing sensitive keys in wp-config keeps them out of the database and version control. WordPress loads this file before anything else, making it available everywhere you need it.

Security Tip: Ensure your wp-config.php file has appropriate permissions (typically 440 or 400) to prevent unauthorized access. You can set this via FTP or your hosting control panel.

Step 2: Creating the WordPress REST API Endpoint

WordPress’s REST API provides a standardized way to interact with your site programmatically. We’ll create a custom endpoint that acts as a secure proxy between the Froala editor and the DeepSeek API.

Understanding the Architecture

Here’s how the data flow works:

  1. User types a prompt in the Froala editor and triggers AI assist
  2. Froala sends a request to your WordPress REST API endpoint
  3. WordPress receives the request, sanitizes the input, and validates it
  4. WordPress makes a server-side request to DeepSeek’s API with your secure API key
  5. DeepSeek processes the request and returns AI-generated content
  6. WordPress formats the response and sends it back to Froala
  7. Froala displays the AI-generated content to the user

This architecture ensures your API key never leaves the server and all requests are properly validated.

Implementing the REST API Endpoint

You have two options for adding this code:

Option A: Add to functions.php (simpler, good for single-site implementations)

Option B: Create a custom plugin (recommended for portability and cleaner code organization)

For this tutorial, we’ll show both approaches, but we recommend Option B for production environments.

Option A: Adding to functions.php

Open your theme’s functions.php file (located in wp-content/themes/your-theme/functions.php) and add:

/**
* Register custom REST API endpoint for DeepSeek AI integration
*/
add_action( 'rest_api_init', function () {
   register_rest_route( 'ai-assist', '/deepseek', array(
       'methods'  => 'POST',
       'callback' => 'handle_deepseek_request',
       'permission_callback' => '__return_true',
   ));
});

/**
* Handle DeepSeek API requests
* 
* @param WP_REST_Request $request The REST API request object
* @return array|WP_Error Response data or error
*/
function handle_deepseek_request( $request ) {
   // Extract and sanitize the user's prompt
   $params = $request->get_json_params();
   $user_prompt = sanitize_text_field( $params['prompt'] );

   // Validate that we have a prompt
   if ( empty( $user_prompt ) ) {
       return new WP_Error( 
           'missing_prompt', 
           'No prompt provided.', 
           array( 'status' => 400 ) 
       );
   }

   // Call DeepSeek API securely from the server
   $response = wp_remote_post( 'https://api.deepseek.com/v1/chat/completions', array(
       'headers' => array(
           'Authorization' => 'Bearer ' . DEEPSEEK_API_KEY,
           'Content-Type'  => 'application/json',
       ),
       'body' => json_encode( array(
           'model'    => 'deepseek-chat',
           'messages' => array(
               array( 'role' => 'user', 'content' => $user_prompt )
           ),
       )),
       'timeout' => 30,
   ));

   // Handle connection errors
   if ( is_wp_error( $response ) ) {
       return new WP_Error( 
           'api_error', 
           'DeepSeek API connection failed: ' . $response->get_error_message(), 
           array( 'status' => 500 ) 
       );
   }

   // Parse the API response
   $body = json_decode( wp_remote_retrieve_body( $response ), true );

   // Check if DeepSeek actually returned an answer
   if ( isset( $body['choices'][0]['message']['content'] ) ) {
       return array(
           'success' => true,
           'data'    => array(
               'content' => $body['choices'][0]['message']['content']
           )
       );
   }

   // Fallback for API errors (like quota exceeded)
   return array(
       'success' => false,
       'error'   => $body['error']['message'] ?? 'Unknown API error'
   );
}

Option B: Creating a Custom Plugin (Recommended)

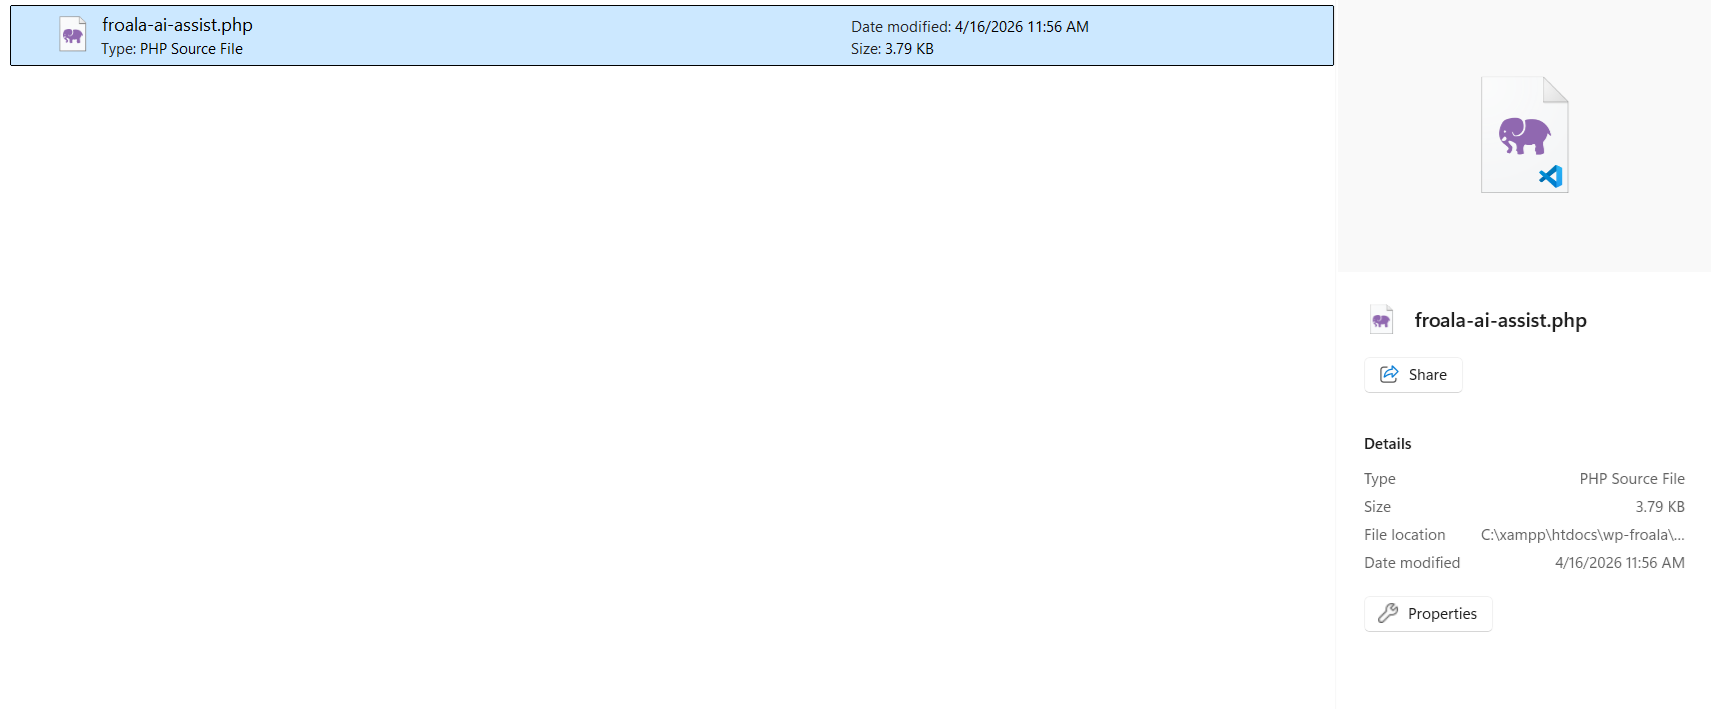
Create a new directory in wp-content/plugins/ called froala-ai-assist. Inside this directory, create a file named froala-ai-assist.php:

AI Assist file

/**
* Plugin Name: Froala AI Assist with DeepSeek
* Plugin URI: https://yoursite.com
* Description: Integrates Froala Editor with DeepSeek AI for intelligent content assistance
* Version: 1.0.0
* Author: Your Name
* Author URI: https://yoursite.com
* License: GPL v2 or later
* Text Domain: froala-ai-assist
*/

// Prevent direct access
if ( ! defined( 'ABSPATH' ) ) {
   exit;
}

/**
* Main plugin class
*/
class Froala_AI_Assist {

   /**
    * Constructor
    */
   public function __construct() {
       add_action( 'rest_api_init', array( $this, 'register_rest_routes' ) );
   }

   /**
    * Register REST API routes
    */
   public function register_rest_routes() {
       register_rest_route( 'ai-assist', '/deepseek', array(
           'methods'  => 'POST',
           'callback' => array( $this, 'handle_deepseek_request' ),
           'permission_callback' => array( $this, 'check_permissions' ),
       ));
   }

   /**
    * Check if user has permission to use AI assist
    * 
    * @return bool
    */
   public function check_permissions() {
       // For now, allow all authenticated users
       // You can customize this based on your requirements
       return true; // is_user_logged_in();
   }

   /**
    * Handle DeepSeek API requests
    * 
    * @param WP_REST_Request $request
    * @return array|WP_Error
    */
   public function handle_deepseek_request( $request ) {
       $params = $request->get_json_params();
       $user_prompt = sanitize_text_field( $params['prompt'] ?? '' );

       if ( empty( $user_prompt ) ) {
           return new WP_Error( 
               'missing_prompt', 
               __( 'No prompt provided.', 'froala-ai-assist' ), 
               array( 'status' => 400 ) 
           );
       }

       // Check if API key is configured
       if ( ! defined( 'DEEPSEEK_API_KEY' ) || empty( DEEPSEEK_API_KEY ) ) {
           return new WP_Error( 
               'missing_api_key', 
               __( 'DeepSeek API key not configured.', 'froala-ai-assist' ), 
               array( 'status' => 500 ) 
           );
       }

       // Call DeepSeek API
       $response = wp_remote_post( 'https://api.deepseek.com/v1/chat/completions', array(
           'headers' => array(
               'Authorization' => 'Bearer ' . DEEPSEEK_API_KEY,
               'Content-Type'  => 'application/json',
           ),
           'body' => json_encode( array(
               'model'    => 'deepseek-chat',
               'messages' => array(
                   array( 'role' => 'user', 'content' => $user_prompt )
               ),
               'temperature' => 0.7,
               'max_tokens' => 2000,
           )),
           'timeout' => 30,
       ));

       if ( is_wp_error( $response ) ) {
           return new WP_Error( 
               'api_error', 
               sprintf( 
                   __( 'DeepSeek API connection failed: %s', 'froala-ai-assist' ),
                   $response->get_error_message()
               ), 
               array( 'status' => 500 ) 
           );
       }

       $body = json_decode( wp_remote_retrieve_body( $response ), true );

       if ( isset( $body['choices'][0]['message']['content'] ) ) {
           return array(
               'success' => true,
               'data'    => array(
                   'content' => $body['choices'][0]['message']['content']
               )
           );
       }

       return array(
           'success' => false,
           'error'   => $body['error']['message'] ?? __( 'Unknown API error', 'froala-ai-assist' )
       );
   }
}

// Initialize the plugin
new Froala_AI_Assist();

After creating this file, activate the plugin from your WordPress admin panel under Plugins > Installed Plugins.

Understanding the Code

Let’s break down the key components of this implementation:

  1. REST Route Registration: The register_rest_route() function creates a new API endpoint at /wp-json/ai-assist/deepseek. This endpoint accepts POST requests and routes them to our handler function.
  2. Input Sanitization: We use sanitize_text_field() to clean the user’s prompt, preventing potential security issues like XSS attacks.
  3. API Request: The wp_remote_post() function is WordPress’s built-in method for making HTTP requests. It’s more secure and reliable than using PHP’s cURL directly.
  4. Error Handling: We check for both connection errors and API-level errors, providing meaningful feedback to users.
  5. Response Formatting: The function returns a standardized response format that Froala can easily parse and display.

Step 3: Creating a WordPress Page with Froala Editor

Now that our backend is ready, let’s create a frontend page where users can interact with the WordPress AI editor.

Creating the Page Template

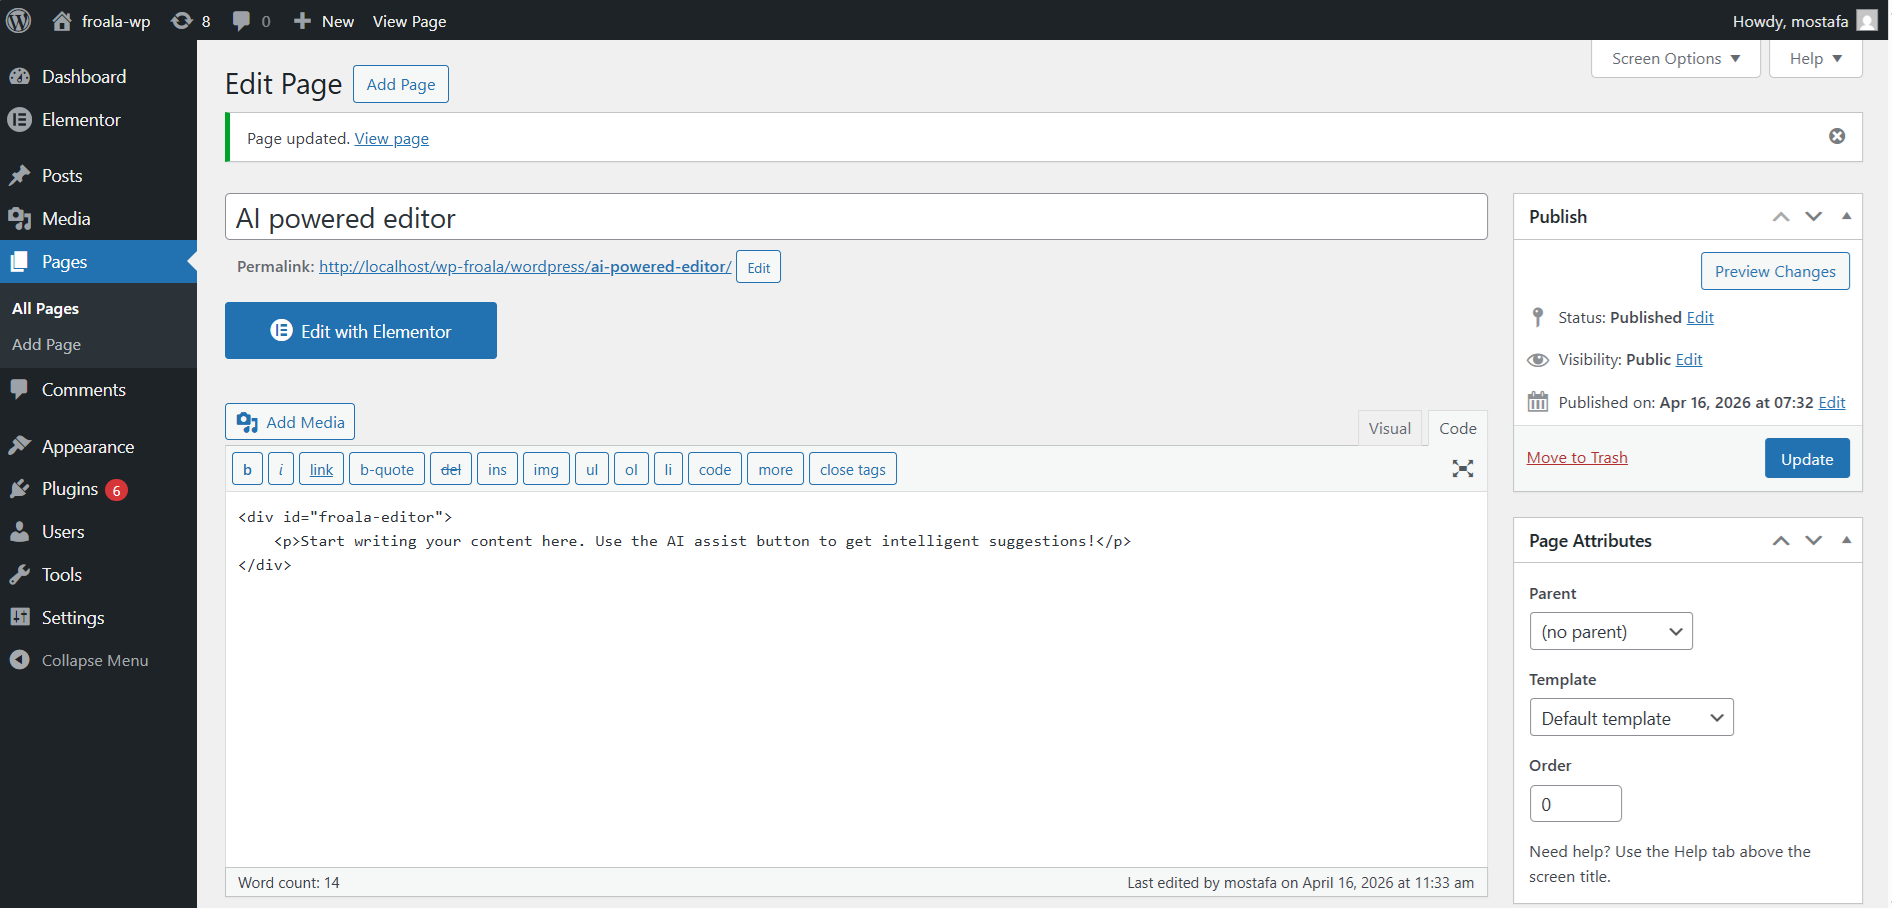
Create a new page in WordPress (Pages > Add New) and give it a title like “AI-Powered Editor” or “Write with AI Assist”. You can use the default page template or create a custom one.

Adding the Froala Editor

You’ll need to enqueue Froala’s CSS and JavaScript files. Add this to your theme’s functions.php or your custom plugin:

/**
* Enqueue Froala Editor assets
*/
function enqueue_froala_editor_assets() {
   // Only load on specific pages
   if ( is_page( 'ai-powered-editor' ) ) { // Replace with your page slug

       // Froala CSS
       wp_enqueue_style( 
           'froala-editor', 
           'https://cdn.jsdelivr.net/npm/froala-editor@latest/css/froala_editor.pkgd.min.css',
           array(),
           '4.0.0'
       );

       wp_enqueue_style( 
           'froala-style', 
           'https://cdn.jsdelivr.net/npm/froala-editor@latest/css/froala_style.min.css',
           array(),
           '4.0.0'
       );

       // Froala JavaScript
       wp_enqueue_script( 
           'froala-editor', 
           'https://cdn.jsdelivr.net/npm/froala-editor@latest/js/froala_editor.pkgd.min.js',
           array( 'jquery' ),
           '4.0.0',
           true
       );

      /*  Add scripts for other feature dependencies as needed.*/


       // Custom initialization script
       wp_enqueue_script( 
           'froala-init', 
           get_template_directory_uri() . '/js/froala-init.js',
           array( 'froala-editor' ),
           '1.0.0',
           true
       );

       // Pass WordPress REST API URL to JavaScript
       wp_localize_script( 'froala-init', 'wpApiSettings', array(
           'root' => esc_url_raw( rest_url() ),
           'nonce' => wp_create_nonce( 'wp_rest' )
       ));
   }
}
add_action( 'wp_enqueue_scripts', 'enqueue_froala_editor_assets' );

Creating the Page Content

In your page editor, switch to the HTML/Code view and add:

 <div id="froala-editor">
    <p>Start writing your content here. Use the AI assist button to get intelligent suggestions!</p>
</div>

<style>
    #froala-editor {
        margin: 20px 0;
        min-height: 400px;
    }
  
</style>

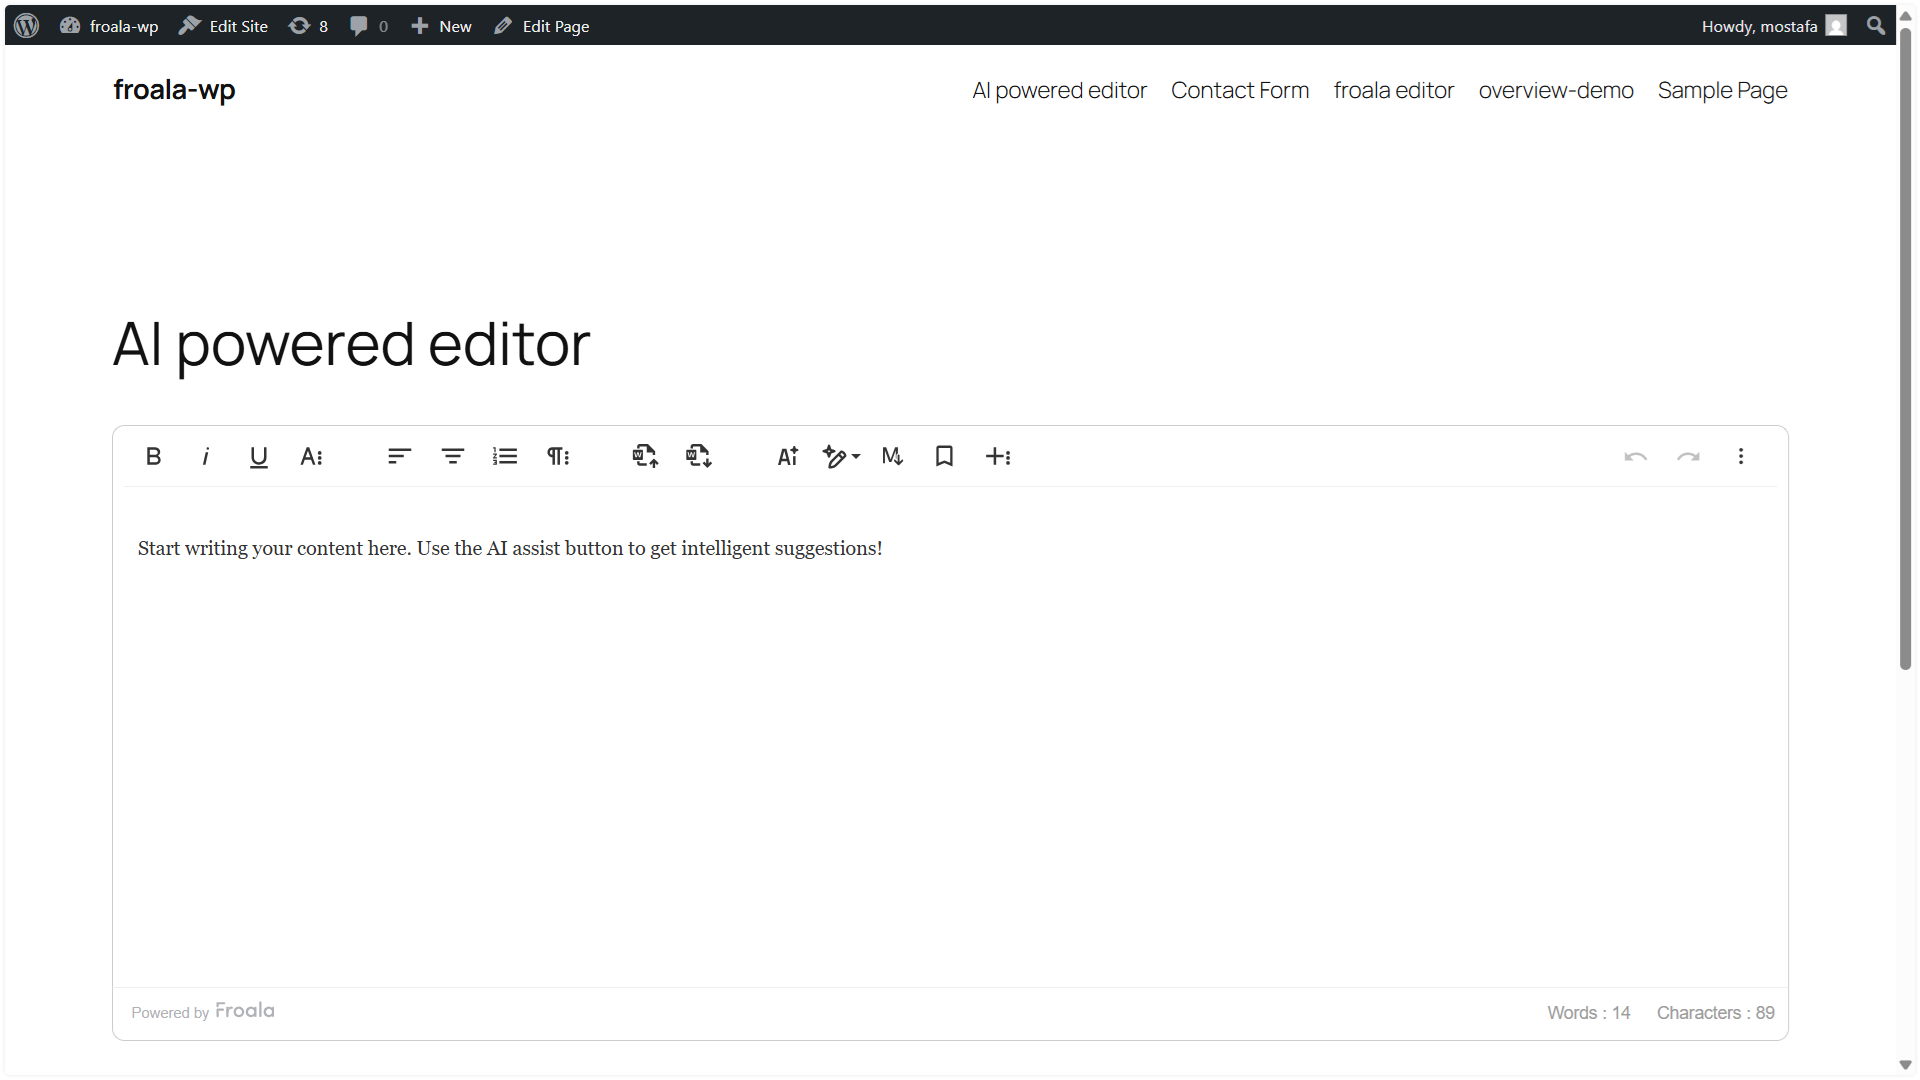
AI editor wordpress

Step 4: Initializing Froala with AI Assist

Create a new JavaScript file in your theme directory at js/froala-init.js:

/**
* Initialize Froala Editor with DeepSeek AI Assist
*/
(function($) {
   'use strict';

   /**
    * Call DeepSeek API through WordPress REST endpoint
    * 
    * @param {Object} data- The user's prompt
    *
    */
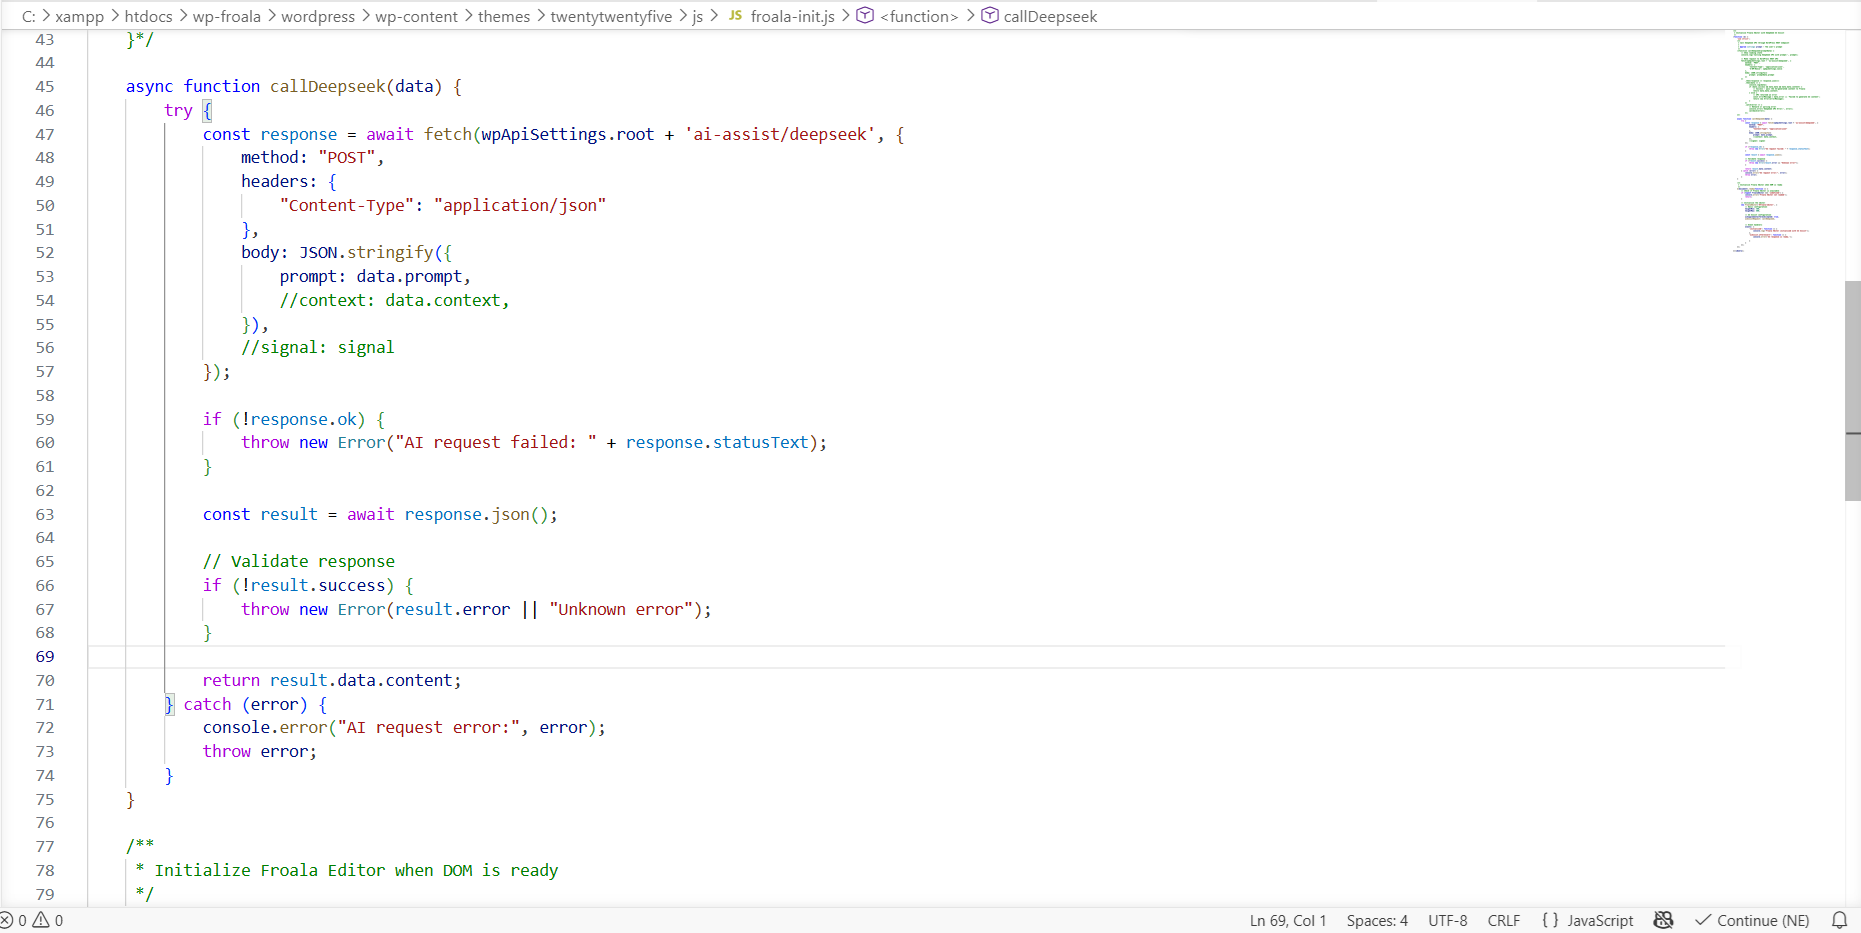
    async function callDeepseek(data) {

       try {

           const response = await fetch(wpApiSettings.root + 'ai-assist/deepseek', {

               method: "POST",

               headers: {

                   "Content-Type": "application/json"

               },

               body: JSON.stringify({

                   prompt: data.prompt,

                   //context: data.context,

               }),

               //signal: signal

           });


           if (!response.ok) {

               throw new Error("AI request failed: " + response.statusText);

           }


           const result = await response.json();


           // Validate response

           if (!result.success) {

               throw new Error(result.error || "Unknown error");

           }


           return result.data.content;

       } catch (error) {

           console.error("AI request error:", error);

           throw error;

       }

   }

   /**
    * Initialize Froala Editor when DOM is ready
    */
   $(document).ready(function() {

       // Check if Froala Editor is available
       if (typeof FroalaEditor === 'undefined') {

           console.error('Froala Editor not loaded');

           return;

       }


       // Initialize the editor

       new FroalaEditor('#froala-editor', {

           // Basic configuration

           heightMin: 400,

           heightMax: 800,


           // AI Assist configuration

           aiSupplementalTermsAccepted: true,

           aiAssistRequest: callDeepseek,


           // Event handlers

           events: {

               'initialized': function () {

                   console.log('Froala Editor initialized with AI Assist');

               },

               'aiAssist.afterInsert': function () {

                   console.error('AI response is ready.');


               }

           }

       });
   });

})(jQuery);

DeepSeek function

Understanding the Froala Configuration

Let’s examine the key configuration options:

  1. aiSupplementalTermsAccepted: This boolean flag indicates that you’ve accepted Froala’s terms for using AI features. Set this to true to enable AI functionality.
  2. aiAssistRequest: This is the crucial connection point. We pass our callDeepseek function here, which Froala will call whenever a user requests AI assistance.
  3. Event Handlers: We set up event listeners to track initialization and AI response insertion.

Step 5: Testing Your WordPress AI Editor

Now that everything is configured, let’s test the integration:

  1. Navigate to Your Page: Visit the page where you added the Froala editor
  2. Write Some Content: Type a paragraph or two of text
  3. Select Text: Highlight some of your content
  4. Click AI Assist: Look for the AI assist button in the Froala toolbar
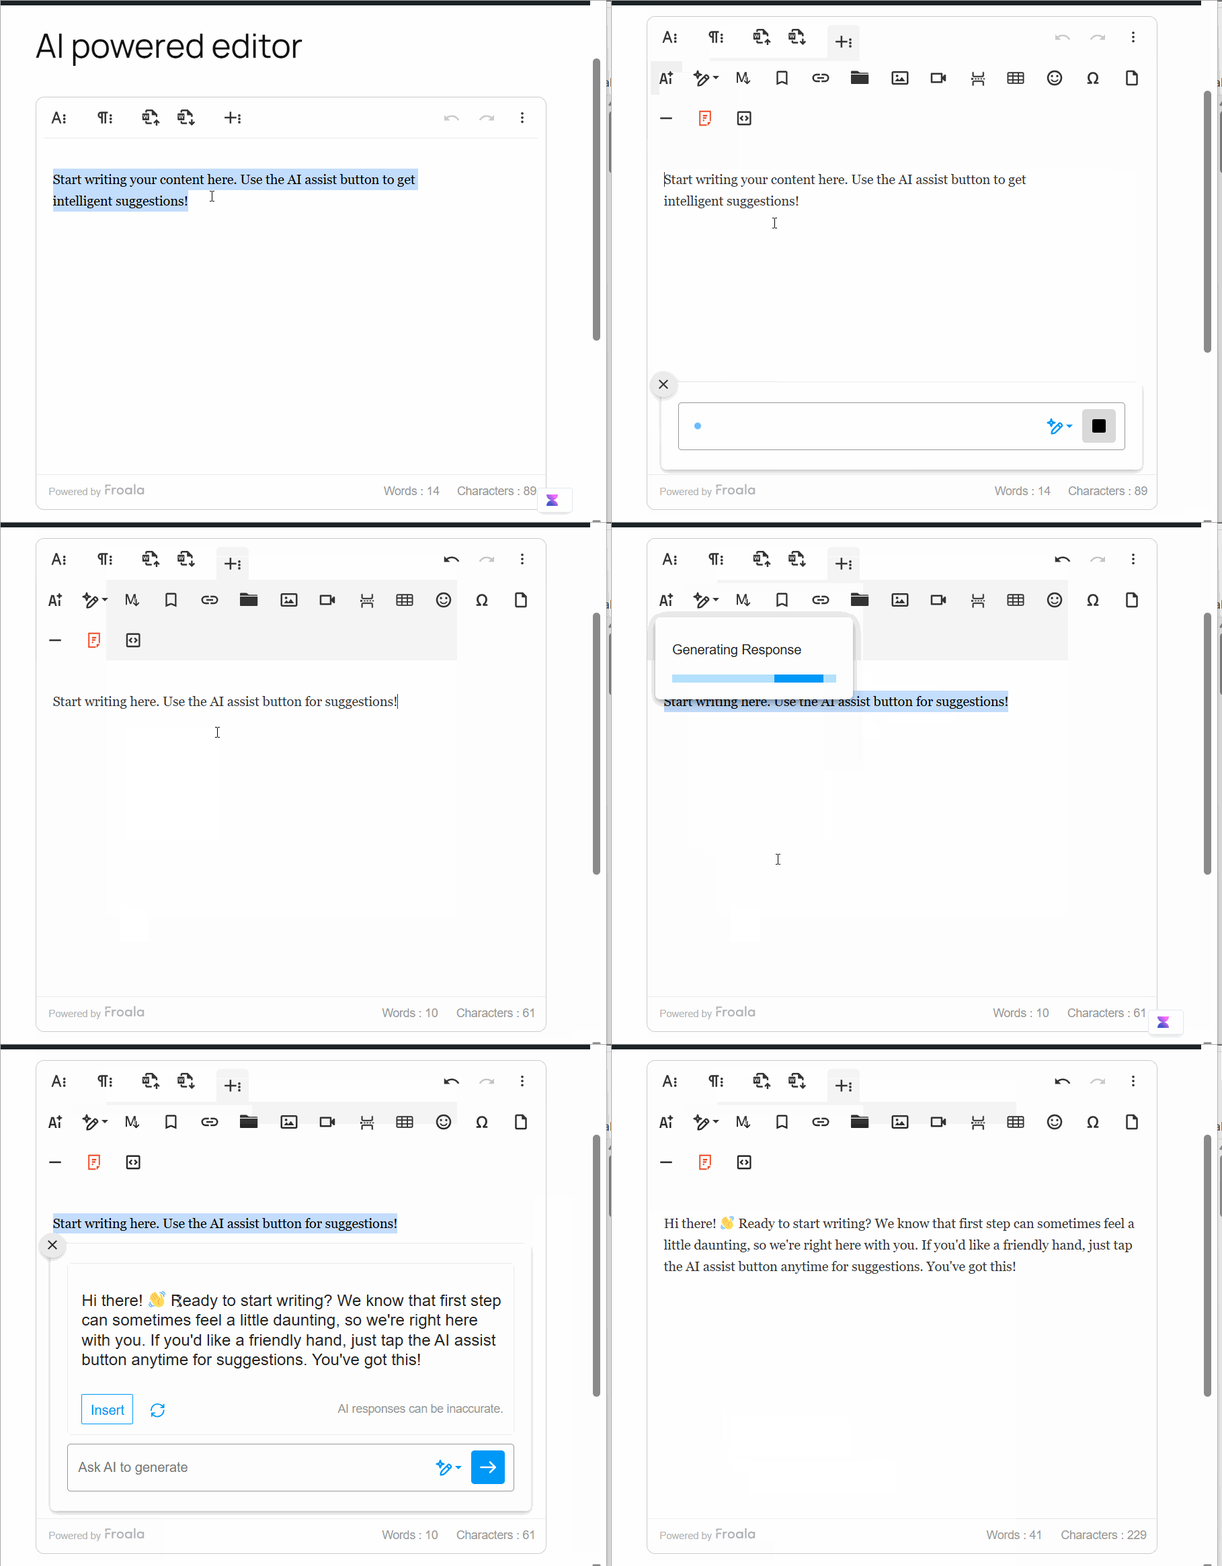
  5. Ask Anything: Try one of the AI commands like “Write about X” or “Expand Content” and watch the magic happen in real-time as DeepSeek processes your request.
  6. Review Results: The AI-generated content should appear, which you can accept, modify, or reject

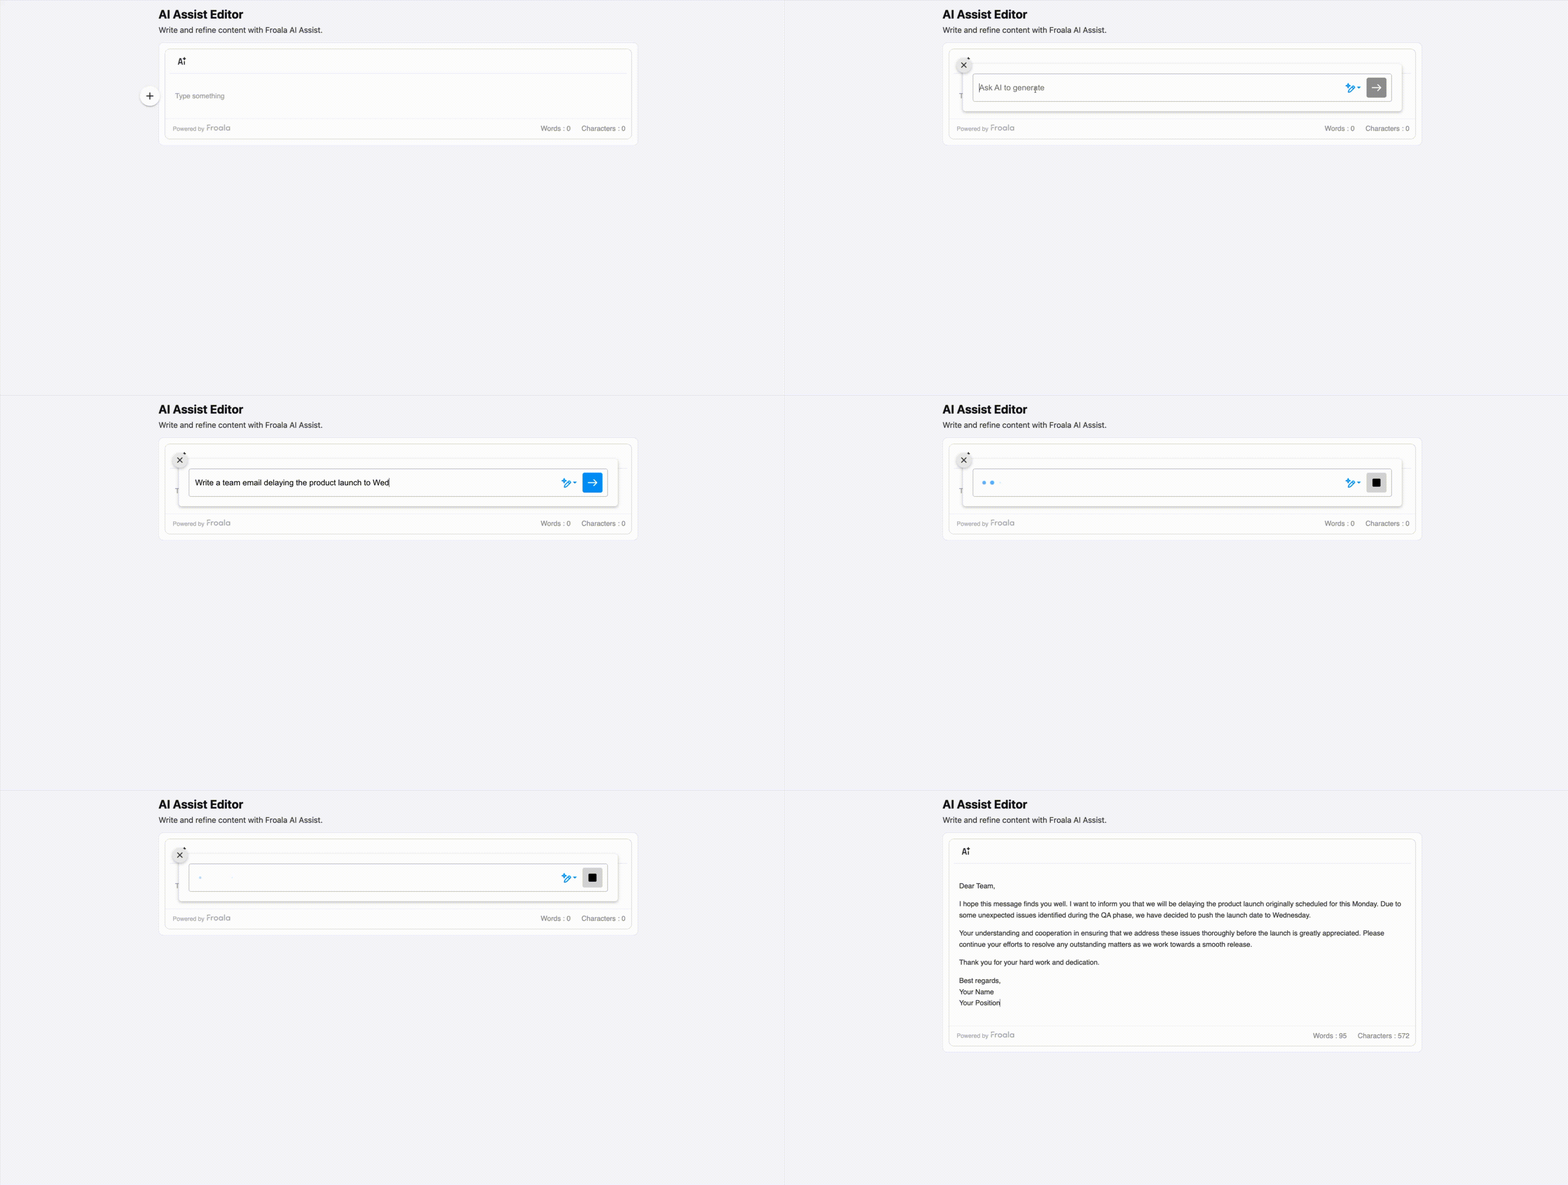
Wordpress AI editor

Troubleshooting Common Issues

Problem: AI Assist button doesn’t appear

  • Solution: Verify that the AI Assist plugin JavaScript is loaded and activated and you are not customizing the toolbar editor buttons. Check your browser’s console for errors.

Problem: “API key not configured” error

  • Solution: Double-check that you’ve added the DEEPSEEK_API_KEY constant to wp-config.php and that it’s spelled correctly.

Problem: “DeepSeek API connection failed”

  • Solution: Verify your API key is valid and that your server can make outbound HTTPS requests. Some hosting providers block external API calls.

Problem: Slow response times

  • Solution: DeepSeek’s response time depends on prompt complexity and server load. Consider implementing a loading indicator and setting appropriate timeout values.

Problem: CORS errors

  • Solution: Since we’re using WordPress’s REST API as a proxy, CORS shouldn’t be an issue. If you see CORS errors, verify that your REST API is accessible and not blocked by security plugins.

Advanced Customization Options

While the basic integration provides powerful AI-assisted editing out of the box, you may want to extend the functionality to meet specific business requirements. The following customizations demonstrate common enhancement patterns that can be adapted to your unique use cases.

Adding User-Specific Rate Limiting

To prevent abuse and control API costs, implement rate limiting:

function handle_deepseek_request( $request ) {
   $user_id = get_current_user_id();

   // Check rate limit (e.g., 10 requests per hour)
   $transient_key = 'ai_assist_limit_' . $user_id;
   $request_count = get_transient( $transient_key );

   if ( $request_count && $request_count >= 10 ) {
       return new WP_Error( 
           'rate_limit_exceeded', 
           'You have exceeded the AI assist rate limit. Please try again later.', 
           array( 'status' => 429 ) 
       );
   }

   // Increment counter
   set_transient( $transient_key, ( $request_count ? $request_count + 1 : 1 ), HOUR_IN_SECONDS );

   // Continue with normal processing...
}

Implementing Usage Logging

Track AI usage for analytics and billing:

function log_ai_usage( $user_id, $prompt, $response, $tokens_used ) {
   global $wpdb;

   $wpdb->insert(
       $wpdb->prefix . 'ai_usage_log',
       array(
           'user_id' => $user_id,
           'prompt' => $prompt,
           'response_length' => strlen( $response ),
           'tokens_used' => $tokens_used,
           'timestamp' => current_time( 'mysql' )
       ),
       array( '%d', '%s', '%d', '%d', '%s' )
   );
}

Security Best Practices

Integrating AI capabilities into your WordPress site introduces new security considerations. Since your REST API endpoint handles user input and communicates with external services, it’s essential to implement robust validation, sanitization, and permission checks.

Input Validation and Sanitization

Always validate and sanitize user input:

function handle_deepseek_request( $request ) {
   $params = $request->get_json_params();

   // Validate prompt exists
   if ( ! isset( $params['prompt'] ) ) {
       return new WP_Error( 'missing_prompt', 'Prompt is required' );
   }

   // Sanitize and validate length
   $user_prompt = sanitize_textarea_field( $params['prompt'] );

   if ( strlen( $user_prompt ) > 5000 ) {
       return new WP_Error( 'prompt_too_long', 'Prompt exceeds maximum length' );
   }

   if ( strlen( $user_prompt ) < 10 ) {
       return new WP_Error( 'prompt_too_short', 'Prompt is too short' );
   }

   // Continue processing...
}

Permission Checks

Implement proper permission checking:

function check_ai_assist_permissions() {
   // Only allow logged-in users
   if ( ! is_user_logged_in() ) {
       return false;
   }

   // Check if user has specific capability
   if ( ! current_user_can( 'edit_posts' ) ) {
       return false;
   }

   // Check if user's account is in good standing
   $user_id = get_current_user_id();
   $is_suspended = get_user_meta( $user_id, 'ai_assist_suspended', true );

   if ( $is_suspended ) {
       return false;
   }

   return true;
}

Conclusion

Congratulations! You’ve successfully implemented a powerful WordPress AI editor by integrating Froala WYSIWYG editor with DeepSeek AI assistance. This implementation provides your users with intelligent content creation tools while maintaining security, performance, and cost-effectiveness.

Next Steps

Consider these enhancements for your WordPress AI editor:

  • Implement user-specific AI command customization.
  • Add support for multiple AI models (OpenAI, Anthropic, etc.).
  • Integrate Froala as a WordPress’s block editor.

Resources

By following this tutorial, you’ve created a production-ready WordPress AI editor that can transform how users create content on your site. Whether you’re building an LMS, a content publishing platform, or any WordPress application that requires rich text editing, this integration provides the intelligent assistance modern users expect.

The combination of Froala’s robust editing capabilities and DeepSeek’s powerful AI creates an exceptional content creation experience that will delight your users and set your WordPress site apart from the competition. Try AI assist feature in action now.


The Performance Benefits of a Lightweight React WYSIWYG Editor

Lightweight React WYSIWYG editor illustration showing modular UI components and performance speed optimization

When teams evaluate a React WYSIWYG editor, the conversation usually starts with features.

Toolbar options. Plugins. Formatting flexibility.

But in 2026, that’s not where the real decision is made.

The real question is this:

What is this editor doing to your performance, and what is that costing your business?

Because in modern React applications, especially SaaS platforms and high-traffic systems, your editor is no longer just a UI component.

It’s part of your performance architecture.

And if it’s heavy, everything else pays the price.

Key Takeaways

  • A WYSIWYG editor directly impacts performance and business outcomes. A heavy editor increases bundle size, slows Core Web Vitals, and can reduce both SEO rankings and user engagement.
  • “Lightweight” is about architecture, not just size. Modular imports, efficient rendering, and lazy loading are what truly reduce performance overhead in React applications.
  • Performance issues scale into real costs. Larger editor bundles lead to higher bandwidth usage, increased CDN expenses, and slower global experiences, especially in high-traffic apps.
  • Developer productivity is part of the ROI. Lightweight editors reduce bugs, simplify integration, and help teams ship faster with fewer performance-related issues.
  • The right implementation maximizes value. Using lazy loading, dynamic imports, and ongoing performance monitoring ensures you fully realize the benefits of a lightweight editor.  

The Business Cost of a Bloated Editor

Let’s make this practical.

Imagine you’ve built a fast, optimized React app. Your Core Web Vitals are in a good place. Your pages load quickly. Users are engaged.

Then you add a rich text editor.

Suddenly:

  • Your JavaScript bundle increases significantly
  • Initial load time slows down
  • User interactions feel delayed
  • Performance scores drop

This isn’t just a technical issue. It directly impacts your business.

Core Web Vitals Take the Hit

A heavy WYSIWYG editor affects all three major metrics:

  • LCP (Largest Contentful Paint): Large bundles delay page rendering
  • FID / INP: Heavy scripts block interactivity
  • CLS: Poor rendering strategies can cause layout shifts

Google has made it clear: page experience affects rankings.

That means your editor choice can quietly reduce your organic traffic.

User Engagement Drops Faster Than You Think

There’s a well-known pattern across performance studies:

Even a 100ms delay can impact user behavior.

Now scale that across:

  • Content dashboards
  • Admin panels
  • CMS interfaces

What feels like a “slightly slower editor” becomes:

→ Lower engagement
→ Higher abandonment rates
→ Lost conversions

That’s not a UX issue anymore. That’s a revenue leak.

Infrastructure Costs Grow at Scale

This is the part most teams overlook.

Every extra KB in your editor bundle gets downloaded:

  • By every user
  • On every session
  • Across every region

For high-traffic platforms, that adds up fast.

A heavier editor means:

  • Higher CDN costs
  • Increased bandwidth usage
  • Slower global performance

At scale, this becomes a measurable operational expense.

What Actually Makes an Editor “Lightweight”?

It’s easy to assume “lightweight” just means a smaller file size.

That’s part of it. But it’s not the full story.

A truly lightweight editor is defined by how it behaves inside your application.

If you’re wondering what defines a lightweight WYSIWYG editor, it comes down to architecture, not marketing claims.

1. Modular Architecture (Not Monolithic)

A heavy editor ships everything. Even features you’ll never use.

A lightweight editor lets you:

  • Import only required features
  • Avoid unnecessary plugins
  • Keep your bundle minimal

This is critical for enterprise apps where requirements are controlled.

2. Efficient Rendering in React

React performance depends on controlled rendering.

A well-built editor:

  • Minimizes unnecessary re-renders
  • Avoids DOM thrashing
  • Plays nicely with React lifecycle

A poorly built one introduces:

  • UI lag
  • Input delays
  • Debugging complexity

3. Lazy Loading and Code Splitting

One of the biggest performance wins comes from not loading the editor at all until needed.

With patterns like:

  • Dynamic imports
  • Route-based loading
  • Modal-triggered initialization

You can preserve your initial page speed.

If your team wants to go deeper, exploring lazy loading a React WYSIWYG editor is one of the highest ROI optimizations you can make.

Lightweight vs Heavy Editor: The Real Impact

Let’s break this down in a practical way.

Performance & Cost Impact Analysis

MetricHeavy Editor ImpactLightweight Editor ImpactBusiness Implication
Bundle SizeLarge, monolithicSmaller, modularFaster load times
LCPSlower renderingFaster page displayBetter SEO rankings
InteractivityDelayedResponsiveImproved UX
Bandwidth UsageHighReducedLower CDN costs
MaintainabilityComplexPredictableFaster dev cycles

A Real-World Scenario: Why This Matters

Let’s say you run a React-based CMS with 10,000 daily active users.

If your editor bundle is:

  • 450KB (heavy) vs
  • 150KB (lightweight)

That’s a 300KB difference per user session.

Now multiply that across:

  • Daily usage
  • Global traffic
  • Multiple sessions

You’re looking at terabytes of unnecessary data transfer per month.

That translates into:

  • Higher infrastructure costs
  • Slower performance in emerging markets
  • Reduced scalability

And that’s before factoring in SEO and conversion impact.

Developer Productivity: The Hidden ROI

Performance doesn’t just affect users. It affects your engineering team too.

A heavy, poorly architected editor often leads to:

  • Unexpected bugs
  • Performance regressions
  • Integration workarounds
  • Time spent debugging instead of building

A lightweight, well-designed editor reduces:

  • Side effects in React apps
  • Complexity in state management
  • Maintenance overhead

That means:
→ Faster development cycles
→ More predictable releases
→ Less technical debt

Build vs Buy: The Performance Reality

At first glance, building your own editor sounds like the “perfect” solution.

You control everything. You optimize everything.

But here’s the reality:

Building a truly lightweight, performant editor is extremely difficult.

You’re not just building features.

You’re maintaining:

  • Performance across React versions
  • Browser compatibility
  • Accessibility compliance
  • Security updates

And that’s ongoing work.

This is where many teams underestimate the hidden costs of building your own HTML editor.

A vendor solution comes with:

  • Dedicated performance teams
  • Continuous optimization
  • Proven scalability

For most enterprises, buying isn’t just faster, it’s smarter.

Vendor Evaluation Checklist (Performance-Focused)

If you’re evaluating editors, don’t just look at features.

Use this checklist:

  • Can the bundle be tree-shaken?
  • Is it ESM-compatible?
  • Does it support lazy initialization?
  • How does it behave in React Strict Mode?
  • Does it introduce double renders or memory issues?
  • What’s the vendor’s track record on performance fixes?
  • Are there APIs for destroy/init in SPA routes (i.e., when navigating between views without full page reloads)?

These are the questions that actually protect your performance long-term.

If you’re operating at scale, this is also where enterprise-grade editor solutions matter because reliability and optimization aren’t optional.

Strategic Implementation for Maximum ROI

Choosing a lightweight editor is only part of the equation.

To truly see the performance benefits, how you implement it inside your React application matters just as much. Small decisions around loading and monitoring can make a noticeable difference in both user experience and overall efficiency.

Use Smart Loading Patterns

One of the easiest ways to lose performance gains is by loading the editor everywhere by default.

Most users don’t need it immediately, so there’s no reason to include it in your initial bundle. Doing so only slows down your app unnecessarily.

Instead:

  • Load it only where needed
  • Use dynamic imports
  • Trigger it on interaction

This keeps your initial bundle clean while still delivering full functionality when required.

Monitor the Right Metrics

Once the editor is integrated, don’t assume performance will stay consistent.

It’s important to keep an eye on how it behaves in real usage, especially as your app evolves.

Track:

  • Bundle size (via Webpack Analyzer)
  • LCP on pages with the editor
  • Memory usage
  • Interaction responsiveness

Performance is not “set and forget.” It needs continuous visibility.

Why This Decision Matters More Than Ever

Modern applications are no longer judged by features alone.

They’re judged by:

  • Speed
  • Responsiveness
  • User experience

Google reinforces this through Core Web Vitals.

Users reinforce it through behavior.

And your infrastructure reflects it in cost.

Choosing the wrong editor creates:

  • Performance bottlenecks
  • Scaling issues
  • Hidden expenses

Choosing the right one removes friction across your entire system.

Performance Is a Business Decision

A React WYSIWYG editor is easy to think of as just another UI component. But in reality, it plays a much bigger role in your application. It quietly influences how fast your pages load, how smoothly users interact, and how efficiently your system scales over time.

At a deeper level, it becomes:

  • A performance layer
  • A cost factor
  • A developer dependency
  • A user experience driver

That’s why the choice of editor isn’t just technical; it’s strategic.

When you choose a lightweight editor, you’re not just optimizing your codebase. You’re making improvements that ripple across your entire product, from faster load times and better search visibility to smoother user interactions and reduced infrastructure overhead.

In practical terms, that means:

  • Stronger SEO performance
  • Higher user engagement
  • More efficient infrastructure usage
  • Faster, more predictable development cycles

And most importantly, you’re making a decision that benefits your entire system—not just today, but as it scales.

Ready to see how a lightweight React WYSIWYG editor can improve performance, reduce bundle bloat, and support long-term scalability? Talk to our team to explore the right setup for your application.
Schedule a Demo


FAQs

What is a lightweight React WYSIWYG editor?

A lightweight React WYSIWYG editor uses modular architecture, efficient rendering, and lazy loading to minimize bundle size and performance impact. It improves page speed, reduces resource usage, and integrates smoothly with modern React applications.

How does a WYSIWYG editor affect Core Web Vitals?

A heavy editor increases JavaScript size, which slows down page load (LCP), delays interactivity (FID/INP), and may cause layout shifts (CLS). This can negatively impact SEO rankings and user experience.

Should enterprises build or buy a React editor?

Most enterprises should buy. Building an editor requires ongoing maintenance for performance, security, and compatibility. A vendor solution reduces long-term cost and provides optimized, production-ready performance.

How can I reduce bundle size when using a React WYSIWYG editor?

You can reduce bundle size by choosing a modular editor that supports importing only required features. Additionally, use techniques like dynamic imports, lazy loading, and code splitting to ensure the editor is loaded only when needed.

What should I monitor after integrating a WYSIWYG editor in React?

After integration, monitor key performance metrics such as bundle size, Largest Contentful Paint (LCP), memory usage, and interaction responsiveness. This helps identify performance issues early and ensures the editor does not negatively impact your application over time.

graphical user interface, text

Enterprise WYSIWYG Editor Requirements in 2026

Enterprise WYSIWYG editor feature illustration showing security, compliance checklist, and content editing interface

At first glance, a WYSIWYG editor feels like a simple UI component, just another box where users type content.

But in enterprise environments, that assumption is expensive.

A poorly chosen editor quietly creates:

  • Developer toil (constant bug fixes, custom integrations, patching)
  • Content team friction (formatting issues, broken layouts, slow workflows)
  • Security risks (XSS vulnerabilities, unsafe HTML output)
  • Platform lock-in (hard-to-migrate proprietary structures)

Over time, these costs compound.

What started as a “quick implementation decision” becomes a long-term operational burden.

Here’s the reality:
Choosing a WYSIWYG editor is not a UI decision. It’s a platform decision.

Just like selecting a database or cloud provider, the editor you choose directly impacts:

  • Engineering velocity
  • Content quality
  • Compliance readiness
  • Total cost of ownership (TCO)

This guide gives you a strategic evaluation framework to assess enterprise WYSIWYG editor requirements. So you can make a decision your team won’t regret in 12 months.

Key Takeaways

  • Choosing a WYSIWYG editor is a platform decision, not a UI choice. It directly impacts security, scalability, and total cost of ownership.
  • Security and compliance features are non-negotiable, gaps here can lead to serious risks, including data breaches and regulatory penalties.
  • Architecture determines long-term ROI. Performance, integrations, and extensibility define how efficiently your platform scales.
  • Content productivity features drive real business value. Clean HTML, reliable paste handling, and workflows save teams hours every week.
  • Vendor reliability and TCO matter more than upfront cost. Strong support, clear pricing, and a flexible exit strategy prevent long-term operational issues.

Non-Negotiable Foundation: Security & Compliance Features

If your editor fails here, nothing else matters. 

These are not optional features. They are basic requirements. Ignoring them can lead to security risks, legal issues, and serious damage to your brand.

XSS Protection & Output Sanitization

Every rich text editor processes user-generated HTML. That makes it a primary attack surface.

Without strong sanitization:

  • Malicious scripts can execute inside your app
  • User data can be exposed
  • You risk compliance violations and reputational damage

Enterprise editors must:

  • Sanitize input and output automatically
  • Handle pasted content safely
  • Patch vulnerabilities proactively

This is why evaluating how enterprise editors handle XSS vulnerabilities is critical, not optional.

Business Impact: A single vulnerability can cost millions in breach remediation and fines.

Accessibility (WCAG / Section 508 Compliance)

Accessibility isn’t just a design principle. It’s a legal requirement in many regions.

If your editor:

  • Produces inaccessible HTML
  • Lacks keyboard navigation
  • Doesn’t support screen readers

…you risk losing:

  • Public sector contracts
  • Enterprise clients
  • Brand trust

Look for editors with built-in accessibility compliance aligned with WCAG and Section 508.

Business Impact: Expands your market reach while reducing legal exposure.

GDPR & Data Privacy Readiness

Modern enterprises operate across jurisdictions. Data laws are strict and constantly evolving. Non-compliance can lead to heavy fines and loss of trust.

Your editor must support:

  • Configurable data handling
  • Privacy-compliant storage
  • Clear data processing policies

Without this, your application may fail compliance audits before launch.

Business Impact: Prevents regulatory penalties and ensures global scalability.

Audit Logging & Content Versioning

In regulated industries (finance, healthcare, education), traceability is mandatory. You need full visibility into every change. Without it, issues are harder to detect and fix. It also becomes difficult to prove compliance during audits.

Your editor should provide:

  • Content version history
  • Audit trails (who changed what, when)
  • Rollback capabilities

Business Impact: Enables compliance audits and reduces operational risk.

Architectural Features for Scale & Developer Efficiency

This is where long-term ROI is determined. These decisions shape how easily your platform can grow over time. They also define how much effort your developers spend maintaining vs building. Get this right, and you unlock speed, flexibility, and lower costs.

Framework-Agnostic SDKs & Deep Integrations

Integration complexity is often underestimated. Without proper SDKs teams spend weeks building wrappers, bugs appear across frameworks and maintenance costs increase over time.

To avoid these issues, it’s essential to look for:

  • Native support for modern frameworks
  • Well-documented SDKs
  • Minimal setup overhead

When evaluating vendors, consider evaluating a vendor’s framework roadmap to ensure long-term compatibility.

Business Impact: Reduces integration time from weeks to hours.

Performance & Bundle Size

Performance is no longer optional. A heavy editor can slow down page load times, hurt Core Web Vitals and reduce conversions.

Research shows a 1-second delay can reduce conversions by up to 7%. This is why understanding the importance of a lightweight editor for performance is essential.

Business Impact: Improves user experience, SEO rankings, and revenue.

Headless / API-First Architecture

Content today isn’t limited to web pages. It flows across mobile apps, emails, digital signage and APIs.

A headless editor enables:

  • Centralized content creation
  • Multi-channel delivery
  • Future-ready architecture

Business Impact: Supports omnichannel strategies without rework.

Extensible Plugin System

Your requirements will evolve. If your editor isn’t extensible:

  • You’ll fork the core code
  • Upgrades become painful
  • Vendor lock-in increases

Instead, look for:

  • Plugin-based architecture
  • Custom logic support
  • Clean extension APIs

Business Impact: Future-proofs your platform while reducing maintenance overhead.

Productivity & Content Integrity Features

This is where your content team wins or struggles. These features directly shape how fast and smoothly content gets created. Small inefficiencies here can quickly turn into hours of lost productivity.

Advanced Pasting from External Sources

Content rarely starts inside your editor. It comes from various sources like Word documents, Excel sheets and Google Docs.

Without proper paste handling:

  • Formatting breaks
  • Teams waste hours fixing layouts
  • Inconsistent content creeps in

Look for editors that support clean paste from Office products.

Business Impact: Eliminates “formatting debt” and saves hours weekly.

Structured Content & Clean HTML Output

Messy HTML isn’t just ugly, it’s expensive. It leads to poor SEO performance, larger page sizes and inconsistent rendering.

A good editor ensures:

  • Clean semantic HTML
  • Consistent structure
  • Reusable content blocks

Business Impact: Improves SEO, performance, and content scalability.

Reliable Image & Asset Management

Media handling is often overlooked until it breaks. Without proper systems servers get bloated, uploads fail and performance suffers.

Look for:

  • Cloud storage integrations (S3, Filestack)
  • Built-in optimization
  • CDN delivery

Evaluate editors with enterprise-grade file upload integrations.

Business Impact: Reduces infrastructure costs and improves load speed.

Collaboration & Workflow Features

Enterprise content isn’t created in isolation. Content teams need features like role-based permissions, approval workflows and commenting systems for easy collaboration in content creation.

Without this:

  • Content bottlenecks increase
  • Errors slip through
  • Publishing slows down

Business Impact: Streamlines content operations and improves governance.

Vendor Reliability & Total Cost of Ownership (TCO)

This is where most decisions fail.

What looks like a cost-effective choice upfront often becomes expensive over time due to hidden maintenance, support gaps, and scalability limitations.

Clear Enterprise Licensing & Pricing

Pricing for WYSIWYG editors can look straightforward at first. But in enterprise environments, it can quickly become expensive once you scale usage, expand teams, or unlock essential features.

Hidden costs are especially common when pricing models aren’t aligned with how your organization actually uses the editor. That’s why it’s critical to evaluate licensing structures beyond the surface-level numbers.

When assessing vendors, look closely at:

  • Per-user vs. per-deployment pricing
  • Scaling costs
  • Hidden add-ons

Business Impact: A clear and predictable pricing model helps you avoid unexpected expenses, ensures smoother procurement approvals, and allows for confident long-term planning as your platform scales.

Long-Term Vendor Viability

Choosing a WYSIWYG editor isn’t a short-term decision. It’s a long-term partnership. The editor you select today will need to evolve alongside your technology stack, frameworks, and business requirements over the next several years.

If a vendor fails to keep pace with modern development trends, your team may face compatibility issues, outdated integrations, or even the need for a costly migration down the line. That’s why evaluating vendor viability is just as important as evaluating features.

When assessing long-term reliability, look for:

  • Regular updates that address security, performance, and compatibility improvements
  • Active product roadmap that provide clear visibility into future enhancements and innovation plans
  • Modern framework support with ongoing compatibility with frameworks like React, Angular, and others as they evolve

Business Impact: A vendor that consistently invests in its product ensures your editor remains stable, secure, and compatible—reducing technical debt and protecting your long-term investment.

Quality Support & SLAs

No matter how robust an editor is, issues will eventually arise. It may be a bug, integration conflict, or unexpected edge case. When that happens, the speed and quality of support can make the difference between a minor disruption and a major operational setback.

This is why support shouldn’t be treated as an afterthought. In enterprise environments, you need confidence that critical issues will be handled quickly, professionally, and with clear accountability.

Enterprise-grade vendors typically provide:

  • Dedicated support teams with specialists who understand the product deeply
  • Fast response SLAs that guarantee response and resolution times for critical issues
  • Priority issue resolution with clear escalation paths for high-impact production problems

When evaluating options, prioritize vendors that offer strong enterprise support plans and SLAs, not just basic ticketing systems.

Business Impact: Reliable support minimizes downtime, keeps your teams productive, and ensures your platform continues to operate smoothly even when unexpected issues occur.

Migration Path & Exit Strategy

This is often ignored until it’s too late. Teams focus on implementation but forget about future flexibility. Without a clear exit path, switching vendors can become costly and complex.

When evaluating options, ask:

  • Can you export content easily? Are there bulk export options without data loss or formatting issues?
  • Is the API flexible? Does it support custom workflows, integrations, and data access?
  • Are formats standardized? Is content stored in clean, portable formats like HTML or JSON?

Business Impact: Reduces vendor lock-in risk and gives your organization the flexibility to adapt as your technology stack evolves.

Feature Evaluation Matrix

Feature CategoryBusiness ImpactKey Questions to Ask VendorsRed Flags
Security & ComplianceRisk reduction, legal protectionHow often do you patch vulnerabilities?No clear patching policy
PerformanceUX, SEO, conversionsWhat is the bundle size?Heavy, bloated scripts
IntegrationDev efficiencyDo you offer SDKs for modern frameworks?Custom integration required
Content IntegritySEO, brandingDoes the editor output clean HTML?Messy markup
Media HandlingCost, performanceDo you support cloud uploads?Local-only storage
Vendor SupportUptime, reliabilityWhat SLAs do you offer?Slow or no support

Build vs. Buy: Decision Criteria

Think of this like choosing a database.

You don’t build one unless:

  • You have a dedicated team
  • You can maintain it long-term
  • You accept ongoing costs

Build if:

  • You have highly specialized needs
  • You can invest in long-term maintenance

Buy if:

  • You want faster time-to-market
  • You need enterprise-grade security
  • You want predictable costs

The Cost of Getting It Wrong

Choosing the wrong editor leads to:

  • Continuous engineering effort
  • Security risks
  • Content inefficiencies
  • Hidden operational costs

And the worst part?

These costs don’t appear immediately. They accumulate quietly over time.

Treat Your Editor Like Infrastructure

An enterprise WYSIWYG editor is not just a feature. It plays a critical role across your platform, impacting security, content workflows, and development efficiency.

It functions as:

  • A security layer that protects your application
  • A content engine that powers content creation
  • A developer dependency that affects scalability
  • A business enabler that supports growth

When evaluated correctly, the right choice can:

  • Reduce engineering backlog
  • Improve content team productivity
  • Strengthen compliance posture
  • Lower total cost of ownership

Treating your editor like infrastructure helps you make a decision that supports both immediate needs and long-term growth.

Ready to evaluate WYSIWYG editors against your specific enterprise requirements?

Schedule a personalized demo with our solutions team to see how a modern editor can reduce your development backlog and content team friction.

Schedule a Demo

FAQs

What are enterprise WYSIWYG editor requirements in 2026?

Enterprise WYSIWYG editor requirements include security (XSS protection), compliance (WCAG, GDPR), scalability, clean HTML output, performance optimization, and extensibility. These features ensure long-term reliability and reduced operational risk.

How do I evaluate a WYSIWYG editor vendor?

Use a structured checklist covering security, performance, integrations, content integrity, and vendor support. Focus on business impact, not just technical features.

Should I build or buy a WYSIWYG editor?

Most enterprises should buy. Building requires ongoing maintenance, security updates, and scaling efforts. Buying reduces time-to-market and total cost of ownership.

graphical user interface, text

Build a Wikipedia-Style Moderation Layer with Froala and IPstack

Wikipedia-Style Moderation

Modern web editors aren’t just UI components—they’re entry points for user-generated content, which means they’re also entry points for abuse.

Platforms like Wikipedia don’t just let users edit content freely—they track, analyze, and moderate every submission. One of the key signals they rely on is IP-based metadata.

In this guide, you’ll learn how to build a simple, production-style moderation layer using:

  • Editor: Froala Editor
  • Geo API: IPstack
  • Backend: Node.js + Express

We’ll keep it beginner-friendly, but grounded in real-world architecture.

Key Takeaways

  • User-generated content requires backend moderation.
  • IP-based metadata is a simple, high-impact signal for detecting abuse patterns
  • Rate limiting and geo-tracking are table stakes for any platform accepting submissions
  • Privacy matters: store only what you need, hash sensitive data, set retention limits

What You’re Building

By the end, your app will:

  • Accept content from a WYSIWYG editor
  • Capture the user’s IP and location securely, on the backend, using IPstack
  • Store metadata with each post
  • Apply basic moderation rules (rate limiting / blocking)

Why This Matters

If your app allows users to submit content (posts, comments, HTML):

You are exposed to:

  • Spam bots
  • Fake accounts
  • Malicious content
  • Coordinated attacks

The editor is not the problem. Uncontrolled submissions are.

Architecture Overview

Here’s the flow we’ll implement:

User → Froala Editor → Submit Content

        ↓

Frontend sends content

        ↓

Backend (Express):

  - Call IPstack

  - Store metadata

  - Run moderation checks

        ↓

Save or block

Step 1: Project Setup

mkdir froala-moderation

cd froala-moderation

npm init -y

npm install express cors

Step 2: Add Froala Editor (Frontend)

Create a simple index.html:

<!DOCTYPE html>
<html>
<head>
  <link href="https://cdn.jsdelivr.net/npm/froala-editor/css/froala_editor.pkgd.min.css" rel="stylesheet">
</head>
<body>

  <textarea id="editor"></textarea>
  <button onclick="submitContent()">Submit</button>

  <script src="https://cdn.jsdelivr.net/npm/froala-editor/js/froala_editor.pkgd.min.js"></script>

  <script>
    const editor = new FroalaEditor('#editor');

    async function submitContent() {
      const content = editor.html.get();

      const res = await fetch('http://localhost:3000/api/post', {
        method: 'POST',
        headers: { 'Content-Type': 'application/json' },
        body: JSON.stringify({ content })
      });

      const data = await res.json();
      alert(data.message);
    }
  </script>

</body>
</html>

This is your content entry point.

Step 3: Create Express Backend

Create server.js:

const express = require('express');
const cors = require('cors');
const path = require('path');

const app = express();
app.use(cors());
app.use(express.json());

app.use(express.static(path.join(__dirname, 'public')));

const PORT = 3000;

app.listen(PORT, () => {
  console.log(`Server running on http://localhost:${PORT}`);
});

Step 4: Capture User IP and Location (IPstack)

Sign up at IPstack and get your API key.

Add this function:

async function getGeoData() {
  const API_KEY = 'YOUR_IPSTACK_KEY';
  
  const res = await fetch(`http://api.ipstack.com/check?access_key=${API_KEY}`);
  const data = await res.json();

  return {
      ip: data.ip,
      country: data.country_name,
      city: data.city
  };
}

Step 6: Add Moderation Logic

We’ll start simple.

Example rule:

  • Block if too many requests from same IP

Add a basic in-memory tracker:

const requestLog = {};

function isSuspicious(ip) {
  const now = Date.now();

  if (!requestLog[ip]) {
    requestLog[ip] = [];
  }

  requestLog[ip].push(now);

  // keep last 1 minute
  requestLog[ip] = requestLog[ip].filter(t => now - t < 60000);

  return requestLog[ip].length > 5; // more than 5 posts/min
}

Step 7: Handle Content Submission

Now combine everything:

app.post('/api/post', async (req, res) => {
  const { content } = req.body;

  // get geo data
  const geo = await getGeoData();

  // moderation check
  if (isSuspicious(ip)) {
    return res.status(429).json({
      message: 'Too many requests. Try again later.'
    });
  }

  const post = {
    content,
    ip,
    country: geo.country,
    city: geo.city,
    createdAt: new Date()
  };

  console.log('Saved post:', post);

  res.json({ message: 'Post saved successfully!' });
});

Step 8: Privacy Best Practices

This is not optional.

✔ Do:

  • Store country, not precise location
  • Set retention (e.g., delete IP after 30 days)
  • Keep IP private (never expose in UI)

❌ Don’t:

  • Collect GPS location
  • Trust frontend IP
  • Store data you don’t use

Step 9: Test Your App

  1. Run backend:
node server.js
  1. Open index.html
  2. Submit content multiple times

After ~5 rapid submissions:

  • You should get a rate limit.

Froala Integration with IPstack

What You Just Built

You now have:

  • A working WYSIWYG editor
  • A backend moderation pipeline
  • IP-based tracking
  • Basic abuse prevention

This is a simplified version of what platforms like Wikipedia do.

Next Steps (Make It Production-Ready)

To level this up:

  • Store data in a database (MongoDB/PostgreSQL)
  • Hash IP addresses for privacy
  • Add CAPTCHA for flagged users
  • Integrate IP reputation services
  • Build a moderation dashboard

Why This Works Well with Froala

Froala Editor fits naturally into this architecture:

  • Clean API (editor.html.get())
  • Easy integration with any backend
  • No lock-in to specific frameworks
  • Designed for real production use—not just demos

It becomes part of your system—not a limitation.

Final Thoughts

If you’re building any app that accepts user content, you’re building a content pipeline.

The difference between a thriving platform and a spam receptacle is whether you moderate at the backend. IP-based tracking is the simplest, highest-impact place to start.

Ready to move beyond this demo? The architecture you’ve built here scales. Add a database, hash those IPs, layer in reputation scoring—and you’ve got the foundation Wikipedia uses.

Start by downloading the editor. Build from there.

graphical user interface, text

The Hidden Maintenance Costs of a Custom WYSIWYG Editor

Iceberg illustration showing hidden maintenance costs of a custom WYSIWYG editor, including security risks, bugs, and technical debt

If you’ve ever considered building a custom WYSIWYG editor, the idea probably sounded appealing at first.

Full control. Tailored features. No licensing fees.

But here’s the reality most teams discover too late:

Building the editor is the cheapest part of owning it.

The real cost begins after launch, and it doesn’t stop.

This guide breaks down the hidden maintenance costs of a custom WYSIWYG editor, provides a simple TCO model, and gives you a vendor evaluation framework you can actually use in budget discussions.

The Illusion of a “One-Time” Cost

When teams estimate a custom editor project, they focus on:

  • Initial development timeline
  • Engineering hours
  • Feature scope

It feels like a one-time investment.

But a WYSIWYG editor is not a static product. It’s a living system deeply tied to browsers, frameworks, security standards, and user expectations.

A better analogy?

Building a custom editor is like constructing an office building. The construction cost is just the beginning. The real expense is decades of maintenance: plumbing, wiring, repairs, and compliance.

And just like that building, your editor will demand continuous investment.

The Five Pillars of Hidden Maintenance Cost

Let’s break down where that cost actually comes from.

The five pillars of hidden costs

1. Security & Compliance Toil

Security is not optional; it’s relentless.

Every custom editor must handle:

  • XSS vulnerabilities
  • Content sanitization
  • Dependency updates (e.g., libraries like DOMPurify for XSS sanitization)
  • Secure paste handling
  • Audit readiness (SOC 2, GDPR)

And this isn’t a one-time setup.

It’s an ongoing cycle:

  • New vulnerabilities emerge
  • Browsers change behavior
  • Libraries require updates

Commercial editors like Froala continuously release updates addressing these risks, highlighting how frequent and complex this work really is.

This is why vendors regularly ship proactive security patches, because threats never stop evolving.

What it costs you:

  • Continuous engineering time
  • Security audits
  • Risk of breaches or compliance failure

2. Browser & Platform Churn

Browsers are constantly changing.

Chrome updates. Safari changes behavior. Firefox introduces quirks.

Each update can break:

  • Cursor positioning
  • Selection APIs
  • Copy/paste behavior
  • Mobile touch interactions

Now multiply that across:

  • Desktop browsers
  • Mobile browsers
  • Different OS versions

This becomes a silent but massive productivity drain.

What it costs you:

  • Ongoing QA cycles
  • Regression testing
  • Emergency fixes after browser updates

3. Feature Creep & User Demand

Your editor will never be “done.”

Once users start relying on it, requests begin:

“Can we add AI writing assistance?”

“We need advanced tables.”

“Can we support better formatting from Word?”

Suddenly, your team is building:

  • AI integrations
  • Collaboration tools
  • Advanced formatting engines

Meanwhile, competitors using commercial tools get access to a comprehensive AI feature set and ready-to-use HTML editor features instantly.

What it costs you:

  • Engineers pulled away from core product work
  • Delayed roadmap delivery
  • Growing backlog of editor-related requests

4. Accessibility Debt

Accessibility isn’t something you “finish.”

Standards evolve. Tools change. Expectations increase.

To stay compliant, your editor must support:

Maintaining accessibility requires:

  • Continuous testing
  • Regular updates
  • Expert-level knowledge

Even enterprise editors invest heavily to maintain compliance.

What it costs you:

  • Dedicated QA effort
  • Specialized accessibility expertise
  • Risk of non-compliance penalties

5. Framework & Ecosystem Drift

Your editor doesn’t exist in isolation.

It must stay compatible with:

  • React updates
  • Angular changes
  • Vue ecosystem shifts
  • Next.js and build tools

And these evolve fast.

What works today may break tomorrow.

Vendors constantly focus on staying current with framework updates, ensuring compatibility across modern stacks.

What it costs you:

  • Continuous refactoring
  • Integration maintenance
  • Developer frustration

Quantifying the Cost: A Simple TCO Model

Let’s make this concrete.

Basic TCO Formula

TCO = Initial Build Cost + Ongoing Maintenance + Opportunity Cost

Where:

  • Initial Build Cost = Engineering time to create the editor
  • Ongoing Maintenance = 25–40% of initial cost annually
  • Opportunity Cost = Value of features your team didn’t build

Example Scenario

Cost ComponentEstimate
Initial Build$150,000
Annual Maintenance (30%)$45,000/year
3-Year Maintenance$135,000
Opportunity CostHigh

Total (3 years): ~$285,000+

And that’s conservative.

Many companies report:

6 months to build
2+ full-time engineers maintaining it long-term

TCO Comparison: Custom vs Commercial Editor

FactorCustom-Built EditorCommercial Editor (e.g., Froala)
Initial CostMediumLow–Medium (license)
Annual MaintenanceHigh (25–40%)Low (included)
Security ResponsibilityYour TeamVendor
Browser CompatibilityYour TeamVendor
Feature DevelopmentYour TeamVendor
Accessibility ComplianceYour TeamVendor
Framework UpdatesYour TeamVendor
PredictabilityLowHigh

Want a custom TCO calculation for your team? Talk to Froala →

The Strategic Alternative: Risk Transfer

Here’s the key mindset shift:

A commercial editor is not just a tool. It’s a risk transfer mechanism.

Instead of your team handling:

  • Security patches
  • Browser compatibility
  • Framework updates
  • Feature evolution

The vendor absorbs that complexity.

This transforms:

  • Unpredictable engineering cost → predictable operational expense (OpEx)
  • Engineering distraction → focused product development

Vendor Evaluation Checklist for Strategic Buyers

If you’re considering a commercial solution, don’t just compare price.

Use this checklist:

Security & Compliance

  • How fast are vulnerabilities patched?
  • Are penetration test reports available?
  • What compliance standards are supported?

Longevity & Roadmap

  • Is the vendor financially stable?
  • Is there a public roadmap?
  • How often are updates released?

Total Cost of Integration

  • How many engineering hours are needed to integrate?
  • Is customization straightforward?
  • Are APIs well-documented?

Support & Escalation

  • What SLAs are offered?
  • Is enterprise support available?
  • Is there a dedicated account manager?

For deeper insight, review detailed vendor comparisons when evaluating options.

Why This Decision Matters More Than You Think

This isn’t just a technical decision. It’s a strategic allocation of engineering resources that directly shapes your company’s growth. Every hour your team spends maintaining a custom editor is an hour diverted from higher-impact priorities, including:

  • building core product features that differentiate your platform
  • improving customer experience and usability
  • delivering revenue-driving innovation

Over time, this trade-off compounds quietly, slowing down your roadmap, stretching your team thin, and ultimately creating a competitive disadvantage against companies that invest their engineering effort where it matters most.

Stop Paying the Hidden Tax

The biggest mistake teams make isn’t building a custom editor.

It’s underestimating what it takes to maintain it.

A custom editor introduces a permanent engineering tax, one that grows quietly but steadily.

If you’re serious about scaling your product and protecting your team’s velocity:

  • Treat editor maintenance as a financial decision, not just a technical one
  • Use TCO to guide your evaluation
  • Prioritize predictability over control

Next Step

Ready to make a smarter decision?

Explore this comprehensive guide to choosing a WYSIWYG editor and evaluate your options with confidence.

Stop pouring engineering resources into non-differentiating editor maintenance. Let’s calculate your potential savings.

Schedule a TCO Consultation

FAQs

1. What is the true maintenance cost of a custom WYSIWYG editor?

The true maintenance cost of a custom WYSIWYG editor typically ranges from 25–40% of the initial build cost annually, covering security updates, browser compatibility fixes, feature enhancements, and accessibility compliance. Over time, these ongoing costs often exceed the original development investment.

2. Is it cheaper to build or buy a WYSIWYG editor in 2026?

While building a custom editor may seem cheaper upfront, the total cost of ownership (TCO) is usually higher due to ongoing maintenance, security risks, and engineering effort. In most cases, buying a commercial solution is more cost-effective because it shifts these responsibilities to the vendor.

3. What are the biggest hidden costs of maintaining a custom rich text editor?

The biggest hidden costs include security patching, browser updates, feature creep, accessibility compliance, and framework compatibility maintenance. These factors create continuous engineering overhead and can significantly slow down product development over time.

graphical user interface, text

Froala 5.1 Release: AI Assist Plugin

Froala 5.1 release with AI assist plugin

Froala 5.1 is here. This release includes performance improvements, bug fixes, and enhanced stability across the editor. But there’s one addition your team has been asking for: Froala AI Assist—a plugin that brings AI directly into your editing workflow, letting your team do what they do best: create better content, faster.

Key Takeaways

  • AI Assist eliminates context-switching. Two toolbar buttons let your team chat with AI, adjust tone, and translate—all without leaving the editor.
  • It’s built for any AI provider. Connect to OpenAI, self-hosted models, or your backend. Froala adapts to your architecture, not the other way around.
  • Measurable productivity gains. Content teams ship faster. Marketing campaigns turn around in hours instead of days. Support docs get clearer instantly.
  • New drag-drop events give you fine-grained control. The drop.beforeCleanup and drop.afterCleanup events let you inspect and modify HTML during drop operations—fixing false cleanup triggers and enabling custom workflows.

Meet Froala AI Assist

AI Assist embeds intelligence directly into your editor—two new powerful toolbar buttons, zero context switching.

AI Chat: Ask Anything Without Leaving

A dedicated AI button opens an interactive popup inside the editor. Your team can:

  • Ask questions and get instant answers
  • Generate new content from prompts
  • Expand ideas and refine existing text.
  • Brainstorm in real-time

All without opening a new tab. All without losing their place or focus.

AI Assist toolbar button

Productivity gain: Drafting + refinement happens in one interface. No tool-switching tax.

AI Shortcuts: One Click, Instant Results

Select text. Click a dropdown. Choose an action. Done.

Supported actions out of the box:

  • Tone adjustment (Professional, Casual, Friendly, Empathetic—fully customizable)
  • Instant translation (any language you support)

No prompts. No waiting for configuration. Just immediate, contextual improvement.

Productivity gain: Tasks that used to require external tools now take seconds.

Real-World Productivity Wins

CMS Platforms: Content editors write faster when they don’t context-switch. More content ships. Same headcount.

Email Builders: Marketing teams adjust tone and language in seconds instead of minutes. Campaign turnaround drops from days to hours.

Documentation Tools: Support teams simplify complex technical language instantly. Better docs, faster. Users get better self-service.

Internal Tools: Teams communicate clearer, faster. Less back-and-forth. More work done.

Anywhere your users create content, AI Assist makes them measurably more productive. That’s not a feature. That’s a business impact.

Built for Developers: Flexible Integration, Full Control

We know that AI integration isn’t one-size-fits-all. That’s why AI Assist is designed to work with any AI provider and any architecture.

Two Integration Paths

Option 1: Frontend (Quick Start)

Connect directly to your AI provider from the browser using a custom request handler.

Best for:

  • Prototyping
  • Internal tools
  • Fast experimentation

Benefits:

  • Minimal setup
  • Full control over prompts
  • Quick time-to-value

Important Consideration ⚠️Exposing your AI API key in frontend code can be risky. It may lead to:

  • Unauthorized usage
  • Unexpected costs
  • Security vulnerabilities

Code Example

new FroalaEditor('#editor', {
  toolbarButtons: ['aiAssist'],
  
  aiAssistEndpoint: 'https://api.example.com/v1/generate',
  
  aiAssistHeaders: {
    'X-API-Key': 'your-api-key',
    'Content-Type': 'application/json'
  },
  
  aiAssistDataKeys: {
    question: 'input_text',
    sessionId: 'thread_id',
    sessionIdValue: generateSessionId(),
    questionOrderNumber: 'turn_number'
  },
  
  aiAssistAdditionalData: {
    model_version: 'v2',
    output_format: 'html',
    language: 'en'
  },
  
  // Response format: { status: 'success', result: { output: { text: '...' } } }
  aiAssistResponseParserPath: 'result.output.text'
});

Option 2: Backend (Recommended for Production)

Route AI requests through your backend for full control and security.

Best for:

  • Production applications
  • SaaS platforms
  • Enterprise environments

Benefits:

  • Protect API keys
  • Validate and sanitize requests
  • Monitor usage and costs
  • Add business logic and guardrails

Code Example:

new FroalaEditor('#editor', {
 toolbarButtons: ['aiAssist'],

 aiAssistRequest: async function(data, signal) {
   try {
     const response = await fetch('https://your-backend.com/api/ai', {
       method: 'POST',
       headers: {
         'Authorization': 'Bearer ' + getUserToken(),
         'Content-Type': 'application/json'
       },
       body: JSON.stringify({
         prompt: data.prompt,
         context: data.context,
         user_id: getCurrentUserId()
       }),
       signal: signal
     });
    
     if (!response.ok) {
       throw new Error('AI request failed: ' + response.statusText);
     }
    
     const result = await response.json();
    
     // Validate response
     if (!result.success) {
       throw new Error(result.error || 'Unknown error');
     }
    
     return result.data.content;
    
   } catch (error) {
     console.error('AI request error:', error);
     throw error;
   }
 },

 events: {
   'aiAssist.beforeInsert': function(event, content) {
     // Sanitize content before insertion
     const sanitized = sanitizeHTML(content);
     return sanitized.length > 0;
   },
  
   'aiAssist.afterInsert': function() {
     // Track usage
     trackAIUsage('content_inserted');
   }
 }
});

This approach ensures your AI integration is secure, scalable, and production-ready.

Simple Configuration, Powerful Customization

AI Assist is designed to be easy to enable—and powerful to customize.

At its core, setup is as simple as:

  • Enabling AI features
  • Connecting your AI endpoint or request handler

From there, you can tailor every aspect of the experience:

Customize the AI Behavior

  • Define your own prompt templates
new FroalaEditor('.selector', {
  aiAssistPromptTemplate: `You are a helpful writing assistant.
Generate content based on the question below.
Your response must be in valid HTML format only.
Preserve all HTML formatting, tags, links, and styles.
Do not include markdown code blocks or backticks.
`
});
  • Control how AI responds (HTML-safe output, formatting rules, etc.)
  • Add custom metadata (user ID, model settings, etc.)
new FroalaEditor('.selector', {
 aiAssistAdditionalData: {
   user_id: 'user-12345',
   model: 'gpt-4',
   temperature: 0.7,
   max_tokens: 1000
 }
});

Customize Tone & Translation Options

Easily configure:

  • Tone styles (e.g., Professional, Casual, Enthusiastic, Empathetic)
new FroalaEditor('.selector', {
aiAssistToneOptions: [
  {
    title: 'Professional',
    prompt: 'Rewrite the following content using polished, formal, and respectful language. Maintain a professional tone that conveys expertise and competence. Preserve all HTML formatting, links, and styles.'
  },
  {
    title: 'Casual',
    prompt: 'Rewrite the following content using casual, conversational language as if speaking with a friend. Keep the tone relaxed and informal. Preserve all HTML formatting, links, and styles.'
  },
  {
    title: 'Enthusiastic',
    prompt: 'Rewrite the following content with high energy and excitement. Use enthusiastic language that conveys passion. Preserve all HTML formatting, links, and styles.'
  },
  {
    title: 'Empathetic',
    prompt: 'Rewrite the following content with deep understanding and compassion. Show empathy and emotional intelligence. Preserve all HTML formatting, links, and styles.'
  }
]
});
  • Supported languages for translation
new FroalaEditor('.selector', {
aiAssistTranslateOptions: [
  {
    title: 'English',
    prompt: 'Translate the following content to English. Maintain the original meaning, tone, and preserve all HTML formatting, links, and styles.'
  },
  {
    title: 'Spanish',
    prompt: 'Translate the following content to Spanish. Maintain the original meaning, tone, and preserve all HTML formatting, links, and styles.'
  },
  {
    title: 'Italian',
    prompt: 'Translate the following content to Italian. Maintain the original meaning, tone, and preserve all HTML formatting, links, and styles.'
  },
  {
    title: 'Portuguese',
    prompt: 'Translate the following content to Portuguese. Maintain the original meaning, tone, and preserve all HTML formatting, links, and styles.'
  }
]
});

Each option is fully customizable with your own AI instructions.

Adapt to Any API Format

AI Assist works with any backend using flexible configuration options:

  • Map request fields to match your API
  • Add custom headers (auth tokens, etc.)
  • Parse responses from any structure
new FroalaEditor('.selector', {
aiAssistResponseParserPath: 'data.answer'
});

// For response: { data: { answer: "text" } }
aiAssistResponseParserPath: 'data.answer'

// For response: { choices: [{ text: "text" }] }
aiAssistResponseParserPath: 'choices[0].text'

// For response: { result: { messages: [{ content: "text" }] } }
aiAssistResponseParserPath: 'result.messages[0].content'

No need to change your backend—Froala adapts to you.

Control the Experience with Events & Methods

AI Assist gives you full control over how AI content behaves inside your editor.

Key capabilities include:

  • Intercept AI responses before insertion. Validate, filter, or reject content.
  • React after content is inserted. Trigger analytics, tracking, or workflows.
  • Programmatically open the AI popup. Launch AI interactions from anywhere in your UI.

This makes it easy to integrate AI into your product’s logic—not just the UI.

From Idea to Integration in Minutes

Whether you want a simple AI-powered editor or a fully customized AI workflow, Froala AI Assist makes it easy:

  • Plug-and-play setup
  • Works with any AI provider
  • Fully customizable behavior
  • Built for both frontend and backend architectures

Get started in four simple steps

  1. Enable AI Assist in your Froala instance
  2. Connect your AI endpoint (frontend or backend)
  3. Customize tones, languages, and prompts for your brand
  4. Your users ship content 3x faster

No infrastructure changes. No architectural constraints. Just productivity gains.

AI Assist: Legal Terms & User Consent

To use AI Assist, you’ll need to set aiSupplementalTermsAccepted to true in your configuration. This captures explicit user consent for our AI legal terms

The Obvious Question: Is This Secure?

Your data stays where you control it.

  • Using OpenAI? Data goes to OpenAI (their policy).
  • Self-hosted model? Data never leaves your servers.
  • Your backend? You own the entire chain.

Froala never stores, logs, or uses your content. We route requests and responses. That’s it.

Start Shipping Faster Today

Content creation shouldn’t be fragmented. Your team shouldn’t context-switch between five tools to write one email.

Froala AI Assist brings intelligence where your team actually works—saving time, eliminating friction, letting them focus on what matters: creating better content.

Explore the Froala AI Assist documentation and start integrating today.

Other Enhancements in Froala 5.1

Beyond AI Assist, this release includes important improvements across the editor:

Event Handling & Drag-Drop Operations

We’ve added fine-grained control over drag-drop interactions with two new events:

  • drop.beforeCleanup – Triggered before content cleanup during a drop operation, letting you inspect or modify HTML before processing.
  • drop.afterCleanup – Triggered after cleanup is complete, giving you access to the final HTML state.

Bug Fixes

Moreover, there are a few bugs fixed including:

List & Formatting Fixes

  • Numbered list font sizing – Font size adjustments now consistently apply to all list items, including empty ones at the end.
  • Ordered list indent behavior – “Decrease Indent” now works on numbered lists just like it does on bullet lists, properly removing list formatting and outdenting text.

Accessibility Improvements

  • Table cell properties – Fixed keyboard navigation so you can now use Enter/Spacebar to interact with cell property controls.

Explore the release notes.

Should You Upgrade?

If you’re looking to ship content faster: AI Assist alone justifies the upgrade. Your team gets built-in AI capabilities without tool-switching—that’s a measurable productivity gain.

If you’re building event-driven workflows: The new drop.beforeCleanup and drop.afterCleanup events give you precise control over drag-drop interactions, fixing the false paste.afterCleanup triggers that were causing unintended logic execution.

This release isn’t just incremental. It’s a meaningful jump in both capability and reliability. Upgrade to Froala 5.1 now.

Try The Latest Froala Editor

Explore a variety of examples that demonstrate the functionality of the Froala HTML Editor.

Support and Feedback

We are dedicated to always offering the best possible experience for all our users. Thank you for being a valuable part of our vibrant and growing community. We would like to hear what you think of the latest release! Join us on our GitHub Community to chat with our product manager, developers, and other members of the Froala team.

Change Log

Please visit the release notes for a complete list of changes.

Technical Questions

If you have a technical question, you can check whether we have already answered it in our help center. If not, contact our Support team.