- Getting Started
- Browser Support
- Languages Support
- Shortcuts
- Activation
- Examples
- Customize the Editor
- Use-cases
- Plugins
- APIs
- Development Frameworks
- Server Integrations
- Server SDKs
- Migration Guides
- Changelog
Migration to Froala From Aloha
Initialization
This article provides a step-by-step guide on how to replace Aloha with Froala Editor in your applications. Froala Editor is easy to integrate and use requiring minimal coding knowledge. Froala editor requires Font Awesome 4.4.0. Froala works without dependencies or files sotred locally, you can use CDN. Aditionally you do not need to define the regions of the page you want to be editable, you can initialize the editor on any element of the HTML dom.
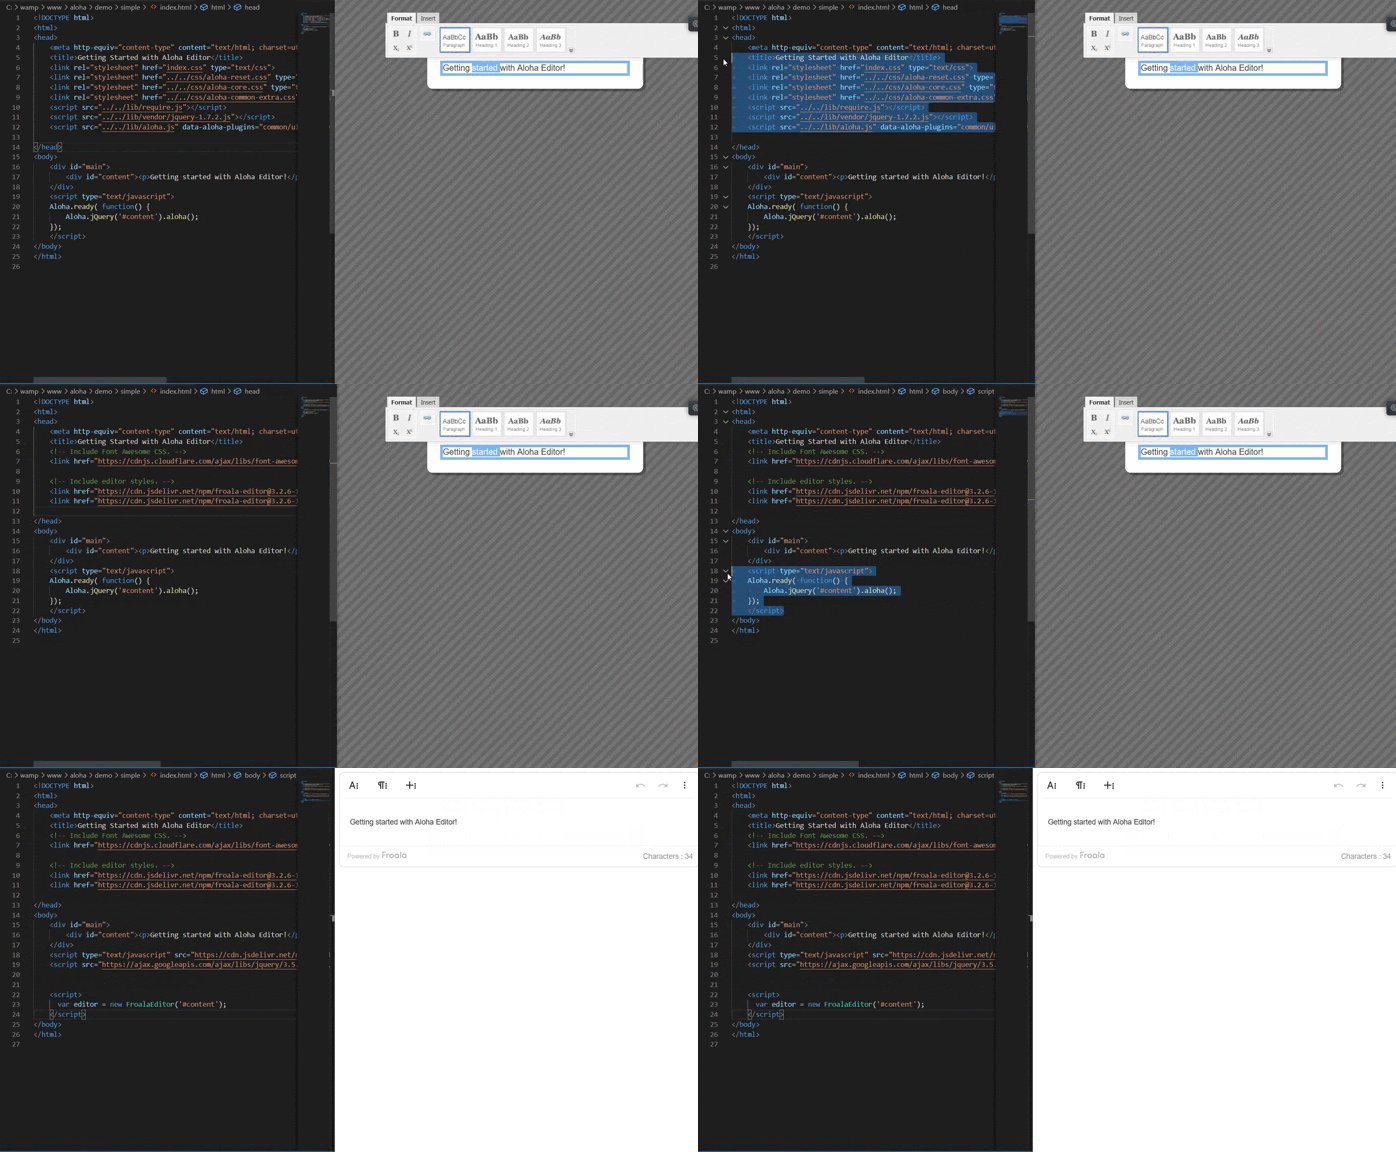
You can watch the following recording as a starting point for migrating:
from Aloha editor to Froala
Remove Your current editor Stylesheets and Scripts
First, remove all editor code and its dependencies from your project.
Aloha WYSIWYG Editor
Remove the Aloha script and style file
  <!-- Include stylesheet -->
      <link rel="stylesheet" href="../../css/aloha-reset.css" type="text/css">
      <link rel="stylesheet" href="../../css/aloha-core.css" type="text/css">
      <link rel="stylesheet" href="../../css/aloha-common-extra.css" type="text/css">
  <!-- Include Aloha JS files -->
     <script src="../../lib/require.js"></script>
      <script src="../../lib/vendor/jquery-1.7.2.js"></script>
      <script src="../../lib/aloha.js" data-aloha-plugins="common/ui,common/format,common/highlighteditables,common/link"></script>
Remove the Aloha initialization script
  <script type="text/javascript">
      Aloha.ready(function(){
          Aloha.jQuery('#content').aloha();
      });
  </script>
Add Froala Editor
Once you have removed all your editor dependencies, you can add Froala Editor following these steps:
Include the required CSS files in the HEAD tag.
<!-- Include Font Awesome CSS. -->
  <link href="https://cdnjs.cloudflare.com/ajax/libs/font-awesome/4.4.0/css/font-awesome.min.css" rel="stylesheet" type="text/css"/>
  <!-- Include Include editor styles. -->
  <link href="https://cdn.jsdelivr.net/npm/froala-editor/css/froala_editor.pkgd.min.css" rel="stylesheet" type="text/css"/>
  <link href="https://cdn.jsdelivr.net/npm/froala-editor/css/froala_style.min.css" rel="stylesheet" type="text/css"/>
Add the JS files at the end of the BODY
  <!-- Add editor JS files. -->
  <script type="text/javascript" src="https://cdn.jsdelivr.net/npm/froala-editor/js/froala_editor.pkgd.min.js"></script>
Initialize the Froala editor
<!-- Initialize Froala Editor -->
  <script>
      var editor = new FroalaEditor('#content')
  </script>
Basic initialization example
Once you have completed all the previous steps, your code should look like this:
<!doctype html>
  <html>
    <head>
      <meta charset="UTF-8">
      <title>Migrate to Froala</title>
      <!-- Include Font Awesome CSS. -->
      <link href="https://cdnjs.cloudflare.com/ajax/libs/font-awesome/4.4.0/css/font-awesome.min.css" rel="stylesheet" type="text/css"/>
      <!-- Include editor styles. -->
      <link href="https://cdn.jsdelivr.net/npm/[email protected]/css/froala_editor.pkgd.min.css" rel="stylesheet" type="text/css"/>
      <link href="https://cdn.jsdelivr.net/npm/[email protected]/css/froala_style.min.css" rel="stylesheet" type="text/css"/>

    </head>
    <body>

      <div id="main">
           <div id="content"><p>Getting started</p></div>
      </div>

      <!-- Add editor JS files. -->
      <script type="text/javascript" src="https://cdn.jsdelivr.net/npm/[email protected]/js/froala_editor.pkgd.min.js"></script>
      <script src="https://ajax.googleapis.com/ajax/libs/jquery/3.5.1/jquery.min.js"></script>
       <!-- Initialize the Froala Editor. -->
       <script>
          var editor = new FroalaEditor('# content'')
      </script>

    </body>
  </html>
Do you think we can improve this article? Let us know.


